You can upgrade to this version of OBR from the OBR 10.2x and 10.3x versions only. You cannot upgrade any other older versions of OBR directly to the latest version.
For External Vertica, make sure to use the License provided by Vertica. Also, no support is available from OBR for External Vertica upgrade.
The Operations Bridge Reporter (OBR) software is available in TAR image part files:
OBR1040_Lin64.part1
OBR1040_Lin64.part2
OBR1040_Lin64.part3
OBR1040_Lin64.part4
OBR1040_Lin64.part5
OBR1040_Lin64.part6
Before you start installing OBR, you must download .tar file into a single location and perform a merge of the contents.
Note: You must not download the .tar file under /opt directory.
Step1: Download the TAR Image Part Files and Check for File Integrity
- Download the part files to a directory on the server where you intend to install OBR.
- Evaluate the md5 checksum of the downloaded image part file then compare and verify if it matches with the corresponding md5 checksum value as listed in “Distribution Contents and MD5 Checksum Values”.
Step 2: Merge the TAR Image Part Files
-
Download the TAR Image parts into a temporary folder on the system where you intend to install OBR.
For example: /tmp/OBR1040-parts.
-
To change directory to the location where you copied the contents of the image part files, run the following command:
cd <temp location>
For example: cd /tmp/OBR1040-parts
Ensure that you have adequate space in the directory.
-
To merge the contents into a single TAR Image file, run following command:
cat OBR1040_Lin64.part1 OBR1040_Lin64.part2 OBR1040_Lin64.part3 OBR1040_Lin64.part4 OBR1040_Lin64.part5 OBR1040_Lin64.part6 > /tmp/OBR1040-parts/OBR1040_Lin64.tar
You must type the command in a single line.
Step 3: Verify the Reassembly of the Build Segments
Compare and verify if the md5 checksum of merged file matches with the corresponding md5 checksum value as listed in “Distribution Contents and MD5 Checksum Values”.
Distribution Contents and MD5 Checksum Values
| File Name |
Size |
MD5 Checksum |
| OBR1040_Lin64.part1 |
4294967296 |
3803b75848ca29a5dfcf5b84e1c53dc8 |
| OBR1040_Lin64.part2 |
4294967296 |
81505df1dcf6bf53a7212c93b88ba281 |
| OBR1040_Lin64.part3 |
4294967296 |
54edc86ad0c569f16289f253c0983c29 |
| OBR1040_Lin64.part4 |
4294967296 |
84cb01d373f909207f0e03c8865c7cd8 |
| OBR1040_Lin64.part5 |
4294967296 |
4c4479e96564ab1ea03e740c32c688b0 |
| OBR1040_Lin64.part6 |
1215221760 |
4275aeae09f579437522bc7038efb499 |
| OBR1040_Lin64.tar (Merged file) |
22690058240 |
1afe750437373dba84764955e4cd3101 |
The OBR media is now available as a single TAR file in the following location:
/tmp/OBR1040-parts/OBR1040.tar
Run the command tar -xvf OBR1040.tar, you will find the HP-SHR_10.40_setup.bin to move ahead with the installation.
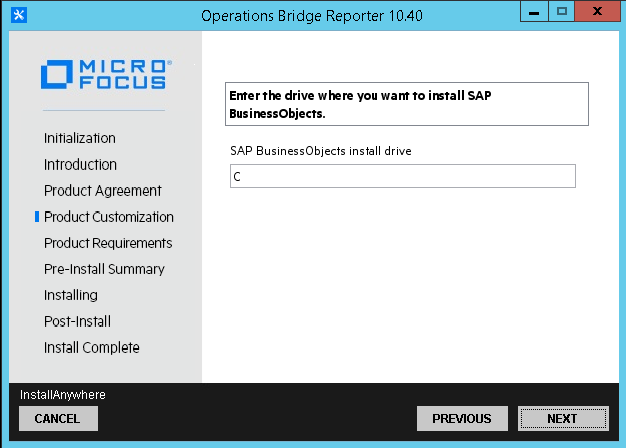
As a requirement for SAP BusinessObjects, you must ensure that the SAP BusinessObjects directory (BO) has read permission to all users. Also, the SAP BusinessObjects sub-directories of the unzipped .tar folder must have all the access rights (777) to the owner and to the other groups. Follow these steps:
- Go to
<Location of unzipped OBR bits>/packages.
-
Run the command chmod 777 BO.
Caution: OBR does not support the Rollback during upgrade. In case of an unsuccessful upgrade, the Rollback option appears. Do not perform Rollback. Contact Software Support for assistance.
Prerequisites for Upgrade
If you have remote Data Processor, make sure to upgrade the remote Data Processor server first and then upgrade OBR.
Before you proceed with the upgrade of OBR, complete the following tasks:
-
Make sure that the previous versions of OBR and related patch are successfully installed and post-install configuration is completed.
-
Take a backup of the complete OBR setup to prevent any data loss due to a unsuccessful upgrade.
For more information, see Backup and Restore topic in the Documentation Portal.
- Ensure all the installation prerequisites and preinstallation tasks listed in the Install section of this assistance are met. Select the installation scenario similar to the existing OBR setup from the selections page in this interactive guide and perform the Prerequisites and Preinstallation tasks.
- Update bash shell to the latest version.
-
Grant complete access to the shrboadmin user by performing the following steps:
- Go to
<Location of unzipped OBR bits>/packages.
-
Run the following commands:
chown shrboadmin:shrboadmin -R BO
chmod 777 -R BO
-
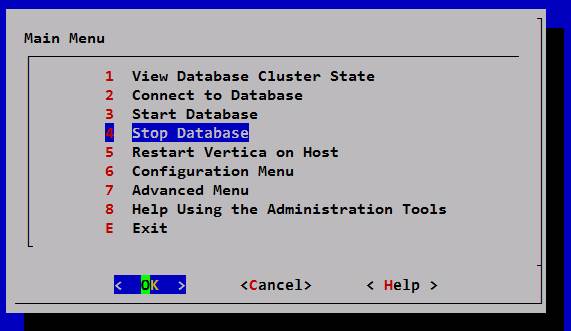
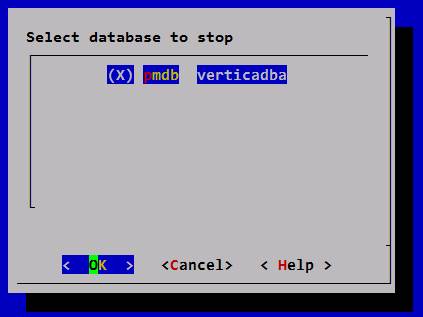
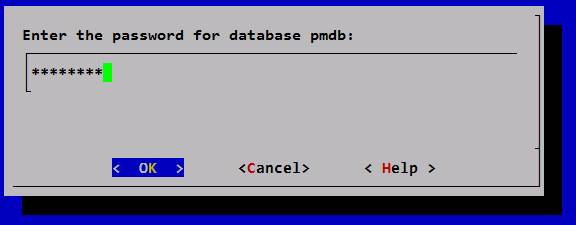
Stop the Vertica Service.
-
To check the status of Vertica Service, run the following command:
service HPE_PMDB_Platform_Vertica status
If the status is running, execute the following command:
service HPE_PMDB_Platform_Vertica stop
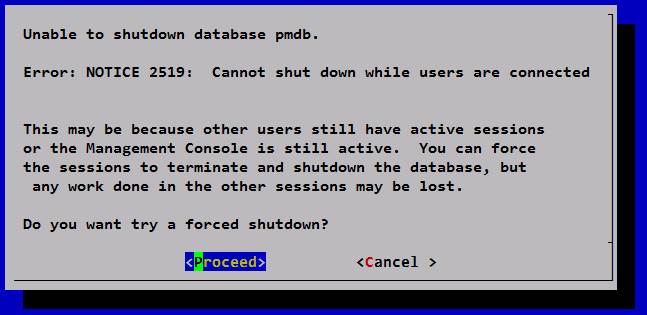
Ensure that the Vertica Service is down before you start upgrading.
- Make sure that no third party tools or applications are using
perl.exe. Stop that application tool service or kill the perl.exe processes.
-
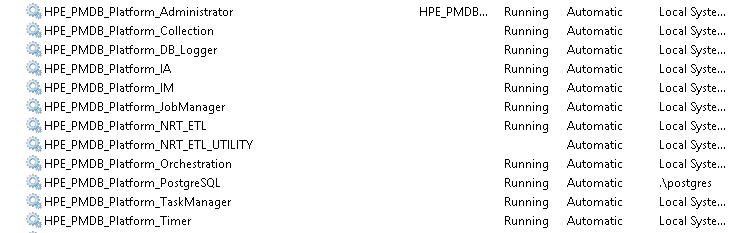
Stop all OBR services using the following steps:
- Log on to the OBR system as root user.
-
Perform these steps:
-
Run the following commands from the location /etc/init.d:
On RHEL 6.x/SLES 11.x
service HPE_PMDB_Platform_Administrator stop
service HPE_PMDB_Platform_Collection stop(If the Collector is installed on the remote system, stop the service on the Collector system before upgrade)
service HPE_PMDB_Platform_DB_Logger stop
service TrendTimer stop
service HPE_PMDB_Platform_IM stop
service HPE_PMDB_Platform_IA stop
service HPE_PMDB_Platform_NRT_ETL stop
service HPE_PMDB_Platform_NRT_ETL_UTILITY stop
service HPE_PMDB_Platform_PostgreSQL stop
service HPE_PMDB_Platform_Orchestration stopservice HPE_PMDB_Platform_JobManager stop
service HPE_PMDB_Platform_TaskManager stopservice HPE_PMDB_Platform_Vertica stop(In Custom Installation, stop this service before upgrading the Vertica server)
On RHEL 7.x/SLES 12.x/OEL
systemctl stop HPE_PMDB_Platform_Administrator.service
systemctl stop HPE_PMDB_Platform_Collection.service(If the Collector is installed on the remote system, stop the service on the Collector system before upgrade)
systemctl stop HPE_PMDB_Platform_DB_Logger.service
systemctl stop TrendTimer.service
systemctl stop HPE_PMDB_Platform_IM.service
systemctl stop HPE_PMDB_Platform_IA.service
systemctl stop HPE_PMDB_Platform_NRT_ETL.service
systemctl stop HPE_PMDB_Platform_NRT_ETL_UTILITY.service
systemctl stop HPE_PMDB_Platform_PostgreSQL.service
systemctl stop HPE_PMDB_Platform_Orchestration.servicesystemctl stop HPE_PMDB_Platform_JobManager.service
systemctl stop HPE_PMDB_Platform_TaskManager.servicesystemctl stop HPE_PMDB_Platform_Vertica.service(In Custom Installation, stop this service before upgrading the Vertica server)
Perform the following steps to stop the SAP BusinessObjects services:
- Log on to the system as root.
-
Run the following command to stop the webserver:
sh /opt/HP/BSM/BOE4/sap_bobj/tomcatshutdown.sh(In Custom Installation, stop this service before upgrading the SAP BusinessObjects server)
Stop the ovc services using the command ovc -kill.
-
Run the following commands to stop the services.
-
ps -ef | grep abcloadNrun
Note down the process ID (pid) displayed by the output of each command and run the following commands
kill -9 <pid_1>
kill -9 <pid_2>
In this instance, <pid_1> and <pid_2> are the process IDs that you noted down in the earlier step.
Important Upgrade Considerations
Use the installer program provided with the OBR media to perform the upgrade. Note the following before performing the upgrade:
-
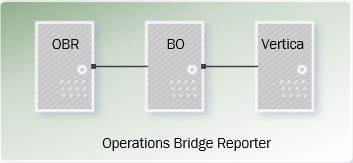
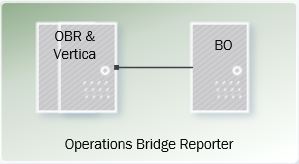
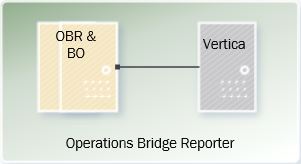
Typical Installation: If all components in the previous version of the OBR setup are installed on a single system, follow the typical installation instructions in this document to complete the upgrade.
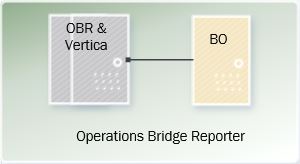
- For OBR and SAP BusinessObjects in same system, ensure that there is a 20 GB disk space available for upgrade.
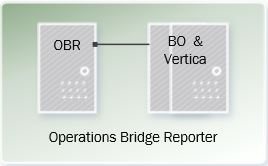
- For OBR and SAP BusinessObjects in separate systems, then there must be a free disk space of 10 GB on each system to perform upgrade.
-
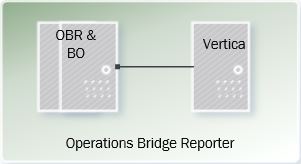
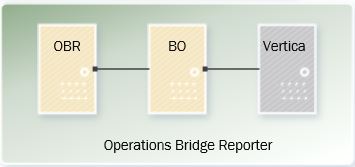
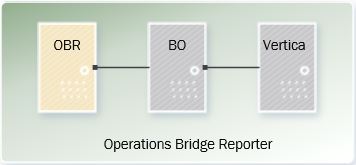
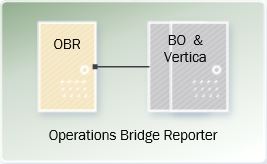
Custom Installation: If Vertica is installed on a remote system in the previous version of the OBR setup, you must select the Custom Installation option in the OBR installer wizard and follow the custom installation instructions in this document to complete the upgrade. Install the OBR components as follows:
- System 1: Vertica.
- System 2: OBR and SAP BusinessObjects.
Upgrade the remote Vertica system (ensure that there is 5 GB disk space available) before upgrading the OBR system. Vertica database must be up and running before performing the OBR upgrade.
Upgrade OBR
-
Go to the media root.
Media root is the directory where the contents of the OBR media (the .tar file) are extracted.
-
At the command prompt, type the following command as root user:
./HP-SHR_10.40_setup.bin
-
Press Enter to start the upgrade. The Choose Locale section appears.
At any point in time during installation, you can type back to go to the previous page and type quit to cancel the installation.
- Choose the locale in which you want to upgrade OBR, and press Enter. The installer shows the introductory information in the console.
- Press Enter. The installer shows the license agreement details.
-
Type Y to accept the agreement, and then press Enter. Follow the instructions in the console.
Review the screen prompts carefully before pressing Enter each time. Pressing the Enter button continuously might take you through the next steps with the default selections.
-
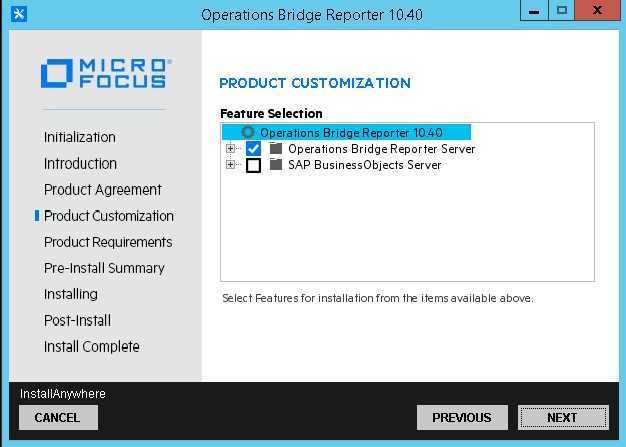
Type 1 to select Typical Operations Bridge Reporter Server and press Enter.
The install scenario selected here should be same as the existing OBR 10.xx install scenario.
-
The installer performs prerequisite checks. If the prerequisite check fails or shows warning messages, ensure that all the prerequisites are met and start the installation again.
If the prerequisite check displays any missing libraries, check the list of missing libraries from the location /tmp/SHR-Missing-Patches.txt and install them. Start the OBR installation again.
-
If the prerequisite check is successful, press Enter. The installer shows Introduction(Upgrade) summary in the console.
- For Force reinstallation of already installed component packages, type N.
-
Press Enter to start the upgrade.
Caution: OBR does not support the Rollback during upgrade. In case of an unsuccessful upgrade, the Rollback option appears. Do not perform Rollback. Contact Software Support for assistance.
For OBR that coexists with the Operations Agent, follow these steps after OBR upgrade:
-
Go to the Operations Agent bits download location directory and run the following command:
oainstall.sh -i -a
- If you get a compatibility error while running the above command, verify the Operations Agent upgrade compatibility using compatibility check tool. For more details, see Operations Agent Documentation.
-
After the successful check of compatibility, run the following command to upgrade Operations Agent:
oainstall.sh -i -a –compatibility_verified
After performing the upgrade, launch the Administration Console > Content Pack Deployment and upgrade the content packs to the latest version. For more information, see Documentation Portal.
The SysPerf_SiS_ETL Content Pack component is deprecated. Instead of SysPerf_SiS_ETL, use SysPerf_SiS_DB or SysPerf_SiS_API.
If the upgrade fails, restore the backup of the previous version and then perform upgrade again.
Upgrade OBR Remote Collector:
If the OBR Remote Collector is installed on a remote system, upgrade it by performing the following:
- From the OBR installer media, browse to the
\packages directory.
-
Copy the following file to the remote system where data collector is installed:
On Linux: HP-SHR-10.40-RemoteCollector.tar.gz
On Windows: HP-SHR-10.40-RemoteCollector.zip
-
Extract the contents and run the following file:
On Linux: HP-SHR-RemotePoller_10.40_setup.bin
On Windows: HP-SHR-RemotePoller_10.40_setup
- Stop the
HPE_PMDB_Platform_Collection service.
- Follow instructions on the console to complete the upgrade.
- Start the
HPE_PMDB_Platform_Collection service.
For OBR Remote Collector that coexists with the Operations Agent, follow these steps after OBR Remote Collector upgrade:
-
Go to the Operations Agent bits download location directory and run the following command:
On Windows: cscript oainstall.vbs -i -a
On Linux: oainstall.sh -i -a
- If you get a compatibility error while running the above command, verify the Operations Agent upgrade compatibility using compatibility check tool. For more details, see Operations Agent Documentation.
-
After the successful check of compatibility, run the following command to upgrade Operations Agent:
On Windows: cscript oainstall.vbs -i -a –compatibility_verified
On Linux: oainstall.sh -i -a –compatibility_verified
Upgrade OBR Data Processor
If the OBR Data Processor is installed on a remote system, upgrade it by performing the following:
- Stop all the services running on the OBR server.
-
In the shared directory, take a back up copy of HPE-OBR folder to another location.
- Go to the
<Location of unzipped OBR bits>/packages
-
Copy the following file to the system where Data Processor is installed:
On Linux:HP-SHR-10.40-DataProcessor.tar.gz
- On the remote Data Processor system, stop the
HPE_PMDB_Platform_TaskManager service.
-
Extract the contents of the tar file and run the following command:
./HPE-OBR-DataProcessor_10.40_setup.bin -i console
- Follow instructions on the console to complete the upgrade.
- Restore the
HPE-OBR folder that was copied in step 2 to another location before the upgrade.
- On the remote Data Processor system, start the
HPE_PMDB_Platform_TaskManager service.
Post-Upgrade Configurations
Perform the following tasks after upgrading OBR:
Task 1: To Synchronize the data on the configured collectors
If you have configured local or remote collectors with DB data sources, then from the OBR server, run the following command:
remotepollerutility –syncds –type DB –pollername local
If you have the remote collector configured, run the following command:
remotepollerutility –syncds –type DB –pollername remotecollectorname
Task 2: Reapplying Access Levels for the Universe Connection
When you upgrade a OBR Content Pack, the Universe connections are recreated. If you have specific user access levels enabled, you must re-assign the access after completing the upgrade. By default, the administrator will have complete access to the Universe connections. Therefore, if you have applied access restriction at each user or group level other than administrator user, you must grant same access restrictions again for the universe connection. For more information about enabling user access levels, see the SAP BusinessObjects documentation.
Task 3: Verify that OBR is Upgraded Successfully
Launch the following URL and make sure that you are able to log on to the Administration Console as administrator:
https://<OBR_Server_FQDN>:21412/OBRApp
Launch the following URL and make sure that you are able to log on to the SAP BusinessObjects Launch pad as administrator:
https://OBR_Server_FQDN>:8443/BI
If you are able to successfully log on as administrator, OBR is upgraded successfully. If you see an authentication error, you must restore the backed-up databases on the system, and perform the upgrade procedure again. For more information, see the Backup and Restore topic in the Documentation Portal.
Task 4: Recreate Administrator and Collection Services
If you have installed OBR in a domain, recreate the following services as mentioned in Configure HPE PMDB Platform Administrator Service for the Domain, Configure HPE_PMDB_Platform_Collection Service for the Domain topic in the Documentation Portal.
- HPE PMDB Platform Administrator
- HPE PMDB Platform Collection
Task 5: Post-upgrade license configuration on SAP BusinessObjects Server
After the completion of upgrade from 10.2x version, follow these steps on the SAP BusinessObjects server:
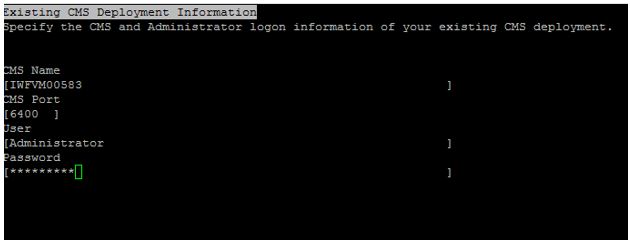
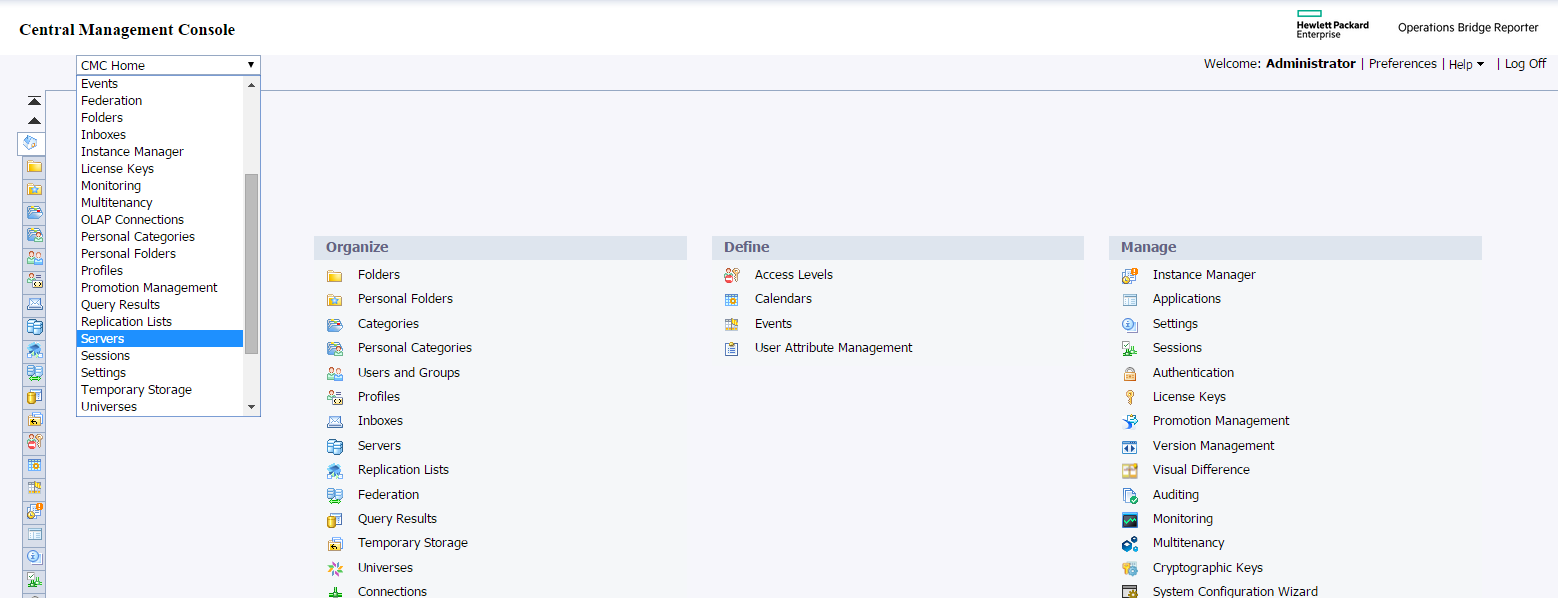
- Log on to CMC page from the Administration Console > Additional Configurations > Reporting Platform or from the URL:
http://<BOHostname>:8443/CMC
- Click
 License Keys.
- Select the existing License code and click Delete.
- Copy the license from
{PMDB_HOME}/config/license/BOLic.txt and paste the license in Add Key and click Add.
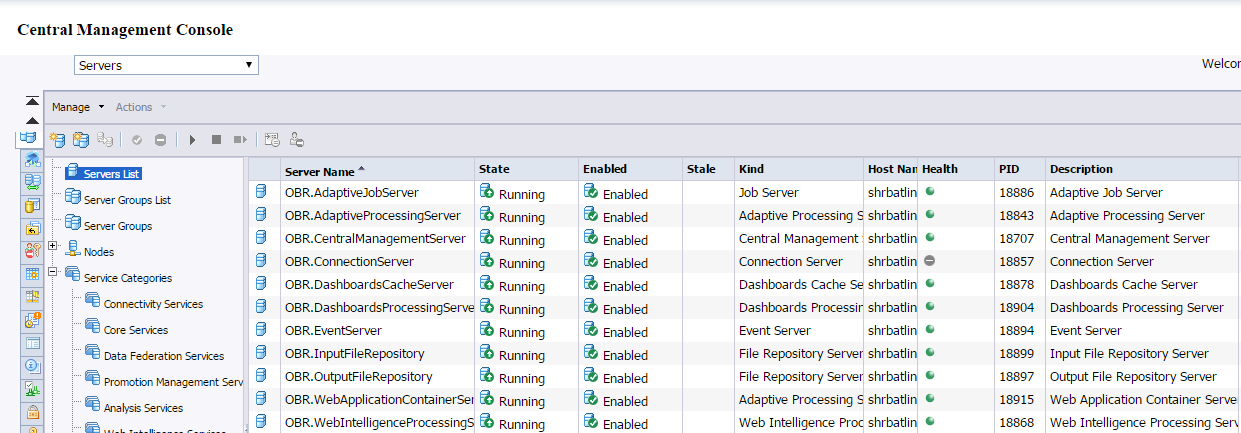
- From the drop-down list select Servers. Click Servers List.
- Select all the servers in Disabled state. Click Enable a server. Wait till all the servers show Enabled state.
- To verify the license update, log on to SAP BusinessObjects BI Launch pad page from the Administration Console > Additional Configurations > Reporting Platform or from the URL:
http://<BOHostname>:8443/BOE/BI. You should be able to log on to the SAP BusinessObjects BI Launch pad successfully.
Task 6: Re-configure the non-default time zone for Vertica
If you have customized the time zones for Vertica in /opt/vertica/share/timezonesets directory, perform these steps on Vertica server after the Vertica upgrade:
- On the Vertica server, kill the
packagemgrSilent process.
- Go to the
/opt/vertica/share/timezonesets directory.
- Open the file that contains the customized time zone and update the relevant section.
-
Update the same into the Default file in the same directory.
Note: Perform the same steps on all Vertica servers in a multi-node cluster.
-
Go to the /etc/init.d directory and run the command:
On RHEL 6.x/SLES 11.x: service HPE_PMDB_Platform_Vertica restart
On RHEL 7.x/SLES 12.x/OEL: systemctl restart HPE_PMDB_Platform_Vertica.service
Task 7: Update the Topology and Data Source password in Administration Console
After you complete the upgrade, make sure that the Topology Source and the data sources have the respective passwords. Follow these steps:
- Log on to the Administration console.
- Click Data Source Configuration.
-
Select Topology Source or relevant data source page.
- Click the configured Host name and click Edit.
- In Connection Parameters verify that the Password field is not blank.
- If the Password is blank, type the password and click Test Connection and then Save.


 About Interactive Installation Guide
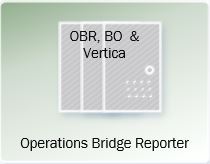


 from the task-bar to open the Server Manager Dashboard.
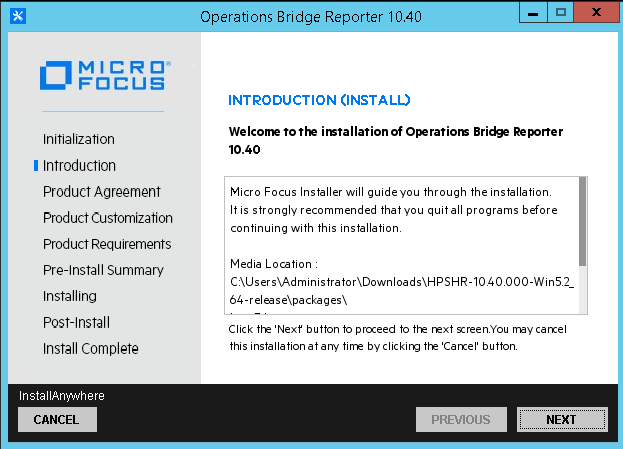


 > Apps > HPE Software > Uninstall.