


Managed OS Platforms as Content
Managed platform support provides a simplified way to add platforms to the SA. Managed platform support allows you to perform changes on the entire SA Core automatically and reduce the need to restart core components.
For each new managed platform, a program APX called the Platform Installer will be made available through ITOM Marketplace. The Platform Installer will perform necessary operations on the SA Core to add support for each new platform.
This section describes how to import the new platform package and deploy the new platform on the SA Core.
SA Patch Updates
During SA patch updates, the latest platform packages available at the time the patch is released are installed. This installation overwrites existing platform installations. Downloaded platform content from the HPELN is updated frequently and may contain more current packages than what is delivered in the SA patch update. This means that the HPELN may have more recent platform packages than the SA patch, which can result in additional functionality.
To avoid any loss of platform functionality resulting from an older package installation, review the Platform Support at Administration > Platforms Support after performing an SA patch upgrade. If the platform update version number is higher than the SA release build number at Help > About HP Server Automation, reinstall the platform from the newer content provided on the HPELN.
Downloading and importing content to the SA Core without the LNc
To download platform packages from ITOM Marketplace individually and import them to an SA Core:
- Enter the following URL, which takes you to the ITOM Marketplace portal:
https://marketplace.saas.hpe.com/itom/content/managed-platform-content-server-automation-2
- A list of installers appears. Download one installer on the SA Core file system.
- Because the installer is an APX, import it to the SA Core using the following command:
/opt/opsware/bin/apxtool import <Platform Installer Filename>
- Run the platform installer.
Deploying support for the new platform
This section describes actions you must take to deploy the newly imported platform.
In this section:
- Required Manage Platforms Permission
- Using the Platform Installer
- Running a Platform Installer
- Deleting a Platform Installer
Required Managed Platforms permissions
To see the SA Client platform support feature and its list of platform installers and to run one of the installers, the SA User Group must have the Manage Platforms permission.
To assign this permission to an SA User Group:
- Open the user group in SA Client, and go to the Action Permissions node.
- In the right panel, search for Manage Platforms under the System Administration category.
- Set Manage Platforms to Yes, and save.
Using the Platform installer
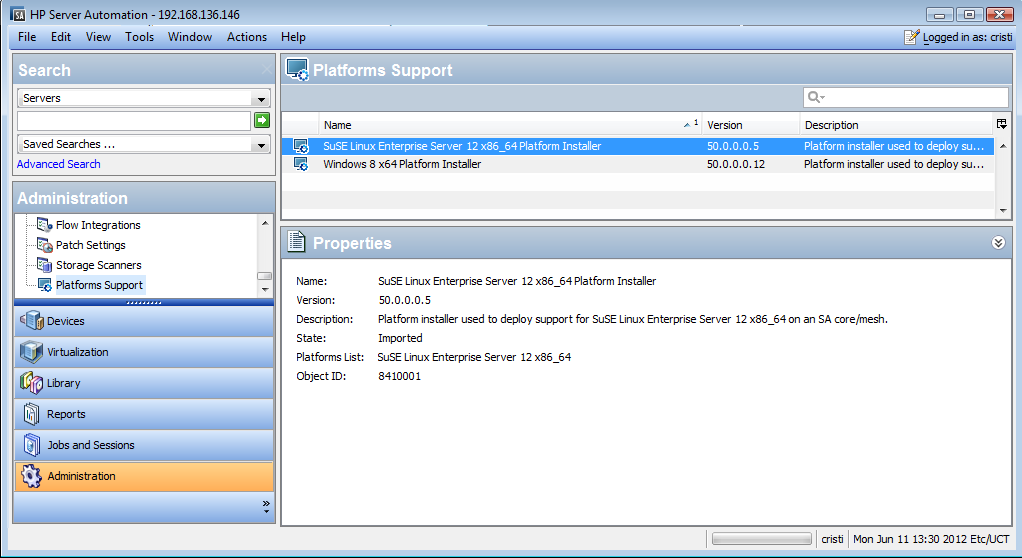
After you have the Managed Platforms permission, the Platform Support entry under the Administration tab is visible in the SA Client.
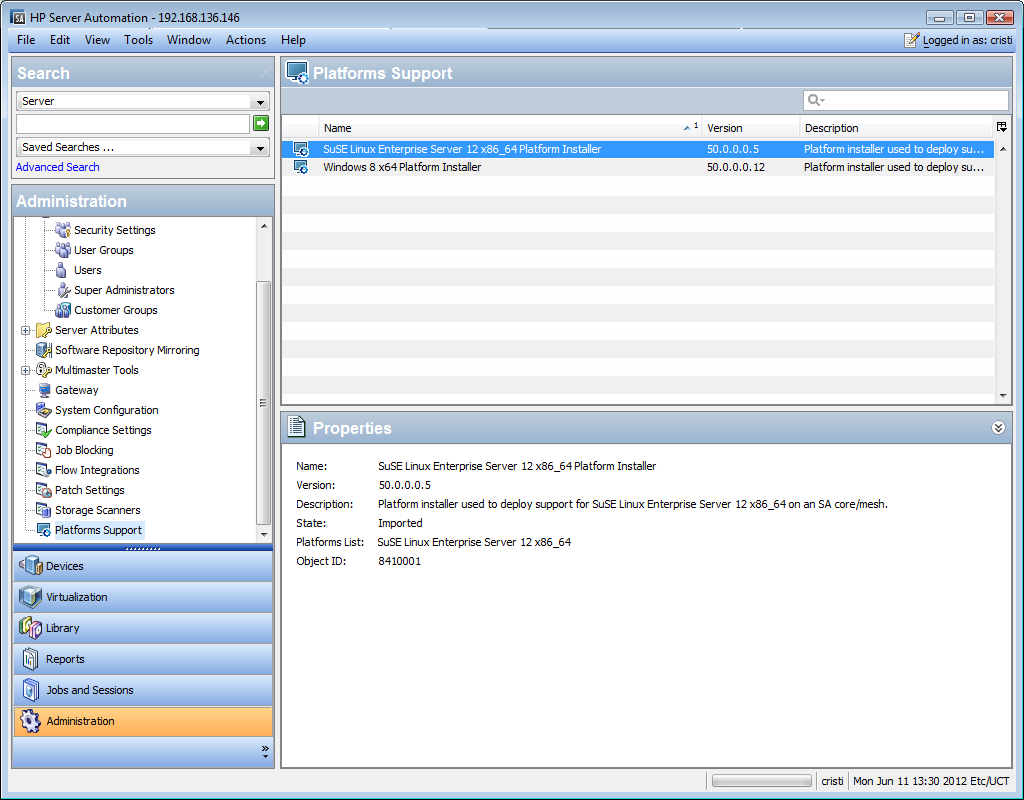
This window lists the platform installers imported on the SA Core. Each installer has the following attributes:
- Name
- Description
- Version
- List of platforms that it will deploy
- State
States of the platform installer, as follows:
- NOT RUN—Installer was imported on the SA Core but was not yet run, so support for that OS is not available.
- FAILED—Installer was imported on the SA Core and run, but it failed. In this case, support for the new OS is only partially deployed, and the new OS cannot be used until the installer is run successfully.
- INSTALLED—Installer was imported on the SA Core and run successfully. Support for the new OS was deployed successfully as well, and the new platform can be used by SA.
- UNKNOWN—Installer status could not be determined.
Running a platform installer
To run an installer, you can:
- Right-click on the installer, and choose Run...
or
- Select one installer and choose Actions > Run... from the main menu
The Run Platform Installer job window will appear. This window provides the option to schedule the task to run at a specified time with no recurrence and to set up email notifications.
After the job is started, the installer determines what changes must occur in your mesh and creates a series of steps.
Some steps can be executed only once (such as ‘Add the new platform to the Truth’), and other steps must be run on multiple machines in your mesh/core configuration (such as ‘Add support to the Agent Deployment Tool’).
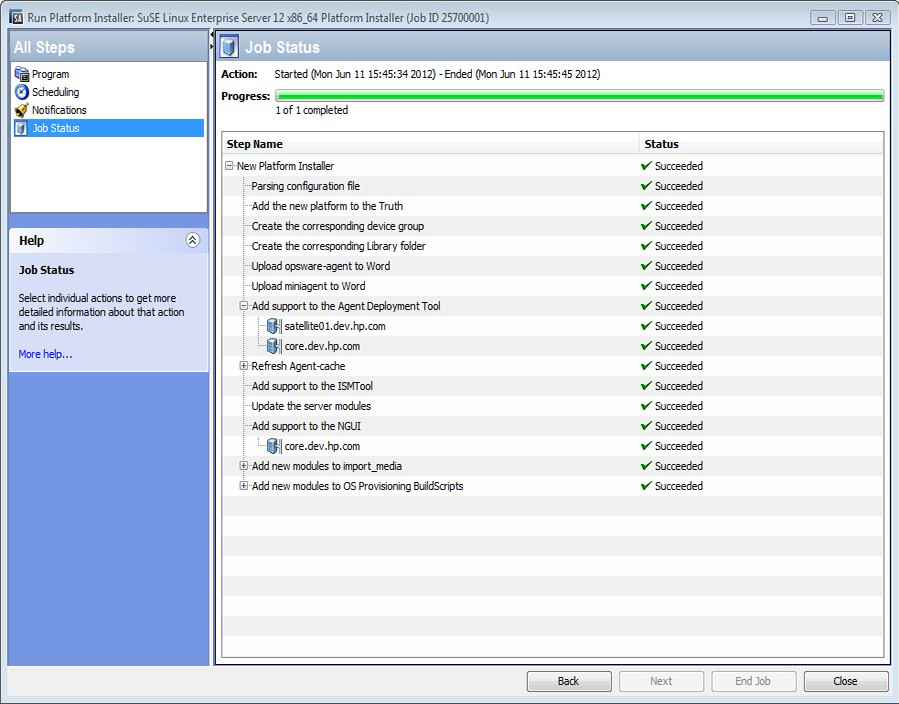
- By selecting each step, you will be able to see the captured stdout and stderr files. If a step must be run on multiple machines, its corresponding node in the job result window will have one child for each machine.
- By selecting that child node, you will be able to see the stdout and stderr files that resulted by running the step on that particular machine.
Deleting a platform installer
To delete an installer, you can:
- Right-click on the installer, and choose Delete
or
- Select one installer and choose Actions > Delete from the main menu
Deleting an installer does not mean removing the support for that OS if it was deployed on the SA Core. So, after importing and running a platform installer, you can safely delete it without losing the support for the new OS in SA.