Searching the Help
To search for information in the Help, type a word or phrase in the Search box. When you enter a group of words, OR is inferred. You can use Boolean operators to refine your search.
Results returned are case insensitive. However, results ranking takes case into account and assigns higher scores to case matches. Therefore, a search for "cats" followed by a search for "Cats" would return the same number of Help topics, but the order in which the topics are listed would be different.
| Search for | Example | Results |
|---|---|---|
| A single word | cat
|
Topics that contain the word "cat". You will also find its grammatical variations, such as "cats". |
|
A phrase. You can specify that the search results contain a specific phrase. |
"cat food" (quotation marks) |
Topics that contain the literal phrase "cat food" and all its grammatical variations. Without the quotation marks, the query is equivalent to specifying an OR operator, which finds topics with one of the individual words instead of the phrase. |
| Search for | Operator | Example |
|---|---|---|
|
Two or more words in the same topic |
|
|
| Either word in a topic |
|
|
| Topics that do not contain a specific word or phrase |
|
|
| Topics that contain one string and do not contain another | ^ (caret) |
cat ^ mouse
|
| A combination of search types | ( ) parentheses |
|
Create a SAML configuration for your organization
Service Manager Service Portal users log in to an organization (a "tenant") by specifying the Organization ID for the organization in the Service Manager Service Portal login URL. For example, to log in to the Consumer organization, users must enter this URL in a browser:
https://SMSP_HOST:9000/org/CONSUMER
Where SMSP_HOST is the fully qualified host name of the Service Manager Service Portal system, and "CONSUMER" is the Organization ID of the Consumer organization.
Tip The Organization ID for an organization can be viewed in the Organization Details view in Service Manager Service Portal.
For this reason, in Service Manager Service Portal, a SAML configuration must be associated to an organization. Before you can create a SAML configuration, an organization for which you want to enable SAML SSO must already exist. For example, you can use the out-of-box Consumer organization in a testing environment, or you can create a new organization that contains groups of users with specific roles and permissions.
Note When enabling SAML SSO for Service Manager by using the Service Manager Service Portal IdM, you must specify the same tenant (that is, the Organization ID of the same organization) in the idm.tenant parameter in the relevant configuration file of each Service Manager client (the Web Tier, SRC, or Mobility Client). For example, if the Organization ID is IDM-SM, the idm.tenant parameter in each Service Manager client must be set to IDM-SM. For more information, see the following topics:
Configure IdM authentication in the Service Manager web tier
To create a SAML configuration for your organization, you need the IdP (ADFS) metadata URL:
https://<your ADFS server>/federationmetadata/2007-06/federationmetadata.xml
Note You may not be able to access the ADFS metadata URL without providing user:password credentials. As a workaround, you can download the metadata XML from your ADFS server and save it in the /var/www/html directory of Service Manager Service Portal (which is empty by default). Next, point the metadata URL in the Service Manager Service Portal UI to http://<your Service Manager Service Portal server>/FederationMetadata.xml.
-
Log in to Service Manager Service Portal Management Console as an administrator:
https://SMSP_HOST:9000/org/PROVIDER - Click Identity, and then select the organization for which you want to enable SAML SSO.
- Go to the Authentication tab, and then click Add Configuration.
-
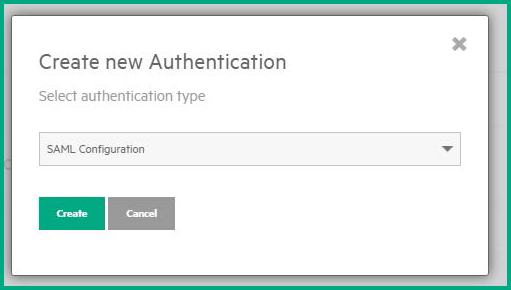
Select SAML Configuration as the authentication type.

-
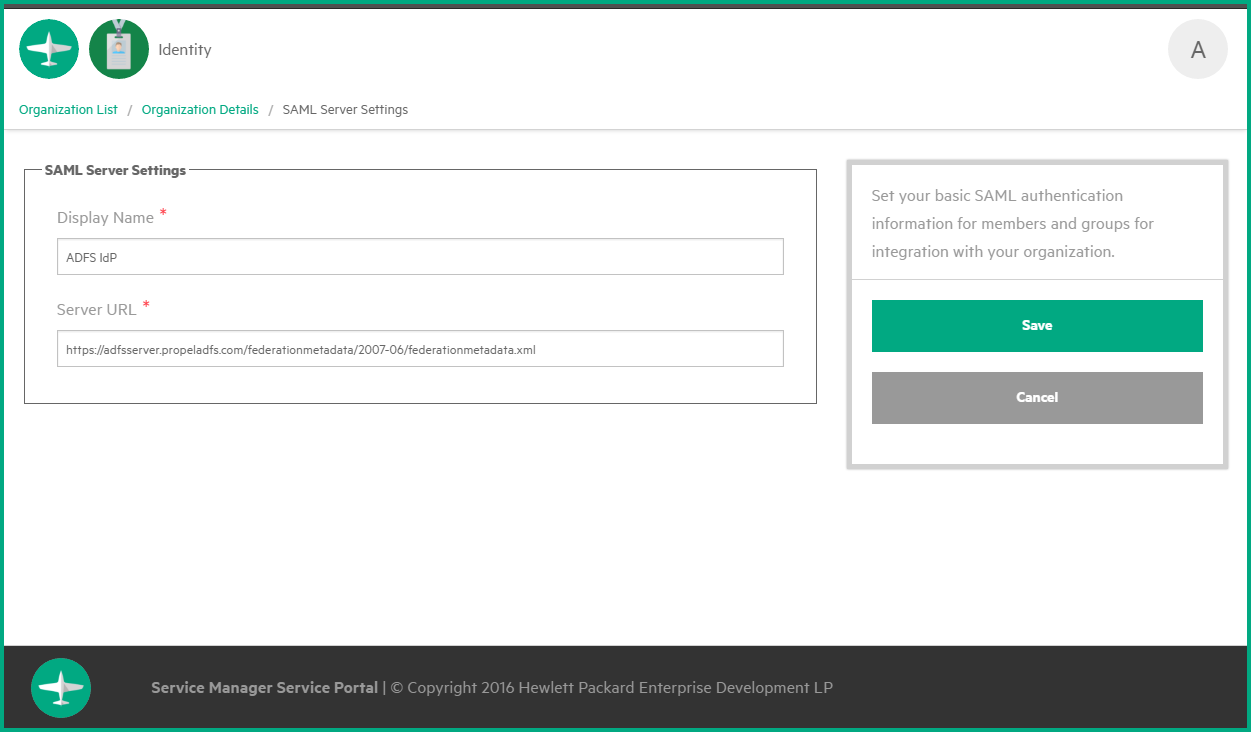
Specify the following SAML server settings:
- Display Name: a user-friendly display name for the IdP (ADFS) server
- Server URL: the IdP (ADFS) metadata xml URL (https://<your ADFS server host name>/federationmetadata/2007-06/federationmetadata.xml)

-
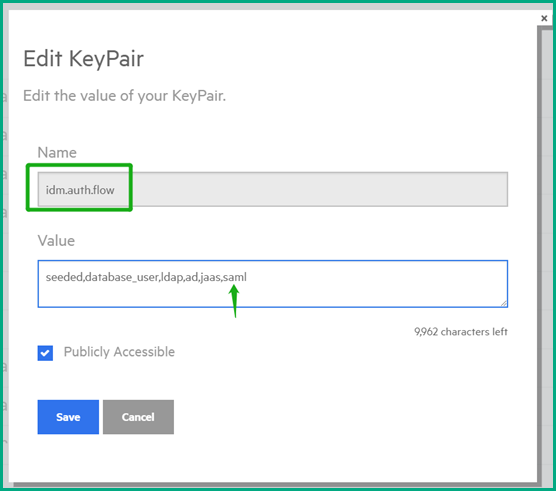
Go to the Customization tab, find the idm.auth.flow field, and then append "saml" to the value with a comma as the delimiter.

Important Besides the SAML configuration, you must configure an LDAP integration, which will handle the user authorization. The SAML configuration will take care of the authentication, while the LDAP configuration will handle the authorization of users. After an LDAP integration has been set up, you need to create Groups based on your LDAP Groups. These Service Manager Service Portal Groups need to be mapped to Roles. LDAP configuration is part of a standard Service Manager Service Portal installation and setup. For detailed steps, see Configure LDAP.
Next step:
Related topics


