


Quick guide to customizing the Service Portal
Service Management provides a default display theme for the Service Portal. You can create a custom theme to suit your company's look and feel.
For more detailed information about where each of the customizable settings affects the Service Portal display, see How to configure Service Portal display theme settings.
Here is a quick guide to enable you to create a custom theme by adjusting the most basic settings and quickly go live with your own branded Service Portal.
Go to Theme Settings
From the , select Administration > Configuration > Service Portal Settings > Theme Settings.
Note This is the location where you configure all the theme settings for the portal, except category settings. You configure category settings in Service Catalog Management.
Create a custom theme
On the Theme Settings page, by default, the out-of-the-box Standard (default) theme settings are displayed.
To create a custom theme:
-
Click
 and select + New theme.
-
The Create new theme dialog is displayed.
-
Type a suitable name for the theme.
-
Select the theme to provide the initial settings that you want to customize.
For example, assume you previously created a custom theme named Alpha. You now want to create a similar theme, based on Alpha, but perhaps with changes to the text color, and background. First, you would give your new theme a name. Then, you would select Alpha from the drop-down list. If you wanted to create a theme based on the Standard theme, you would select Standard from the drop-down list.
-
-
Click Create.
Design header
In the Settings tab, Header section, do the following:
| Field | Action |
|---|---|
| Name |
If your company name is not part of your company logo, type in the name. Otherwise, ensure this field is blank. |
| Logo |
Click Note It is recommended that you use an image file that is already being used in your company's website. |
| Background |
Select a color that complements the logo. Note Generally, it is recommended to keep the white background. It is clean and easy on the eyes and enables easy detection of an end user’s personal area icon on the top right. |
 to locate the relevant file and upload it for use in the portal.
Note The Agent interface header label and Agent interface header logo fields affect the display outside the Service Portal.
Select a background image
In the Settings tab, Global page settings section, under Background image, click  to locate the relevant file and upload it for use as a background to the Service Portal,
It is recommended that you follow these guidelines:
- Use an image that does not include a lot of detail.
- Select an image that splits the screen horizontally into two main color areas.
- Avoid having specific objects or people located at the center of the image as these details are hidden by the main area of the page or the home page category tiles.
Note You can use an image from the selection of complimentary background images in our image pack. To download the image pack, scroll to the Catalog icons section at the bottom of the Settings tab.
Design the category tiles
The category tiles on the Service Portal home page can be comprised of several graphic designs. It is recommended to mix and match these designs for an interesting and attractive look. You can use available background images and solid background colors.
-
Scroll to the Catalog icons section at the bottom of the Settings tab, and click the Service Catalog Management link.
-
Select Categories.
-
Select the category you want to set, and click Details.
-
In the General tab, Category display settings section, set the background by doing one of the following:
-
Select Background image per category from the drop-down list. You can choose from 20 possible category background images.
-
Set Background color per category. Make sure the Background image field is clear and select one of the background colors from the drop-down list.
-
Set Background color with an Image icon. Make sure the Background image field is clear and select one of the background colors from the drop-down list. Click Upload image to select an icon to use for the category. You can use one of the icons supplied in the downloadable sample images pack available from the Service Portal Settings page. It is highly recommended to use a white image icon.
-
Use the Default category background. If no background image or background color is selected, a default color is selected. The default color assumes the same style ( including color and blur effect) of the Service Portal sidebar. These settings appear in the MISC section of the Service Portal Settings page.
It is highly recommended that you mix and match the different category background styles. The recommended ratio is 3:2:1 per the details in this table:
Option 1 Option 2 3 solid color tiles using different colors 3 solid color tiles using different colors 2 background images 2 default color tiles which are usually a darker color – same as the portal sidebar 1 default color tile which is usually a darker color – same as the portal sidebar 1 background image -
- You have the option to enter a URL in the URL field and this category links to that site. This must be a category that does not include a service or offering. The category appears in the portal and links to the URL you enter. For example, you can link to an external ticketing system.
- Set the Display order of the category as it appears in the portal.
Note The settings are per category so you must select each category and edit the Category display settings section.
Enable custom theme
To make a custom theme the default theme, do the following:
-
Ensure the custom theme is selected. If selected, its name is displayed at the top left of the page.
-
Click More, and select Enable.
-
Click More, and select Set as default.
Note It is recommended that each time you save a change to your custom theme, refresh the portal to view how your change has affected the display. You can also use the Preview button to view your changes without saving them.
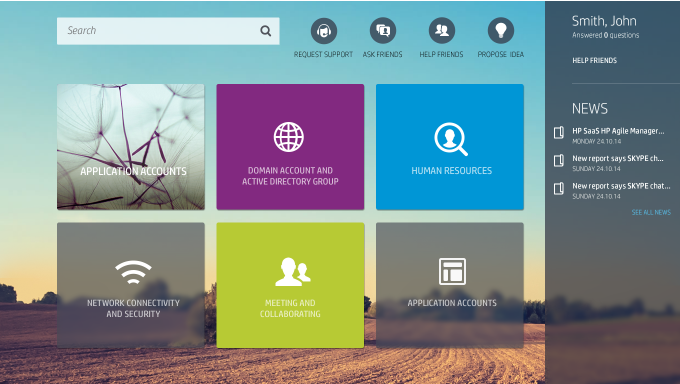
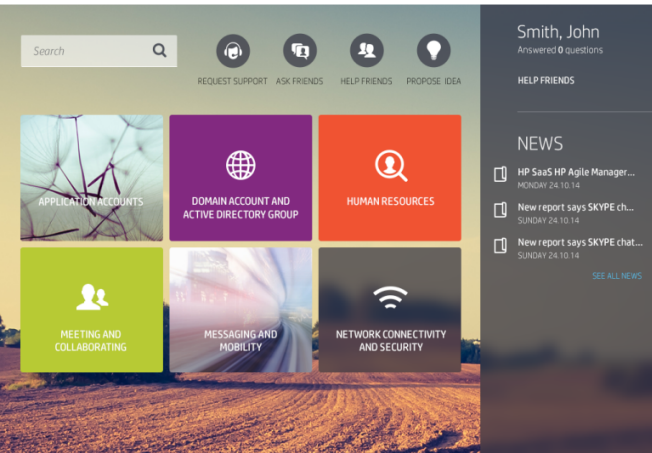
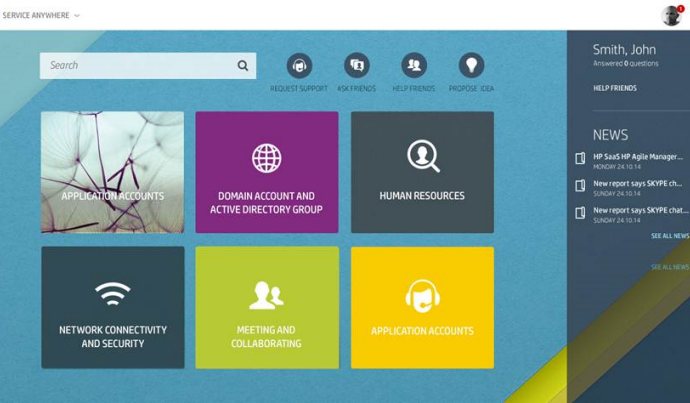
Sample portals
Here are a selection of sample portals that you can use as a guideline for designing your own successful portal.
Related topics


