


Use cases: SA-OO flows
This section discusses use cases associated with SA-OO flows. The section is divided into two subsections: use cases for administrators, and use cases for end users.
Administrators: Configuring OO flows
As an administrator, you will need to configure OO flows and verify your changes and settings before your users can run flows in SA.
To configure flows:
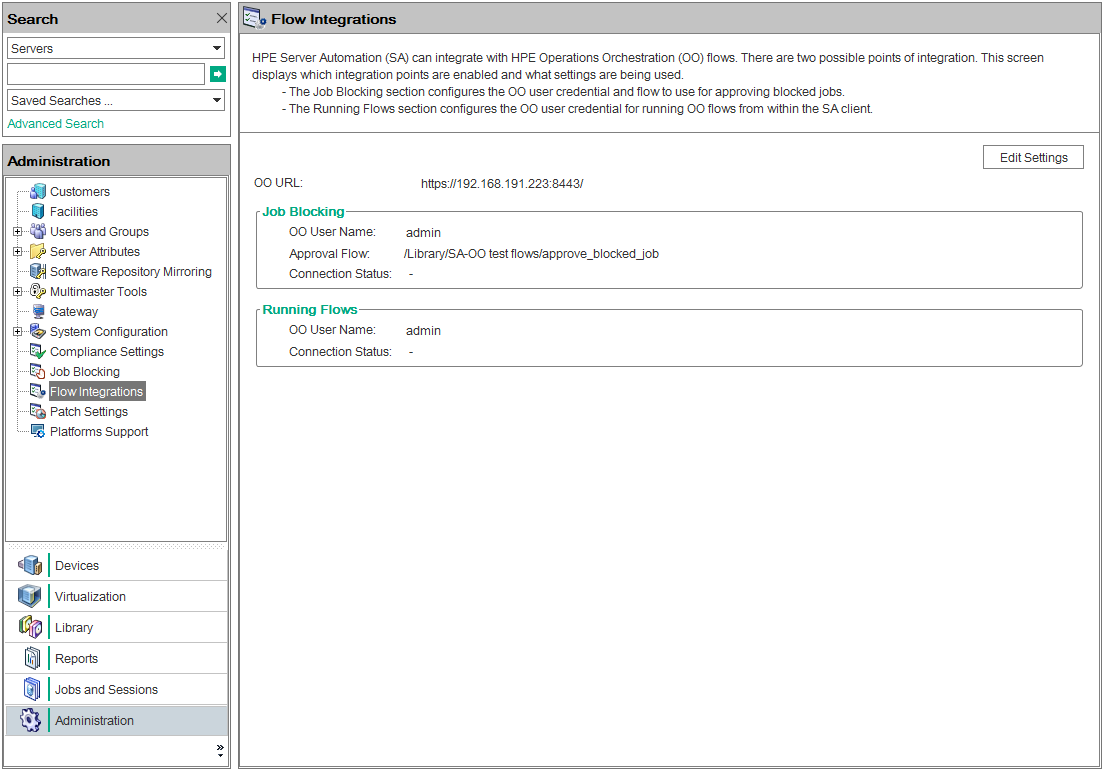
- In the SA Client navigation panel, select Administration Flow Integrations.
- In the Flow Integrations panel, click Edit Settings to display the Edit Flow Integration Settings window.

The Flow Integrations panel displays real-time information for the following users:- For Job Blocking: OO user who has permission to run the Approval Flow.
- For Running Flows: OO user whose credentials are used to run flows from SA.
Any changes to user accounts (such as a disabled account or changes to OO credentials (user name, password, or URL)) are displayed instantaneously while this panel is open.
-
For running a flow, enter or change the following information:
- OO URL - the location of the OO server in the following format:
<protocol>://<hostname or host IP address>:<port number>/
Examples:https://10.255.166.110:8443/
https://10.255.166.110:8443/PAS/ -
OO user name and password ()
For information about blocking jobs and the blocking job section of this window, see the SA-OO - blocking jobs section.
A hyphen designates an unconfigured status, a red check mark designates an invalid status, and a green check mark designates a valid status. Both valid and invalid statuses are displayed with their latest verification timestamp.
- OO URL - the location of the OO server in the following format:
- Click Verify Connection to check the validity of the credentials you entered.
If the connection status is valid, a check mark appears. -
Click Apply to save the flow-integration settings changes.
Note The Apply button is disabled if no data exists in the Edit Flow Integration Settings panel, if the data in the fields is incorrect, or if a check mark does not appear next to the connection status.
To verify flow changes and settings:
- Log on to the SA Client.
- In the navigation panel, select Administration.
- In the navigation tree, select Flow Integrations.
The Flow Integrations panel displays real-time information for the following users:- For Job Blocking: OO user who has permission to run the Approval Flow.
- For Running Flows: OO user whose credentials are used to run flows from SA.
Any changes to user accounts (such as a disabled account or changes to OO credentials (user name, password, or URL)) are displayed instantaneously while this panel is open.
When the flow or job-blocking action is complete, a check mark appears next to the status.
Users: Running OO flows
Flows are operations that perform some of the most common automated tasks. SA-OO integration allows users to run flows from SA.
As a user, you can choose servers and flows; enter or choose a flow input, a runtime option, a scheduling option, and notification parameters; and add or delete servers.
To run flows:
- In the SA Client navigation panel, select Devices.
- In the top panel, select Servers > All Managed Servers.
You must select a server before you can select a flow. - Right-click a server name.
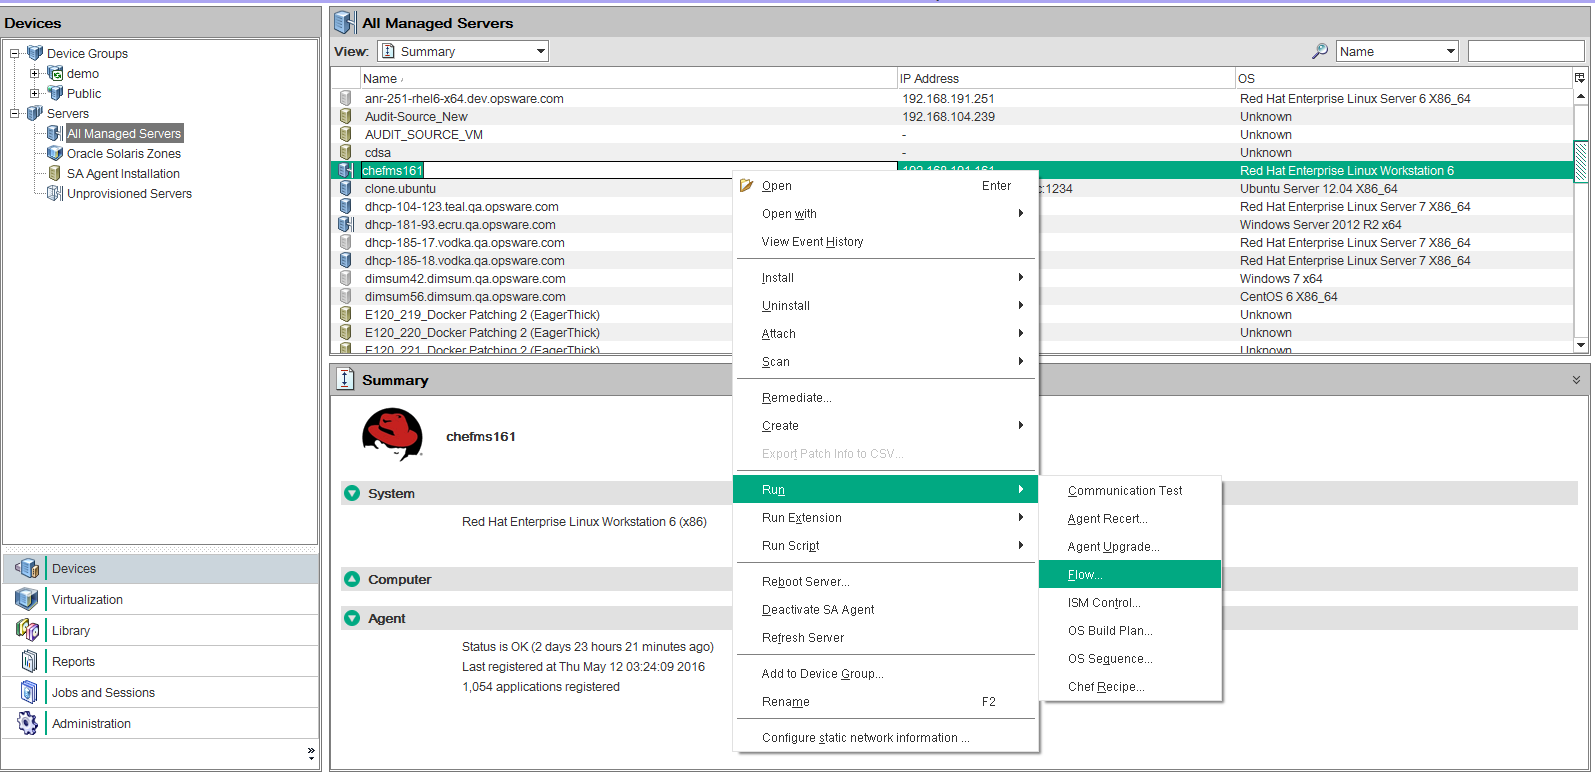
- Select Run Flow... to display the Select Flow OO window.
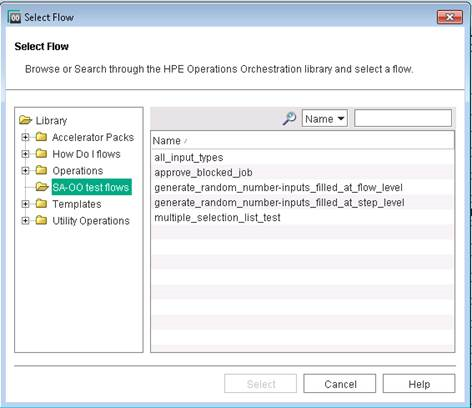
- In the Select Flow window, select a flow category from the library tree to display its component flows.
- In the name list, select a flow and click Select to display flow details in the Run Flow window.
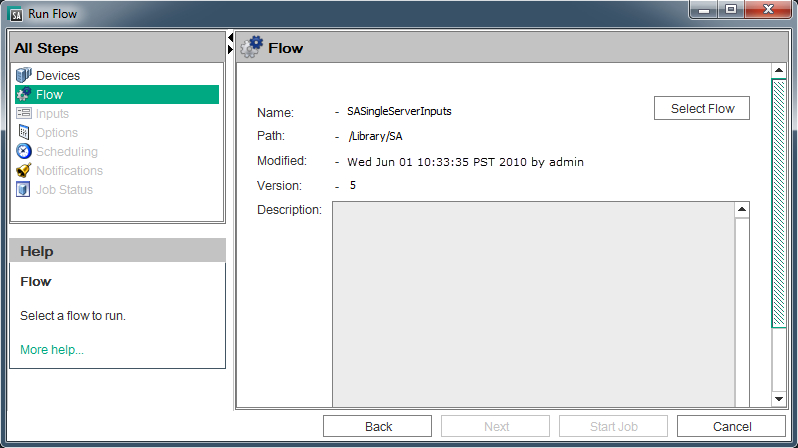
In the All Steps panel of the Run Flow Window, select each of the categories in turn (Inputs, Options, Scheduling, and Notification) to enter values for their parameters, as the rest of this procedure explains. Alternatively, you can choose Next from each panel to view the categories. -
To enter values for flow inputs, select Inputs in the All Steps panel and enter values for the inputs that the panel displays (some values are automatically filled in for you).
For example:
saServerScriptNameor click Select Script to display a list of scripts.saServerNamesaServerIdentifier
See Flow inputs in Supplementary information for more information on inputs.
- To enter values for runtime options, select Options from the All Steps panel, and enter a value for the job timeout. This is the number of minutes that the server will run a job before it times out. The default value is: 180 minutes and the timeout value is between 1 and 1440 minutes.
- To select scheduling options, select Scheduling in the All Steps panel and enter values for:
- Schedule frequency
- Time and Duration
- To enter notification information, click Notifications in the All Steps panel and add values for:
- Recipient email address
- Notifier (click Add Notifier)
- Ticket identification number (there are no conventions for the identification number - you can choose any number)
- Click Start Job to start the job, or click Cancel to erase the choices you made in this session.
- Click Job Status to view the status of the SA job. (optional)
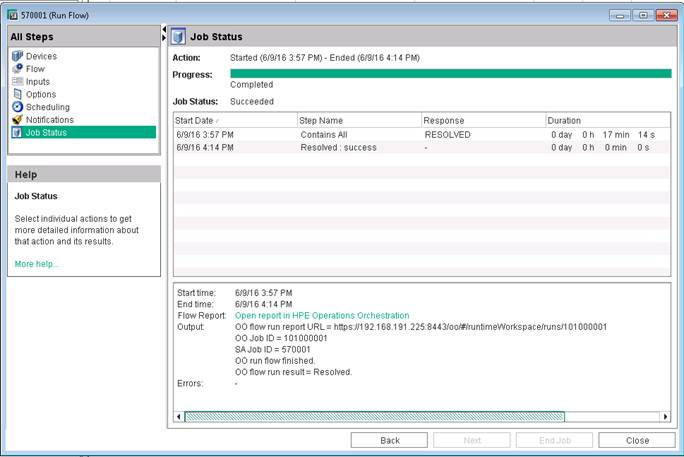
When the SA job is complete, this window displays the status of each step in the flow (in the Response field) and a URL that points to more detailed flow-related information on OO.
It is possible that SA job monitoring succeeded even if at least one step failed. The OO API does not provide a call that precisely determines success or failure of the entire OO flow. Therefore, you cannot determine the success or failure of your OO flow from the SA Job Status screen or from the information provided at the URL.
To add or delete servers:
- Run the flows.
- In the All Steps navigation panel of the Run Flow Window, select Devices.
- Right-click a server icon and choose Add or Delete, or click the plus or minus sign.
The Select Servers and Device Groups window is displayed. - Click Select to add a server to the list of servers.
The Run Flow window displays the new server in the Devices panel, or shows that the removed server is absent.