


Starting the build plan
Selecting servers
In the Run OS Build Plan window you can add new servers, remove servers or open a selected server You can select one or more servers Actions are available from the specific buttons or by right-click on the list or server The list could be already populated with managed or unprovisioned servers if you opened the wizard from either Managed or Unprovisioned Servers panes.
You can assign a specific customer to the selected servers and this will be shown in the servers pane.
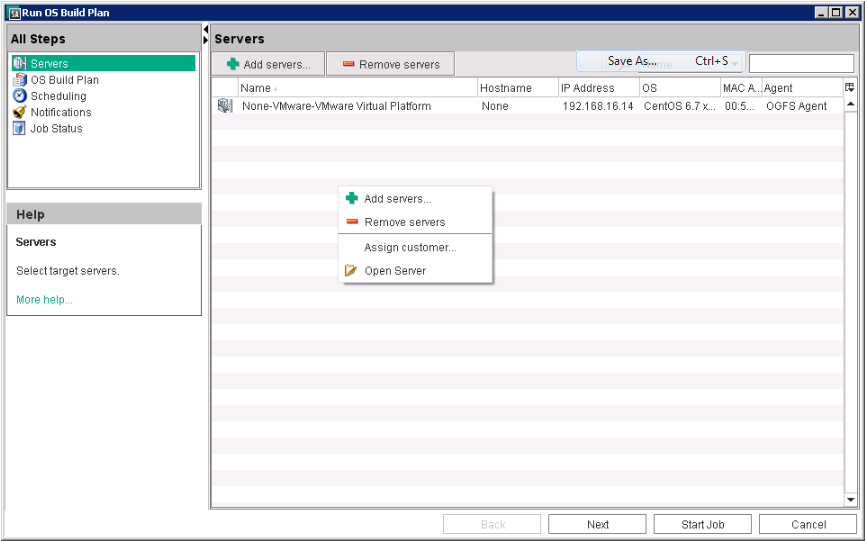
After selecting the intended server or servers move to the next step.
Selecting the OS Build plan
-
From the OS Build Plan pane, click Select. A new window is displayed giving the option to select the intended OS Build Plan. The OS Build Plan could be already selected if you opened the wizard from an open Build Plan or the SA Client Library.
You can press the Start job now. The required steps are complete. This will create a scheduled job that will run immediately and progress will jump to the Job Status pane.
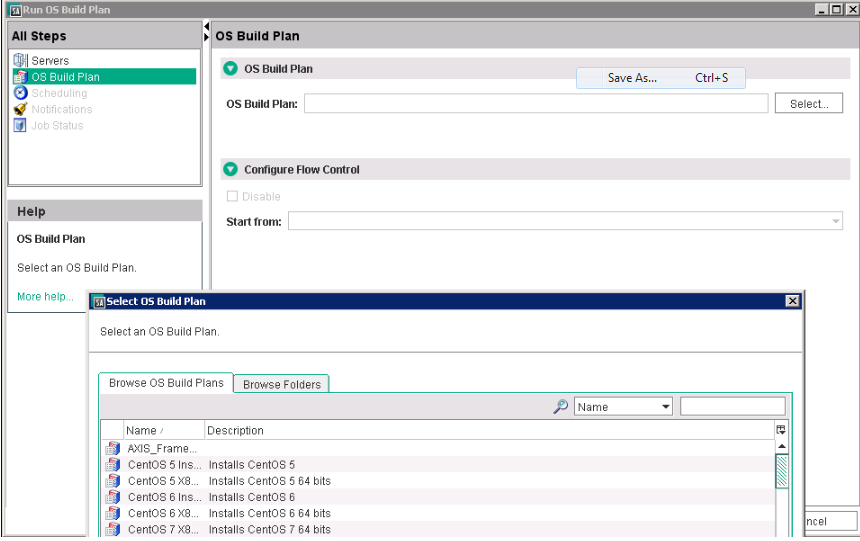
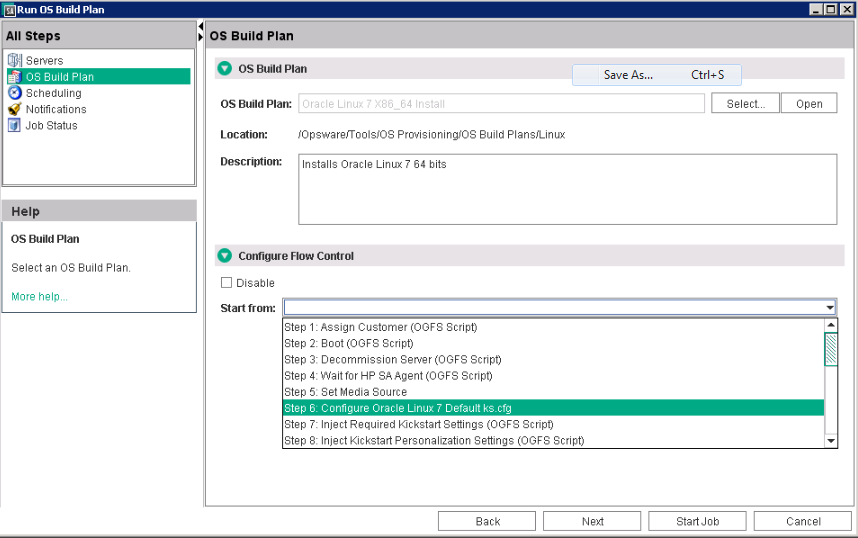
After selecting the OS Build Plan this will show up in the pane with the affiliated description and location.
-
You can open and modify the selected Build Plan by clicking Open. At any time, you can select another Build Plan to replace the previous one.
The Configure Flow Control pane is available now. You can select from which step the Build Plan execution should start (this is optional). You can disable the flow control also. By default, this is enabled so that the current Build Plan execution is aware of the previous Build Plan.
-
After selecting the intended OS Build Plan move to the next step.
Scheduling a job
By default the Run Task Immediately will be selected. You can select a new date when this job will start. This is synchronized to your computer's clock. This step is optional.
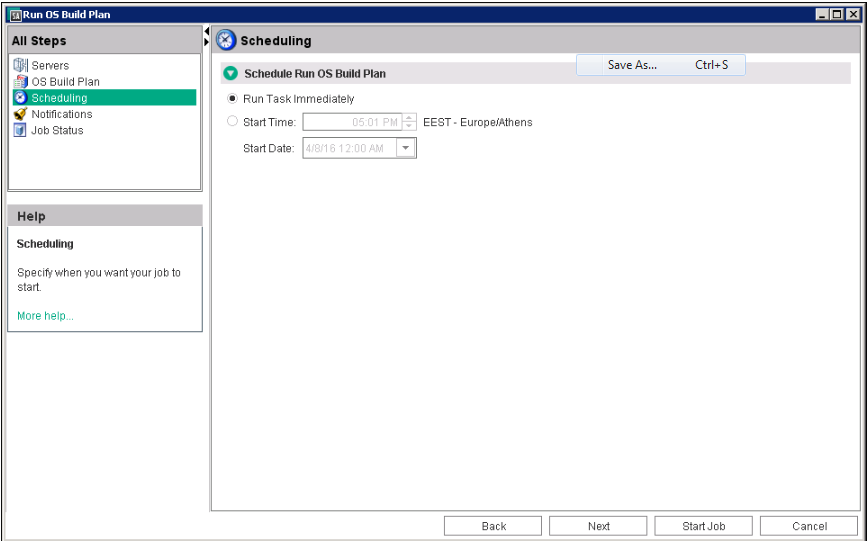
After selecting the intended time move to the next step.
Setting notifiers
In this step you can add or remove notifiers. These are the receiving email addresses that will eventually receive a notification when the job is done. You can also set the Ticket ID like for any other job. This step is optional.
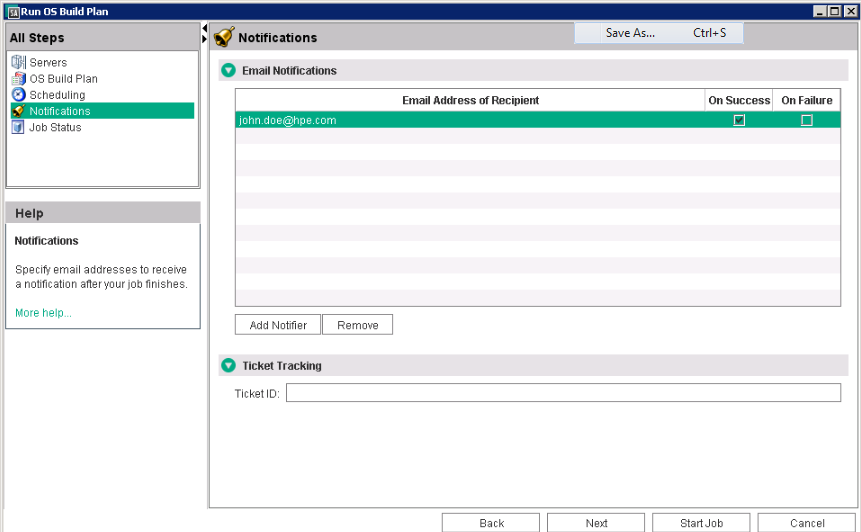
After setting the notifiers move to the next step.
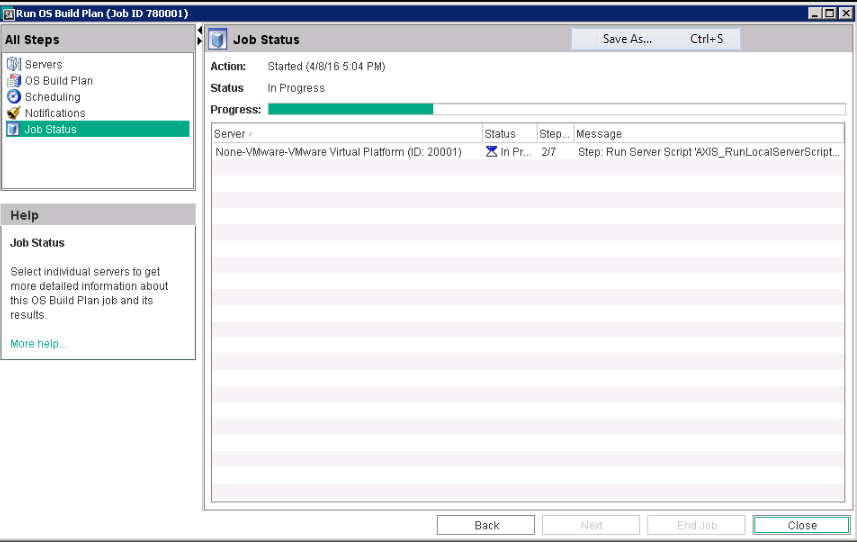
Starting the job
If you reach the job status pane, press Start Job. The OS Build Plan job will be in progress until all the Build Plan Steps are executed successfully.
If any of the Build Plan step fails then the job also fails. When the OS Build Plan job completes, the job will be in Succeeded state. After the job is complete, the Re-run job will be available and this will open a new window with the same parameters as the previous one. Press Start job.
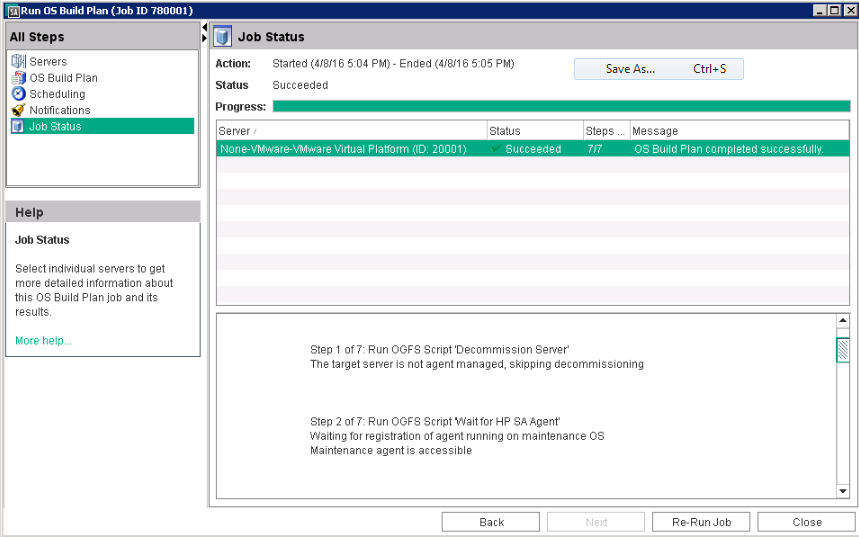
The server is now up-and-running and under SA management.