


Prerequisites
- Any server running a VS managed by SA must be an agent-managed server. That is, it must have an SA Agent installed on it. Do not remove the SA Agent from servers running VSs managed by SA.
The simplest way to ensure the server is a managed server running the SA Agent is to check the icon next to the server. A blue server icon indicates it is agent-managed (see Icons for virtualization items).
Alternatively, you can examine the server summary or the server properties in the SA Client. Select the Devices tab and locate the server under All Managed Servers. Select the server, then select the Summary View or the Properties View. Examine the agent status or the agent version. If this information does not appear, it is not an agent-managed server. For information about installing the SA Agent, see the SA 10.60
- Ensure that a software registration has been performed on the server. For more information on running a software registration, see the SA 10.60
- When adding a VS, specify a user with full permissions and privileges to the VS.
- Any action done on the VS from SA is logged in the VS history as this user.
- Enter the user with full permissions, and then apply SA user permissions within SA.
- To ensure full discovery in OpenStack, the user must be a member of each Project to be discovered and managed in SA. We recommend that the user also has the Admin role for each project.
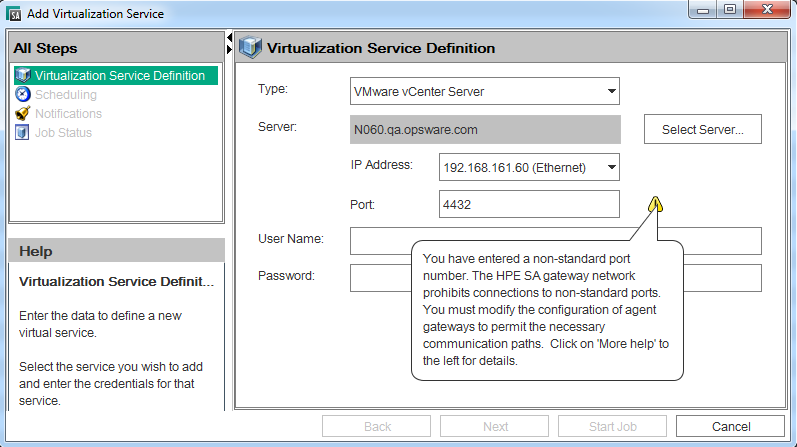
- When you add a VS with a non-default port, you must first configure agent gateways to allow communication with the port.
In vCenter, the Add VS wizard provides you with 443 as the default standard port. If you edit this field, the following window appears:
- To allow tunneling in OpenStack, SA Agent gateway communication must be configured as shown in the following table:
Port Used to Communicate With 5000 - Or a custom port for your deployment OpenStack controller node 8774 - Or a custom port for your deployment OpenStack Nova service 8776 - Or a custom port for your deployment OpenStack Cinder service Use the following steps to configure your agent gateway in OpenStack. In this example, OpenStack is configured to listen on the default ports, and the agent gateway name is
example_gateway1- Identify the gateway host by opening the
/etc/opt/opsware/agent/opswgw.argsfile from the OpenStack server. - On the gateway host, open the
/etc/opt/opsware/example_gateway1/opswgw.customfile. - Add the following new lines:
opswgw.EgressFilter=tcp:*:5000:*:*opswgw.EgressFilter=tcp:*:8774:*:*opswgw.EgressFilter=tcp:*:8776:*:* - Save and close the file.
- Restart the agent gateway component on the gateway host identified in Step 1 by running the following command:
/etc/init.d/opsware-sas restart opswgw-agwsIf you upgrade and enable IPv6 on a vCenter or OpenStack server, change the “:” to “@” on each line shown in step 3 and restart the agent gateway on each slice in each facility where IPv6 is enabled. For example:
For OpenStack:
opswgw.EgressFilter=tcp@*@5000@*@*For vCenter:
opswgw.EgressFilter=tcp@*@8776@*@*opswgw.EgressFilter=tcp@*@8774@*@*For more information on configuring the agent gateway, see the SA 10.60
http://www.openstack.org/