


An Example of Teaching an MSI Based Installer to the User SAI
- Select Tools > Import data from MSI.
- From the Open dialog, navigate to and select the MSI file to use. The file will have an extension of .msi or .exe.
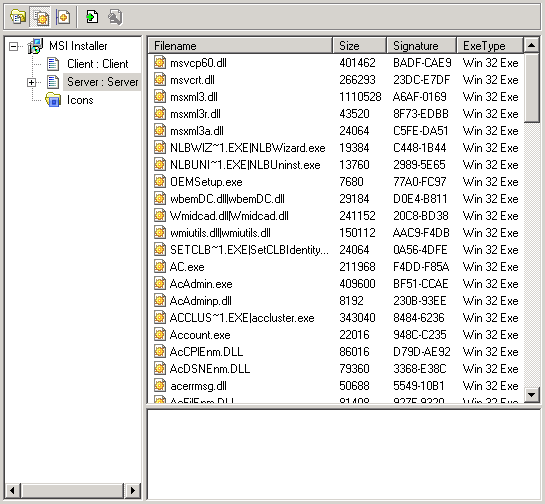
- Click the MSI Database tab to examine the contents of the MSI file.
- Click the Show Only Executable Files button on the toolbar and make sure that all other toolbar buttons have been deselected. Now you will see only executable files.
- Check the Company Name and see if it is the same as the Manufacturer entry in the Summary tab.
- You can do this by clicking on the executable file name in the Files pane and looking at the Version Information displayed in the pane below. In this case the Company Name is the same as the Manufacturer entry in the Summary tab.
- However, had it not been the same, you would then add the file as a third party file. An example is shown below.

In this example, there are several features. Features are displayed in the following way and are indicated by the  icon.
icon.
Unique Name Key: Display name
If we look at the Scanner Generator Feature entry we can see that the Unique Name Key is Scanner_Generator, while the display name has no underscore.
Looking through the MSI structure, look for the components of the application that can be installed separately and therefore should be taught as individual applications. For example Client/Server parts (see the example below) or some shared applications that are also packaged in the installer, for example MSDE or DAO components.
This example displays the contents of the Microsoft Applications Center 2000 SP2 installer. The same installer contains both Server and Client components of the application.
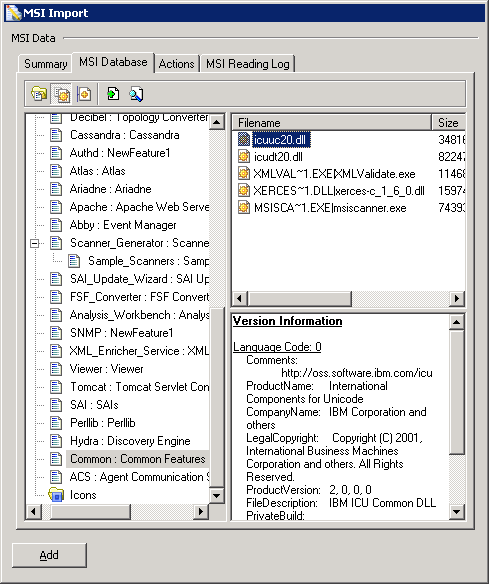
Here we can see that the Company Name is IBM Corporation.
- Select Tools > Import data from MSI.
- From the Open dialog, navigate to and select the MSI file to use. The file will have an extension of .msi or .exe.
- Click the MSI Database tab to examine the contents of the MSI file.
- Click the Show Only Executable Files button on the toolbar and make sure that all other toolbar buttons have been deselected. Now you will see only executable files.
- Check the Company Name and see if it is the same as the Manufacturer entry in the Summary tab.
- You can do this by clicking on the executable file name in the Files pane and looking at the Version Information displayed in the pane below. In this case the Company Name is the same as the Manufacturer entry in the Summary tab.
- However, had it not been the same, you would then add the file as a third party file. An example is shown below.
In this example, there are several features. Features are displayed in the following way and are indicated by the icon.
Unique Name Key: Display name
If we look at the Scanner Generator Feature entry we can see that the Unique Name Key is Scanner_Generator, while the display name has no underscore.
Looking through the MSI structure, look for the components of the application that can be installed separately and therefore should be taught as individual applications. For example Client/Server parts (see the example below) or some shared applications that are also packaged in the installer, for example MSDE or DAO components.
This example displays the contents of the Microsoft Applications Center 2000 SP2 installer. The same installer contains both Server and Client components of the application.
Here we can see that the Company Name is IBM Corporation.
To teach files to a version of the software:
- In the SAI Editor main window, select a User SAI, and navigate to the pertinent release.
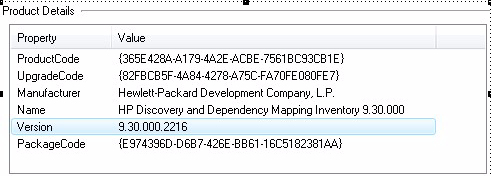
- In the MSI Importer, examine the Version entry on the Summary tab.
- In the SAI Editor main window, create a new Version (if necessary) to match the MSI version:
- Select the release to which the new Version belongs.
- Click the
 icon. The Version Properties dialog is displayed.
 - Fill in the details, and leave the Install string blank (it gets imported later).
- Click OK.
- Go back to the Summary tab of the MSI Importer.
- In the Destination SAI box, select the version that you just created. You will need to expand the tree to do this.
- In the Product Details box, select the Version listed.
- Switch to the MSI Database tab of the MSI Importer.
- Select a Feature or Component node in the tree.
- Choose one of the following methods to import its files into the User SAI:
- Method 1: Click the Add button.
- Method 2: Drag the whole Feature (or individual files) onto the Version node in the Destination SAI box. You can select multiple files by using the SHIFT/CTRL key while clicking the files.
- Method 3: Right-click the feature or component, and choose Import Files from the shortcut menu.
- Method 4: Right-click files in the Files pane, and choose Import Files from the shortcut menu.
- Right-click the file(s) and select the relationship of the file(s) to the application from the Main, Associated, and 3rd Party options
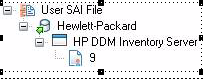
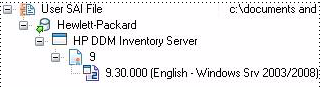
For this example, we will create a new Version under the following release:
For example:
For this example, we will create version 9.30.000 under release 9:
The version that you selected in the Destination SAI box will now be highlighted in gray.
If you drag a Component node on to a Version, the files in that node will be imported. If you drag a Feature node onto a version, the files in that Feature and all of that feature’s descendants will be imported.
The Importing Files dialog opens
Tip You can select multiple files holding down the SHIFT/CTRL key while clicking on the files.
Main files are generally pointed to by a shortcut. Any files pointed to by shortcuts will be marked as Main. Double-check that these files should really be given the Main rating.
After you have specified the correct relationship for each file, click OK.
The new file is now included in the User SAI and will be recognized as scan files are processed in the future.
Examine the warnings and messages by clicking on the links in the bottom pane of the Summary tab.
You will be automatically directed to the appropriate place in the Actions tab. You will need to examine the entries associated with the action warnings and decide whether they are files that need to be taught to the application and what relationship they have with the application.
Nested Installer Tab
A nested installation is where another MSI resides inside the MSI. You will need to choose one of the following ways to handle this situation:
- Is the nested installation a standalone application that can also be released—either as part of another application or standalone? If so, it needs to be taught as a separate application and linked with the current application using a release relationship.
- If not, the files need to be added to the same application as associated files.
Called Executables tab
You will have to examine whether the called executable is going to install some other executable files. For example, look at the command-line column—if it says install.exe or setup.exe this would indicate that an executable file is being installed. You could get clues from the Name of the Action. A Called Executable Actions could be for example,
Install <name of the executable>
In the following example, the Called Executables are not installing other files, they are merely sending commands to run SQL scripts.
DLL Calls tab
This tab lists all Dll calls made.
Invoked scripts tab
This tab shows any scripts that would be invoked. Once you have examined the files, return to the MSI Database tab.