


The Mapping File
The following example demonstrates how to create the mapping file.
In this example, we will simulate a push of a node and an IP address. We will create a TQL query called: Node Push, as follows:
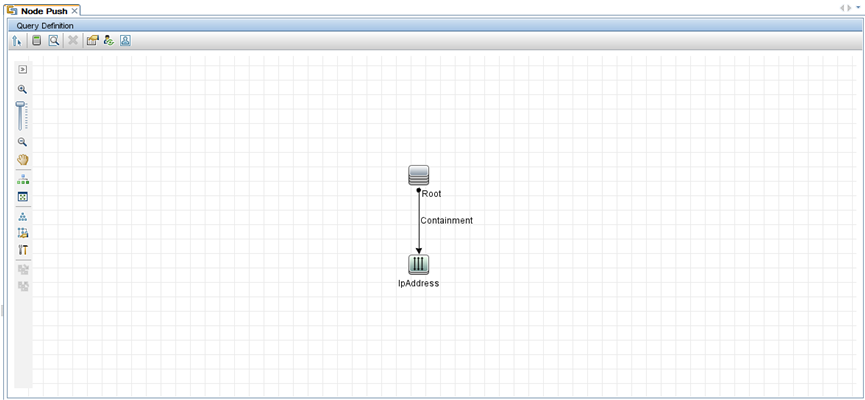
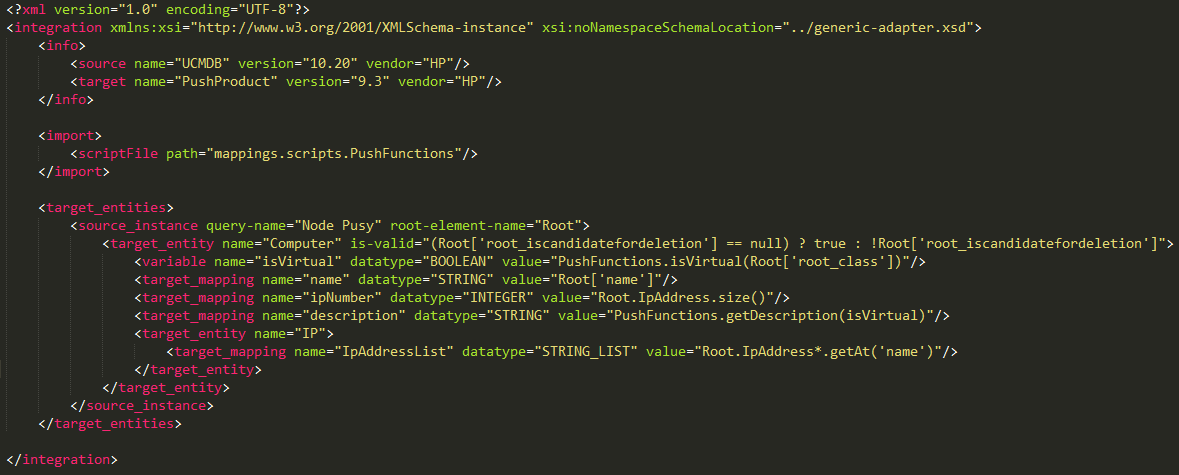
In the mapping file we create two target CI types: Computer and IP. Computer has one variable and two attributes. IP has one attribute.
The following is the mapping XML file:
The query results appear as follows:
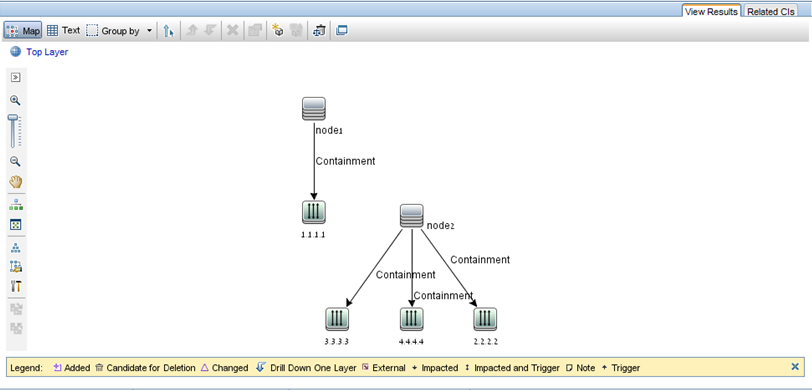
Here is the RTN list built according to this mapping file:

Each root instance is mapped separately using the mapping file. Thus in this example, the PushAdapterConnector receives a list of two RTN roots.
Note The previous push adapter had the ability to create a general mapping for a CI type. The new push adapter mapping is per TQL query. While running a push job that uses a query named x, the adapter looks for the relevant mapping file (the one that has attribute: query-name=x).
You can calculate the values in the mapping file using groovy script language. For details, see The Groovy Traveler.