


Create an APX
The following diagram shows the basic steps to creating an APX and the corresponding commands to use. For a tutorial on how to create a web APX, see Tutorial: Create a Web application APX. For a tutorial on how to create a program APX, see Tutorial: Create a program APX.
Creating an APX
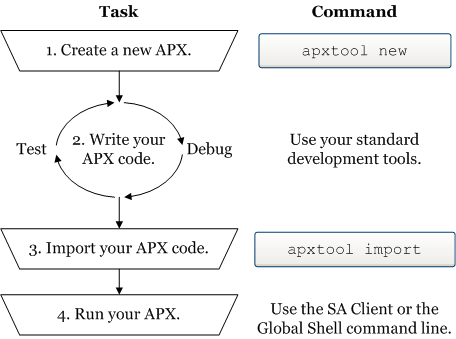
- To create a new APX, use the
apxtool newcommand. This command creates a set of template files you can edit to create your own APX.
You can optionally register your new APX with theapxtool newcommand. Registering your APX reserves the name of your APX in SA. If you do not register your APX at this step, you can register it with theapxtool importcommand in step 3 below.
See apxtool command. - After creating APX template files, develop your APX code by modifying the template files created by the
apxtool newcommand and possibly adding your own files. You can test your APX code to make sure it is running correctly. - When your APX code is tested, you must import it into SA with the
apxtool importcommand. - Run your APX either from the SA Client or from the Global Shell command line.
- From the SA Client: Select Library By Type tab Extensions Program. Select an APX. Select the Actions Run menu.
- From the Global Shell command line: Open the Global Shell from the SA Client by selecting the Tools Global Shell menu. Run your APX by entering the command:
/opsw/apx/bin/<APX name>
For more information, see Running Extensions to SA and the SA Global Shell sections in the Server Automation Using Guide on the HPE SSO portal.
To create an APX extension that is intended to run on VMware ESXi servers, the APX extension must communicate with the ESXi server remotely using its web services interface. For more information on VMware ESXi servers, see the Virtual Server Management section in the Server Automation Using Guide on the HPE SSO portal.