


Tutorial: Create a Web application APX
This tutorial demonstrates how to create, publish, and run a simple web application APX named mywebapp.
Running the default version of the APX created during this tutorial displays the output of the PHP command, phpinfo. Later the tutorial shows you how to modify the PHP code so that it displays a list of managed servers. Because the tutorial provides the source code, prior knowledge of PHP is not required.
Complete the following tasks in order.
- Setting permissions and creating the tutorial folder
- Creating a new web application
- Importing the new web application into SA
- Running the new web application
- Modifying the web application
- Running the modified web application
Tutorial prerequisites
To complete this tutorial, you must have the following capabilities and environment:
- The ability to log on to SA as
adminor as another member of the Super Administrators group. Logging on asadminenables you to set permissions. - The ability to log on to SA as a user who belongs to the Advanced Users group.
- Advanced users have permission to create and run the web application. In the example commands shown in this tutorial, the name of this user is
jdoe. - An understanding of how to set client feature permissions in the SA Client.
- For more information about permissions, see the "User and Group Setup" section in the the SA
- An understanding of how to create folders in the SA Client
- For details on folders, see the SA
- An understanding of how to open a Global Shell session.
- An understanding of basic Unix commands such as
lsandcd. - Experience developing web applications that run on HTTP servers.
Setting permissions and creating the tutorial folder
- Log on to the SA Client as a member of the Advanced Users group and create the following folder in the SA Library:
/Dev/MyApp
Later in the tutorial, you will upload a web application into the MyApp folder. In the non-tutorial environment, the name of this folder is arbitrary. You can create or choose any other folder to contain your web applications. - Exit the SA Client.
- Log on to the SA Client as
adminand open the Folder Properties of theMyAppfolder. - On the Permissions tab of Folder Properties, make sure that the Advanced Users group has the following permissions:
- List Contents of Folder
- Read Objects Within Folder
- Write Objects Within Folder
- Execute Objects Within Folder
- Exit the SA Client.
Creating a new web application
- Open a Global Shell session as an SA user who belongs to the Advanced Users group.
- In your core’s OGFS home directory, create a directory named
mywebappand then change to that directory:$ mkdir mywebapp
$ cd mywebapp
The web application files will be stored in themywebappdirectory. - Using the
apxtoolnewcommand, create the directory structure and default files for the web application as shown below.$ pwd
/home/jdoe/mywebapp
$ ls
$
$ apxtool new -tw -d "This is my first app." \
-u com.hpe.sa.jdoe.mywebapp
Create source directory /home/jdoe/mywebapp/com.hpe.sa.jdoe.mywebapp? Y/N y
Info: Successfully created APX 'mywebapp' source directory: /home/jdoe/mywebapp.
The-twoption indicates that the APX type is a web application,-dspecifies a description, and-uspecifies a unique name for the application.
For more information about theapxtool newcommand options, see the online help:$ apxtool new -h - Change directories into the new directory created by the
apxtool newcommand and list the files there.$ pwd
/home/jdoe/mywebapp
$ cd com.hpe.sa.jdoe.mywebapp
$ ls
APX-INF cgi-bin css images index.php
$ ls -R
.:
APX-INF cgi-bin css images index.php
./APX-INF:
apx.cfg apx.perm description.txt interfaces usage.txt
./cgi-bin:
./css:
hp_sa.css
./images: - Display the contents of the default
index.phpfile:$ cat index.php
<?php
// Show information about PHP
phpinfo();
?>
As with other web applications, you can replace theindex.phpfile with anindex.htmlfile. However, this tutorial uses theindex.phpfile, which you will modify in a later section. - Examine some of the files in the
APX-INFdirectory. For more information, see APX files.
TheAPX-INFdirectory contains information that is specific to APX web applications. As shown by the followingcatcommand, thedescription.txtfile holds the text you specified with the-doption ofapxtool new.$ ls APX-INF/
description.txt apx.cfg apx.perm usage.txt
$ cat APX-INF/description.txt
This is my first app $
The followinggrepcommand shows some of the properties inapx.cfg, the APX configuration file. The values fortypeanduniquenameresult from the-tand-uoptions of theapxtool newcommand. For details on the APX configuration file, see APX configuration file - apx.cfg.$ grep "=" APX-INF/apx.cfg
type=webapp
name=mywebapp
unique_name=com.hpe.sa.jdoe.mywebapp
Importing the new web application into SA
Importing the web application performs the following actions:
- Installs the web application on an HTTP server within SA.
- Copies the web application to a folder that appears in the SA Library and in the Global Shell.
- Assigns a version number to the web application.
Enter the apxtool import command and respond to the prompts with y, as shown below. The -f option specifies the folder in the SA Library where the web application will be stored. The -c option sets the current version of the web application.
$ pwd
/home/jdoe/mywebapp/com.hpe.sa.jdoe.mywebapp
$
$ apxtool import -f "/Dev/MyApp" -c
APX source is not specified.
Do you want to publish current directory: /home/jdoe/mywebapp/
com.hpe.sa.jdoe.mywebapp? Y/N y
APX with unique name 'com.hpe.sa.jdoe.mywebapp' does not exist.
Register it into the system? Y/N y
Info: Successfully registered APX 'mywebapp' (310001) in folder ‘/Dev/
MyApp’.
Info: Successfully published a new version '1' for APX 'mywebapp'.
Info: Successfully set APX 'mywebapp'(310001) current version as '1'.
Running the new web application
Now that you have published the web application, you are ready to run it from the SA Client, just as an end-user would.
- Log on to the SA Client as a user who belongs to the Advanced Users group.
- Select the Library tab and the By Type tab.
- Navigate to the Extensions Web node where you should see the
mywebappextension.
If you do not seemywebapp, make sure that you have the necessary permissions as described in Setting permissions and creating the tutorial folder. -
To run the web application, select
mywebapp. and select the Actions Run menu.
The following figure appears. The web application displays the information generated by thephpinfostatement of theindex.phpfile.
Web Application Version 1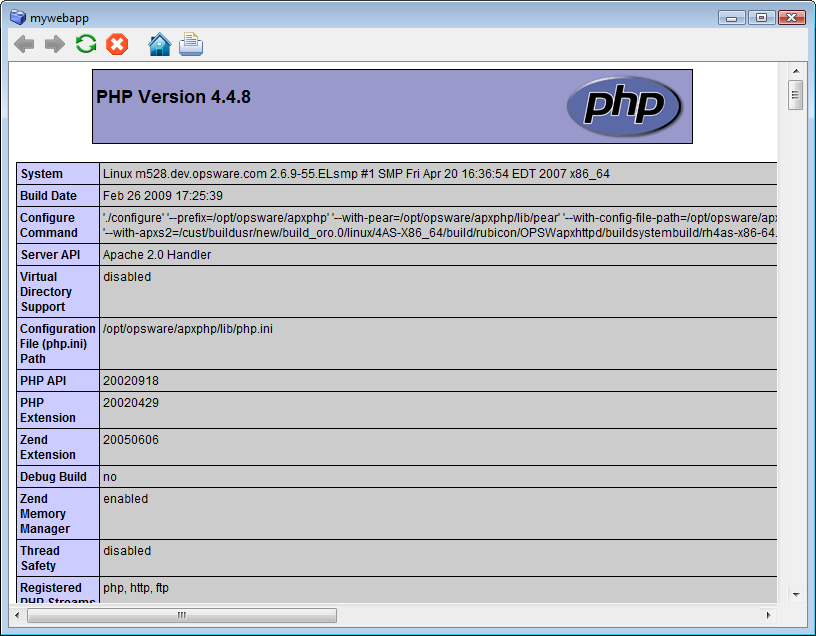
Modifying the web application
Running the default index.php file is a good way to check your development environment, but it does not take advantage of SA functionality. In this section, you modify the index.php file so that it lists the names of servers managed by SA.
- In the Global Shell session, locate the
index.phpfile of the web application.$ cd /home/jdoe/mywebapp/com.hpe.sa.jdoe.mywebapp
$ ls
APX-INF cgi-bin css images index.php - Open the
index.phpfile in a text editor such asvi. - Replace the contents of
index.phpwith the following lines:<html>
<head>
<title>Servers</title>
</head>
<body>
<p>List of servers:</p>
<?php
passthru("ls /opsw/Server/@");
?>
</body>
</html>
Thepassthrustatement above runs thelscommand and passesstdout(without reinflates) back to the web page. Thelscommand lists the names of your managed servers as they appear in the OGFS. - Save the
index.phpfile and exit the text editor. - Publish the modified web application.
The followingapxtool importcommand sets the current version to 2. The-Foption suppresses the confirmation prompts.$ apxtool import -f "/home/jdoe/mywebapp/com.hpe.sa.jdoe.mywebapp" \
-c --version=2 -F
Info: Successfully published a new version '2' for APX 'mywebapp'
Info: Successfully set APX 'mywebapp'(310001) current version as '2'.
Running the modified web application
- In the SA Client, use the View Refresh menu to refresh the view of your web extensions, which should now contain version 2 of
mywebapp. - Select
mywebappand select the Actions Run menu. The output should be similar to the Web Application Version 1 except it displays the output of the PHPpassthrustatement and the OGSHlsstatement, which lists all your managed servers. Note that thepassthrustatement removes the line feeds that separate the server names returned by thelscommand.