


Migrate a VM - vCenter
You can migrate a VM to run on a different host, migrate a VM’s storage to a different storage location, or migrate the VM to a different resource pool. To migrate a VM, it must be powered off or suspended. For more information, see Power on/off a VM - vCenter and SCVMM and Suspend a VM - vCenter and SCVMM .
- In the SA Client, select the Virtualization tab to display your virtualization inventory.
- Navigate to the VM you want to migrate. If the VM is powered on, power it off or suspend it.
-
Select the desired VM and right-click or select the Actions menu. Select VM Manage > Migrate to display the Migration Type window, as shown in the following figure.
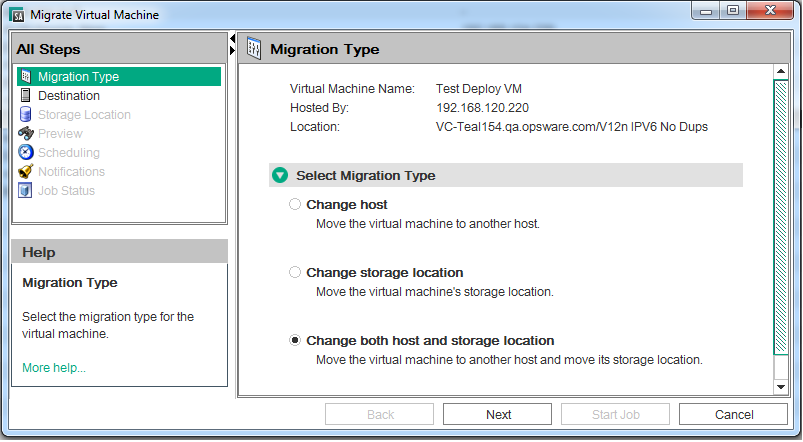
- Migration Type: Select the type of migration you want, then select Next. You can change the VM host, or the VM storage, or both. The next window or windows depend on the type of migration you selected. Check all of the following windows that apply to your situation:
- Destination: Change the host where you want to migrate the VM. Examine the Compatibility Details to make sure the selected location can support the VM, and select Next.
- Resource Pool: Change where you want to place the VM. Examine the compatibility details to make sure the resource pool can support the VM, and select Next.
- Storage Location: Select the datastore in which you want to store the VM configuration file and the VM disk files. Verify that the specified storage location is compatible with the VM you are migrating, and select Next.
- Select the format for the virtual disk. You can specify the same format as the source disk, thin provisioned, or thick provisioned with lazy zeroing. If the VM has multiple disks, this setting applies only to disks being migrated to another datastore. It will not change the format for disks not being migrated to another datastore.
- In Basic mode, select the datastore where all the VM related files will go (the VM configuration file and the VM disk files).
- In Advanced mode, you can select different datastores for the VM configuration file and for each of the VM disk files. Select the VM configuration file or any disk, then select the datastore from the drop-down list of available datastores.
- Preview: Verify the changes. Use the Back button or select a previous step to make changes, then select Next.
- Scheduling: Select when you want the migrate VM job to run, then select Next.
- Notifications: Optionally enter a notifier, then select Next.
- Job Status: Select the Start Job or Schedule Job button. This runs the job or schedules it to be run in the future and displays the Job ID number in the window banner. You can use the Job ID number to look up the job under the Jobs and Sessions tab.
When the job runs, it migrates the VM and displays the results.