


Create a configuration template with Visual Editor
The Visual Editor mode enables you to create a simple application template without having to learn CML or understand the whole configuration file. This is a useful tool if you want to parameterize a small section of a configuration file to push changes to a server.
- To begin, you can create an application configuration template using the Visual Editor by starting with an existing file, such as:
- A working configuration file on an SA managed server
See Creating a template from a working configuration file. - A sample configuration file imported from the local PC
See Importing and creating a template.
- A working configuration file on an SA managed server
- Then, the Visual Editor mode provides a user interface for editing a simple application configuration template without using CML.
- Simply mark the configuration options that should be replaced at configuration push time and the form view appears. The marked options populate the parameter name, display name, and data type fields based on the underlying template. The form view allows you to modify the parameter details as desired. See Editing a configuration template with Visual Editor.
- Simply mark the configuration options that should be replaced at configuration push time and the form view appears. The marked options populate the parameter name, display name, and data type fields based on the underlying template. The form view allows you to modify the parameter details as desired. See Editing a configuration template with Visual Editor.
- After creating the template, you have the option of instantly generating the application configuration instance.
- From a working configuration file on a managed server, you can view a list of compatible templates, open a template, and instantly generate the application configuration instance and attach it to the server. The configuration instance opens in the value set editor, where you can modify the values and push the changes to the server. See Managing configuration files
Note The ability to perform specific actions in SA is governed by your permission settings. Additionally, in order to access the Visual Editor through the server file system, you need to have OGFS permission to read the file system. To obtain additional permissions, contact your SA Administrator. See the SA
Importing and creating a template
- From the SA Client navigation pane, access the folder where you wish to import the configuration file from your PC by selecting Library > By Folder or > By Type and navigate to the desired folder.
-
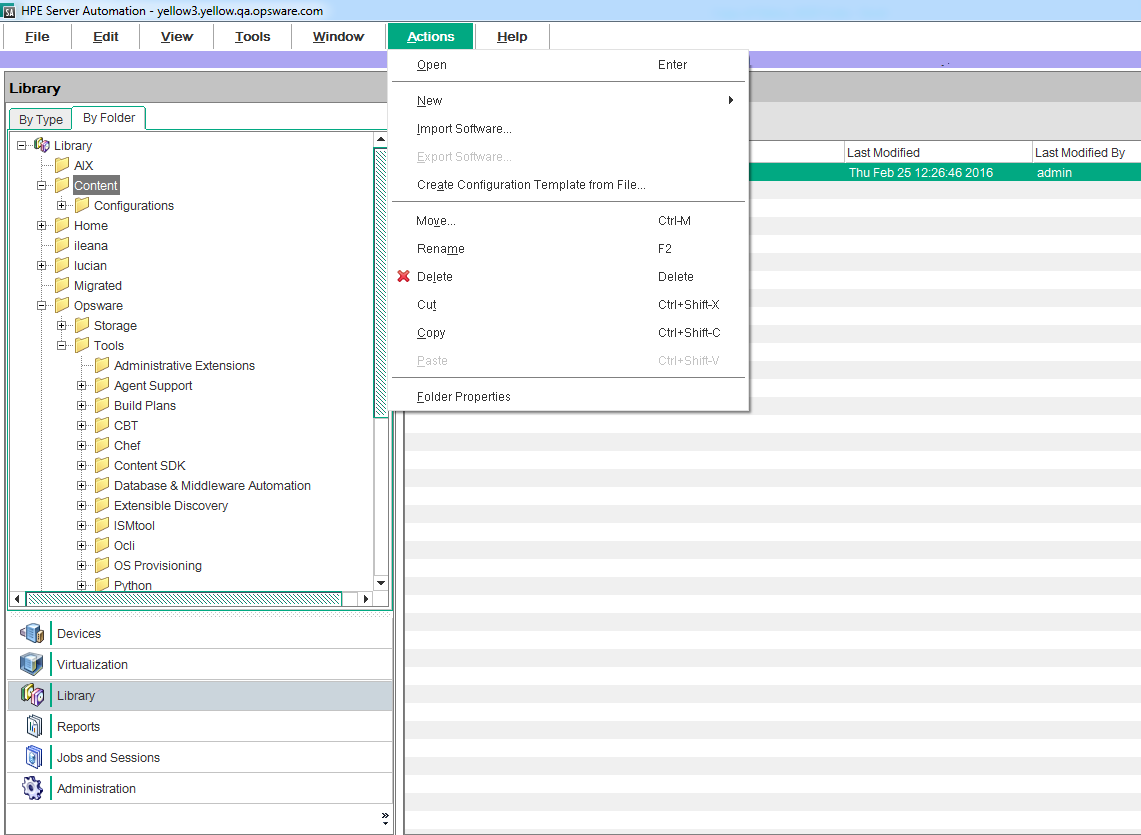
From the Actions menu, select Create Configuration Template from File....
- Find and select the configuration file you wish to import and click Open.
- A template of the selected file opens in Visual Editor mode.
See The Visual Editor interface and Editing a configuration template with Visual Editor.
Creating a template from a working configuration file
To create a configuration template with the Visual Editor from a working configuration file:
- Open a server browser:
- From the SA Client navigation pane, access the list of managed servers or device groups:
- Select Devices > Servers > All Managed Servers to view the server list.
- Select Devices > Device Groups to view the device group list.
- From the content pane, select the server or device group you want to open.
- From the Actions menu, select Open.
- From the SA Client navigation pane, access the list of managed servers or device groups:
- Navigate to Server Browser > Inventory > Files.
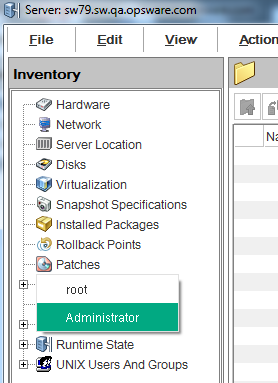
- When prompted, choose the appropriate root path for the server file system (typically, root for UNIX or Administrator for Windows).
- Right-click the configuration file and choose Create Configuration Template with Visual Editor.
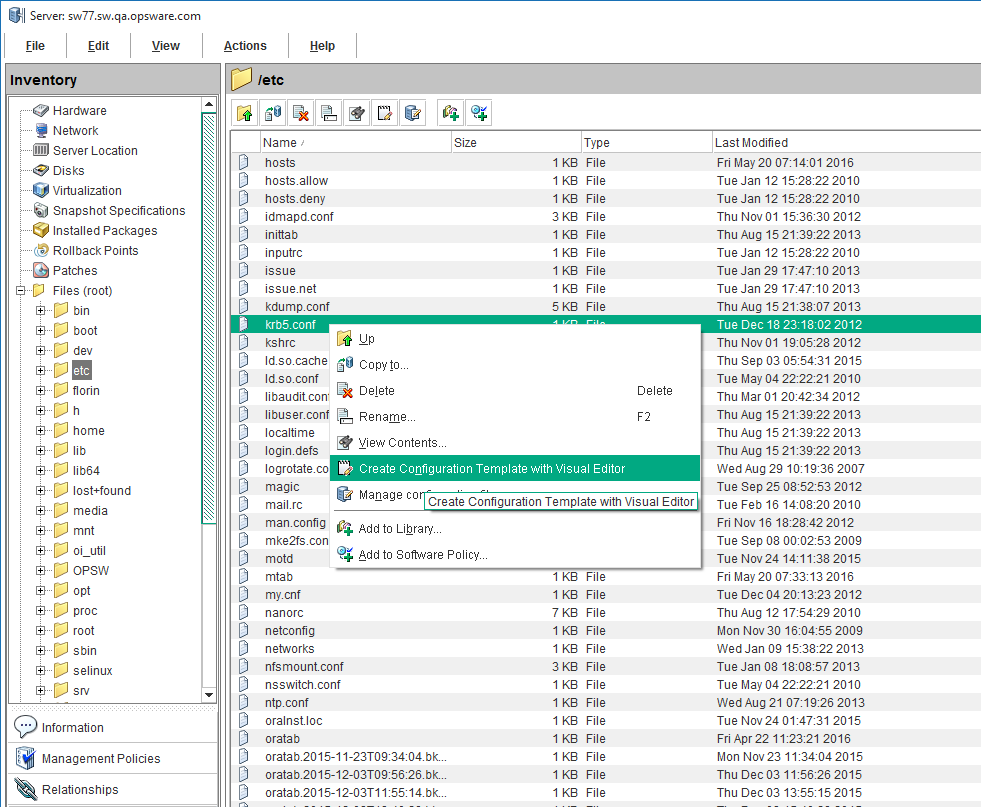
A template of the selected configuration file opens in Visual Editor mode. See The Visual Editor interface.
The Visual Editor interface
The Visual Editor interface displays the underlying application configuration template details in a split panel, where the lower panel displays the detailed properties of the selected parameter in an editable form view. The Parameter Properties panel appears when you first enter the Visual Editor window.
Visual Editor interface
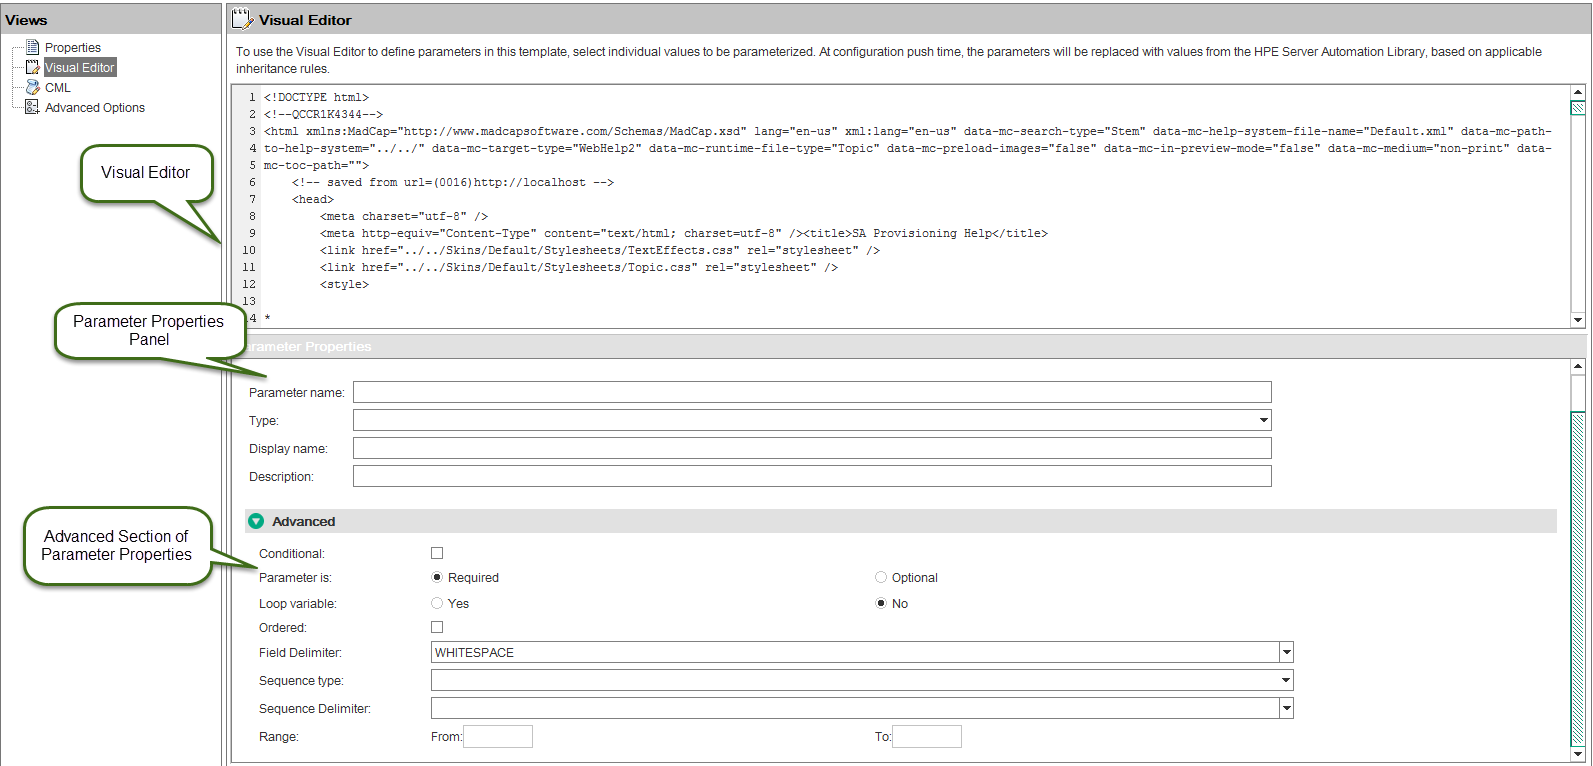
When you select a value in the Visual Editor and then click inside the Parameter Name field of the Parameter Properties panel, the fields in the Parameter Properties panel are populated based on the values in the underlying configuration file.
The parameter properties fields are editable in the user-friendly form view.
Parameter Properties form

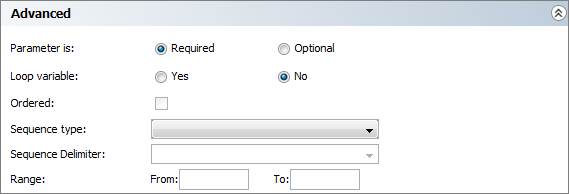
Advanced section of Parameter Properties: Use the Advanced section to specify additional options about the parameter, such as whether it is required (default) or optional, if it is a loop variable, an ordered list, a sequence (specify type and delimiter), or a range. The range is specified for a numeric type such as integer, decimal or port. (The numeric type can be part of a sequence.)
Advanced section of the Parameter Properties form
How the Visual Editor Interface Works
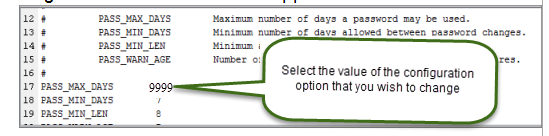
In the Visual Editor, select the value of configuration option that you wish to replace when you push the configuration and the form view appears.
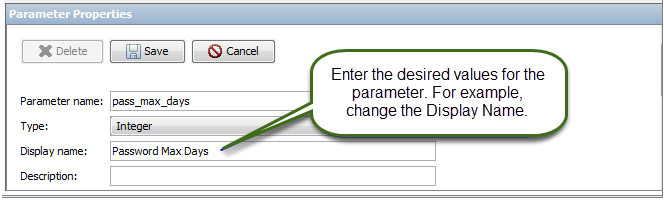
The marked options populate the Parameter name, Display name, and Type (data type) fields in the Parameter Properties panel based on the data in the underlying configuration file. The form view allows you to modify the parameter details as desired.
Editing the configuration template in Visual Editor

For instructions on editing the configuration template with the Visual Editor, see Editing a configuration template with Visual Editor.
Advanced options in Visual Editor
The Advanced Options view allows the user to modify global CML options in the template. To access this view, select Advanced Options in the Views pane of the template.

These values are populated by default and do not require user input, but they are editable:
- Defining the three mandatory fields: filename-key; filename-default and namespace
- Specifying whether the generated template will be a partial or full template (partial, by default, meaning only the specified values will be replaced.)
- The push timeout value and other CML formatting and parsing options.
Note Visual Editor Limitations: The Visual Editor editor only supports a portion of the CML content. If the CML is modified directly in a way that is not supported by the Visual Editor, a warning message will inform you of the incompatibility. You will have a choice of keeping your changes and disabling the Visual Editor, or abandoning your changes and staying with the Visual Editor.
Editing a configuration template with Visual Editor
In addition to basic instructions for the flow of the Visual Editor, this section has tips for editing a configuration template with the Visual Editor. For instructions on opening the visual editor, see Create a configuration template with Visual Editor.
To edit a configuration template:
- Open the Visual Editor.
SeeImporting and creating a template or Creating a template from a working configuration file. - Define the parameters you want to push.
See Creating a simple parameter or Creating a sequence parameter for examples. - Review the Properties tab to specify the name of the template and the location where you want store it.
- Click Save to save the template.
Creating a simple parameter
- Select the configuration option that you wish to replace when you push the configuration and the form view appears.
- In the Parameter Properties panel, click in the Parameter name field, and the marked options populate the Parameter name, Display name, and Data Type fields based on the underlying template.`
- Enter the desired values for the Parameter name and Display name and click Save to save the parameter.
- The newly created parameter will be highlighted in blue in the Visual Editor.
Creating a sequence parameter
To create a sequence parameter:
- Perform the same steps as when you create a simple parameter (see Creating a simple parameter).
- In the Advanced section, specify a value in the Sequence Type field: Set or List.
A List must hold the elements in a particular sequence, and a Set cannot have any duplicate elements.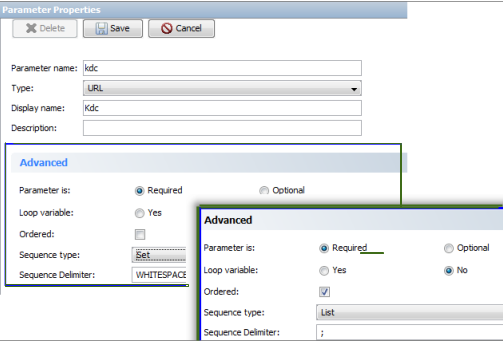
- Specify the Sequence Delimiter. This is the type of character that is used to separate the values in the list.
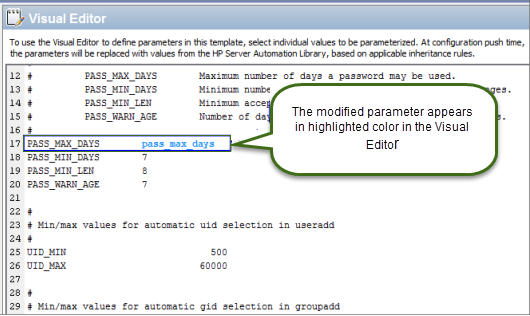
In the Visual Editor panel, the sequence parameter will be created in such a way that all the elements in the configuration file that match the parameter will be highlighted using the same parameter name.
Managing configuration files
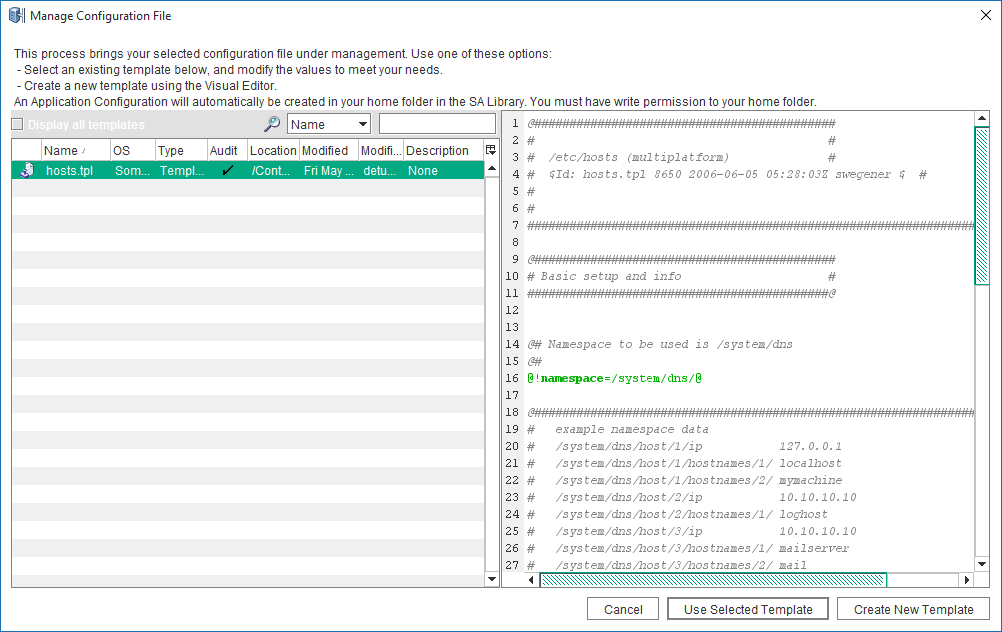
The Manage Configuration File feature enables you to quickly model a working configuration using an existing template.
Note You must have OGFS permissions to access the file system root directory in order to initiate this operation. You must also have right permission to your Home folder in order to complete this operation.
To model a working configuration using an existing templates:
- Open a server browser:
- From the SA Client navigation pane, access the list of managed servers or device groups:
- Select Devices > Servers > All Managed Servers to view the server list.
- Select Devices > Device Groups to view the device group list.
- From the content pane, select the server or device group you want to open.
- From the Actions menu, select Open.
- From the SA Client navigation pane, access the list of managed servers or device groups:
- Navigate to Server Browser > Inventory > Files. (This step requires that you have OGFS permissions.)
When prompted choose the appropriate root path for her server file system (typically, root for UNIX or Administrator for Windows.) - Right-click on the configuration file and select Manage Configuration File.

Existing templates in SA that match the configuration filename and path are listed as suggestions. Only templates that match the server platform are offered. -
Select the template to view the contents in the preview pane.
Alternative options:
- Choose “Display all templates” check box to expand the list to include all templates that match the server's platform.
- Click Cancel to close this window and return to the servers file system directory.
- Click Create New Template to create a new template based on the selected configuration file using the Visual Editor. (See Creating a template from a working configuration file or Editing a configuration template with Visual Editor.)
- If you select Create New Template, when you save and close the template, you are prompted to indicate if you want an application configuration to be generated and an instance be attached the server.
- Optional: If you just want to save the template to revisit later, click No. The template is saved in the directory specified in the Properties tab.
- Click Yes to instantly generate the application configuration instance and attach it to the server. The configuration instance appears in the Value Set Editor.
- Click Use Selected Template to create a new application configuration using the selected template. (This step requires that you have permission to your Home folder.)
The newly created configuration file will be placed in your Home folder in the SA Library and an instance of it will be attached to the managed server.
A confirmation message appears advising that the configuration file was created and attached to the server.
- Click OK. The configuration instance appears in the Value Set Editor.
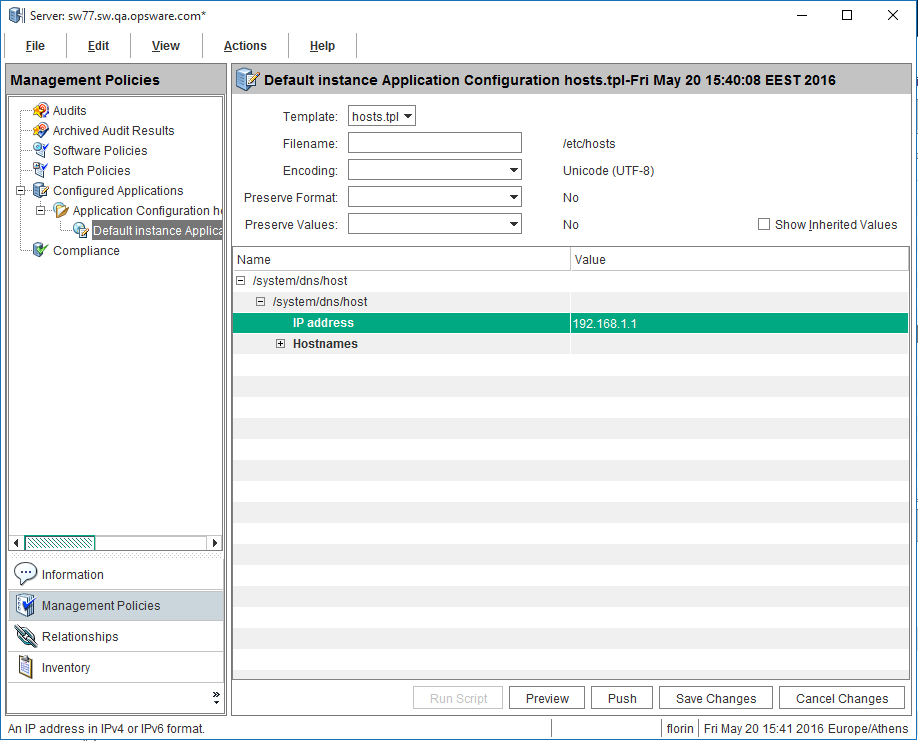
- Enter the value set data for this instance (see Setting values in the Value Set Editor).
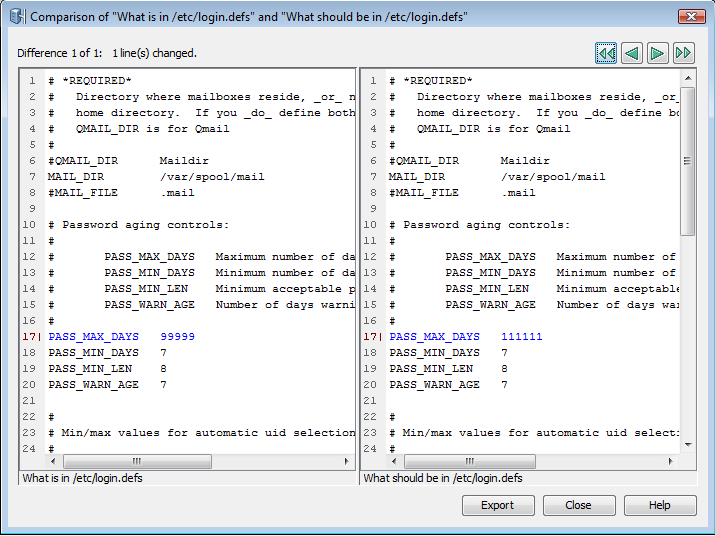
- (Optional) Click Preview to preview the change compared to the current value side by side. Click Close to return to the Application Configuration instance view.
- Click Push to push the change to the server.