


Work with targets
The following topics provide basic instructions for creating and maintaining targets.
For more detailed information, follow the links provided in each topic.
Creating a new target
This topic provides basic instructions for creating a new target. It assumes that you have the SA permissions required to create Application Deployment targets and that you have permission to edit the environment in which the target will reside. See Prerequisites.
To create and configure a new target:
- Go to the Targets screen (click Targets in the lower left corner).
- Click Create a New Target. The Create New Target dialog opens.
- Enter the target name. The name must be unique within the environment.
- In the Location drop-down field, select the environment that will contain this target.
There are two ways to populate your target with tiers: you can add them manually, or you can create them automatically.
To automatically create the same set of tiers in your target that are used in an existing application, select “Use Application's Tiers” and select a version of the application.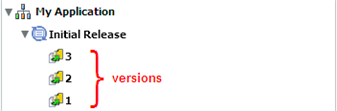
Note that a specific version of a particular release of the application must have been previously created before it will appear in the Select Version drop-down list. - Click OK.
- To add tiers to this target, follow these steps:
- Click Add Tier.
- Select the type of tier to add. You must create the same set (or a superset) of tiers that are used by your application.
A group of standard tiers are provided with your software. If a tier that you need is not available, your Application Deployment administrator may need to add it. See Administer tiers. - Click Add.
- Repeat these steps for each tier that your application requires.
- For each tier that you added in step 6, follow these steps to specify the servers that will be included in this tier:
- Select the tier that you want to work with.
- Add a server to the tier.
- Repeat step 7 to add servers to all remaining tiers.
- Click Save Target to save your changes.
- Click Add Server.
The list of available servers is filtered by platform. Make sure that you select suitable servers for your tier. For example: You should select only Red Hat EL 5 servers if your components for that tier are intended for RedHat EL 5. - In the Add Servers to Target dialog, locate and select the managed server that you want to add. You can use the CTRL key to select multiple servers.
- Click OK.
Managing targets
If you have the proper permissions (see Overview), you can use the Manage Targets tool to perform certain tasks. This tool enables you to do the following things:
To open the Manage Targets tool, click Manage targetson the Targets screen. If you do not have permission to view targets, this button is not available.
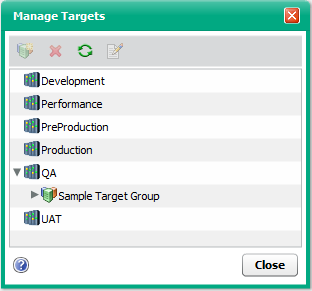
The Manage Targets tool contains a table that lists the following items:
![]() Environments
Environments
![]() Target groups (can be nested)
Target groups (can be nested)
![]() Targets
Targets
Manage Targets tool
Each item in the table that has “children” is preceded by an arrow. Click the ![]() arrow to expand an item; click the
arrow to expand an item; click the ![]() arrow to collapse it. To refresh your view and collapse all items, click the “Refresh” button
arrow to collapse it. To refresh your view and collapse all items, click the “Refresh” button ![]() .
.
To edit a specific item, select the row containing that item, and click the “Edit Properties” ![]() button on the tool bar—or simply double-click the item. You can only modify the name of a target or target group from the Manage Targets tool, however. To modify the structure or content of a target, return to the Targets screen.
button on the tool bar—or simply double-click the item. You can only modify the name of a target or target group from the Manage Targets tool, however. To modify the structure or content of a target, return to the Targets screen.
Creating a new target group
A target group is a container that you can use to organize your targets in a hierarchy. If you have the proper permissions (see Overview), you can create target groups.
To create a target group:
- Go to the Targets screen (click Targets in the lower left corner).
- Open the Manage Targets tool (see Managing targets).
- Expand the environment in which you want to create the target group.
- To create a target group at the top level, select the environment. To create a nested target group, select the existing group under which you want to create the new group.
- Click Create Target Group.
- Specify a name for your new group. The name must be unique within this container in the hierarchy.
- Click OK. Your new group should now be visible in the table. The groups and targets are listed in alphabetical order at each level of the hierarchy.
You can drag and drop targets and target groups to different locations within the same environment. You cannot move them between environments, however.
Deleting targets or target groups
If you have the proper permissions (see Overview), you can use the Manage Targets tool to delete targets or empty target groups.
To delete an existing target or target group:
- Open the Manage Targets tool (see Managing targets).
- In the table, select the row containing the item that you want to delete. Note the following:
- You can select multiple items by using the Ctrl or Shift key. You can only delete multiple items of the same type, however—for example, multiple targets or multiple target groups.
- If you delete a target, any jobs that are scheduled but not running are also deleted.
- You can only delete empty target groups.
- Click Delete.
You will be asked if you really want to delete the item (or items). Click Yes to delete.
Renaming a target or target group
If you have the proper permissions (see Overview), you can change the name of a target or target group by using the Manage Targets tool.
To rename a target or group:
- Open the Manage Targets tool (see Managing targets).
- In the table, select the row containing the target or group that you want to rename.
- Click Edit Properties.
- Enter a new name for the target or group. Target names must be unique within the environment. Also see Naming rules.
- Click OK.
Adding a tier to an existing target
This topic provides basic instructions for adding a tier to an existing target. It assumes that you have the SA permissions required to create Application Deployment targets and that you have permission to edit the environment in which the target resides. See Prerequisites for details.
To add a tier to an existing target:
- Go to the Targets screen (click Targets in the lower left corner).
- From the Select Target drop-down list, select the target where you want to add the tier.
- Click Add Tier.
- Select the type of tier to add. You must create the same set (or a superset) of tiers that are used by your application.
A group of standard tiers are provided with your software. If a tier that you need is not available, your Application Deployment administrator may need to add it. See Administer tiers. - Click the Add button.
- Add one or more servers to your new tier (see Adding a server to an existing tier).
- Click Save Target to save your changes.
Removing a tier from an existing target
This topic provides basic instructions for removing a tier from an existing target. It assumes that you have the SA permissions required to edit Application Deployment targets and that you have permission to edit the environment in which the target resides. See Prerequisites.
To remove a tier from an existing target:
- Go to the Targets screen (click Targets in the lower left corner).
- From the Select Target drop-down list, select the target from which you want to remove the tier.
- Select the tier that you want to remove.
- Click Delete Selected Item.
- Click Yes.
- Click Save Target to save your changes.
Adding a server to an existing tier
This topic provides basic instructions for adding a server to an existing tier. It assumes that you have the SA permissions required to edit Application Deployment targets and that you have permission to edit the environment in which the pertinent target resides. See Prerequisites.
To remove a tier from an existing target:
- Go to the Targets screen (click Targets in the lower left corner).
- From the Select Target drop-down list, select the target that you want to work with.
- Select the tier where you want to add the server.
- Click the Save Target to save your changes.
Removing a server from a tier
This topic provides basic instructions for removing a server from an existing tier. It assumes that you have the SA permissions required to edit Application Deployment targets and that you have permission to edit the environment in which the target resides. See Prerequisites.
To remove a server from an existing tier:
- Go to the Targets screen (click Targets in the lower left corner).
- From the Select Target drop-down list, select the target that you want to work with.
- Select the server that you want to remove.
- Click Delete Selected Item.
- Click Yes.
- Click Save Target to save your changes.
Note that this process only deletes the server from the target. It has no effect on the server itself.