


Create a Join in Service Manager
Before creating a join, search the database to see if the join already exists.
Search the Database
- Start your Service Manager client.
- Type
dbin the HPE Service Manager Command Line, and then press Enter. The Database Manager utility opens. - Type
joindefin the Form field, and then click Search. - Type the name of the join you want to create, and then click Search on the toolbar. Join Definition files are typically named for the tables being joined. In this example, you are looking for a join called probsummary-contacts or contacts-probsummary.
You can create a join if no records are found in the search result.
Create a Join if It does not Exist
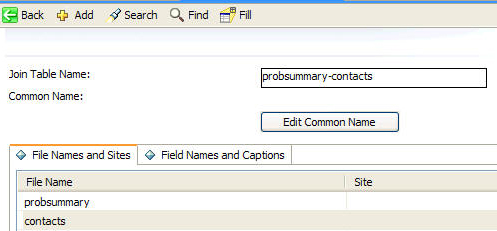
- Enter a name for the join in the Join Table Name field (keep with the common naming convention).
-
Add the names of the tables to be joined in the fields, starting with the upper-left field and working down in columns.
- Under the File Names and Sites tab, add tables of
probsummaryandcontacts. -
Click Add on the toolbar. The join is created.
- Under the File Names and Sites tab, add tables of
- Type
dbin the HPE Service Manager Command Line and press Enter. The main Database Manager window opens. - Type
erddefin the Form field, and then click Search. -
Search for the Entity Relationship Diagram (ERD) Definition you are about to make. In this case, you might want to search based on the First Filename, Second Filename, and Relationship Type. See the table below for descriptions of these fields.
Field
Description
First Filename
Name of the table you want as the parent table in this join. This table shows all of its records. In the example, this is
probsummarybecause the primary goal is to show all open incidents.Second Filename
Name of the dependent table. This table only shows records related to each record of the parent table. In the example, the name is
contactsbecause the contact name determines the contact information for each individual incident record.Relationship Type
One-To-Many, Many-To-One, or One-To-One. This refers to the number of times the record of one table can be connected to records from another table. Use the Many-To-One relationship in this example because a single contact can occur in multiple incident records, but an incident summary can contain only one contact name.
-
If no match occurs, create an ERD definition by filling in the First Filename, Second Filename, and Relationship Type described in Step 5.
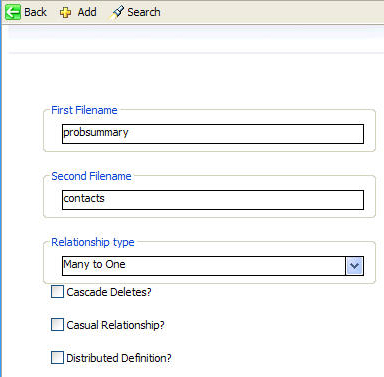
- Type
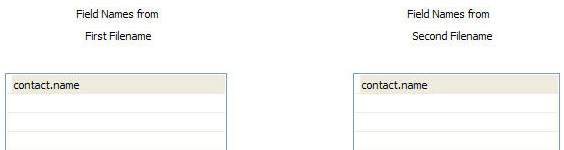
probsummaryin the First Filename field,contactsin the Second Filename field and select Many to One from the Relationship type drop-down box. - In the Field Names from First Filename box, enter the fields where you want to create the join (that is, the field in the first table that is equivalent to the field in the second table).
- Do the same for the Field Names from Second Filename box. In this example, the contact.name field in the probsummary table contains the same data as the contact.name field in the contacts table.
-
Click Add.
-
Restart your Service Manager server and the legacy listener.
Note The join does not take effect until you shut down and restart your Service Manager server and the legacy listener.
The join results in the following:
- Your report prints every record in the
probsummarytable that meets your selection criteria. - For each record, the system looks in the
contactstable for a record containing the same name in the contacts.contact.name field as contained in the probsummary.contact.name field. All requested contact information for that record is printed.