


How to Create and Configure CyberArk Account for the Integration
To successfully integrate UCMDB/UD with CyberArk, follow the instructions below strictly to create and configure a safe, an account, and an application ID in CyberArk for the integration.
-
Sign in to CyberArk Password Vault
-
In your Web browser, enter http://<IP address of CyberArk Password Vault Web Access machine>/PasswordVault.
-
Select CyberArk
 as the authentication method.
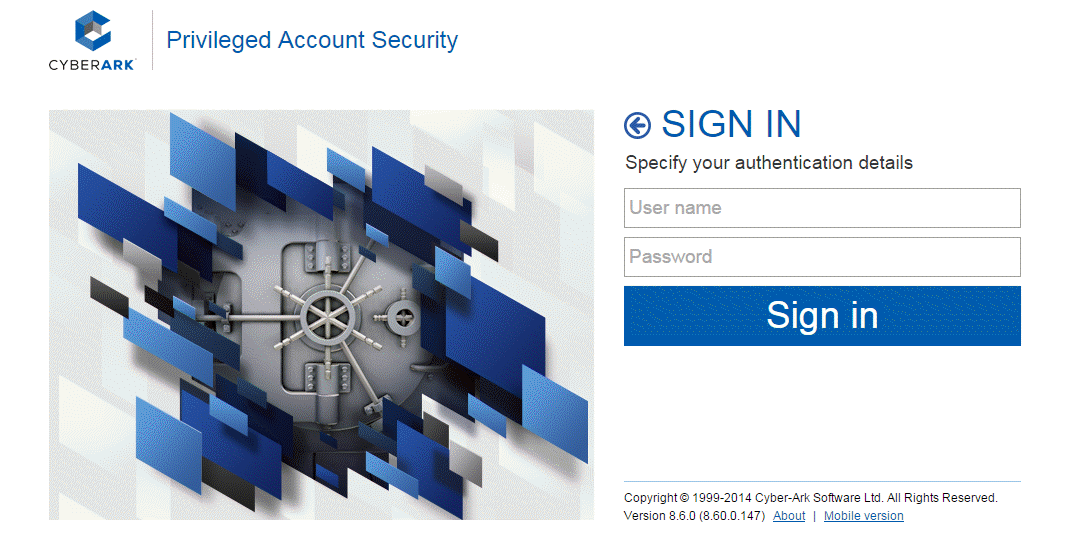
-
Provide your user name and password, and click Sign in.
-
-
To do so,
-
Go to the POLICIES tab and create a safe
- On the POLICIES tab, from the navigation pane select Access Control (Safes), and then click Add Safe
 .
. -
On the Add Safe page, provide values as described below:
- Safe name: Provide a Safe name. For example, NancySafe.
- Description: Provide a description for the Safe name.
- Saved Passwords: Keep the default Save password versions from the last [7] days option selected.
- Assigned to CPM: Keep the default PasswordManager option selected.
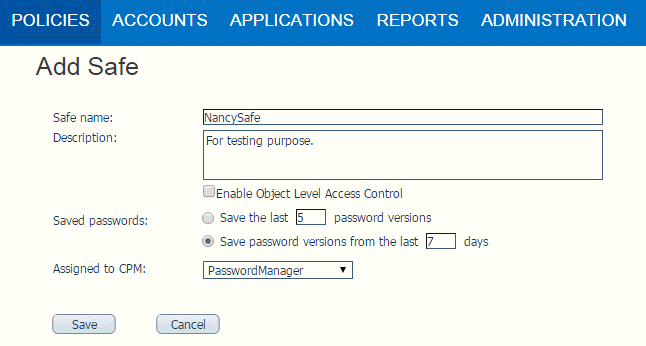
- Click Save
- On the POLICIES tab, from the navigation pane select Access Control (Safes), and then click Add Safe
-
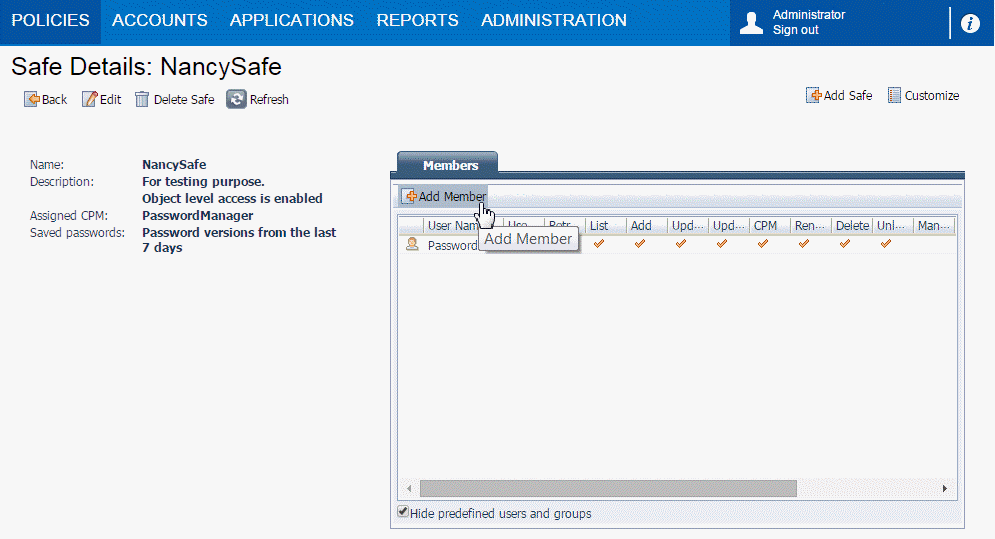
Add the new Safe to the Safe Members list
-
On the Safe Details: <Safe Name> page, click Add Member.
-
In the Add Safe Member dialog, click Search, and then from the returned list select the desired Credential Provider Username (usually Prov_<server>).
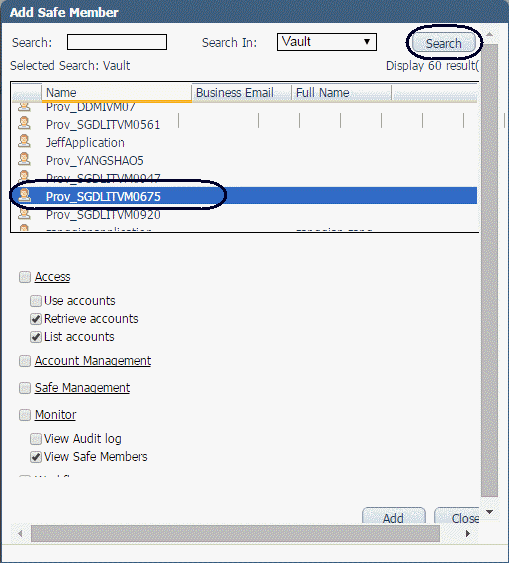
Note The credential provider user only needs the following permissions:
- Retrieve accounts
- List accounts
- View Safe Members
- Click Add.
-
Click Close.
The Credential provider username you just added should now display in the Members list.
-
-
-
Create and configure an account
-
Go to the ACCOUNTS tab, click Add Account
 .
. -
On the Add Account page, provide values as described below:
- Store in Safe: Select the Safe name you just created in step 2.
-
Device Type: Select Operating System from the drop-down list.
Note: The required properties and optional properties may vary with the device type you select. In this document, Operating System and Windows Domain Account are selected for Device Type and Platform Name respectively as an example. For details about other properties, refer to the CyberArk Credential Provider and ASCP Implementation Guide . - Platform Name: Select a platform name value from the drop-down list. In this example, Windows Domain Account is selected.
-
Address: (Optional) Enter the IP address of the target server that you want to discover.
-
User Name: Specify the user name for the account you configure in CyberArk. This is the account used by the UCMDB Server to connect to the target server that you want to discover.
- Password: Enter the password for the account you configure in CyberArk.
- Confirm Password: Enter your password again.
-
Name: Select an Auto-generated or Custom name for your Safe account.
If you select Custom, provide a custom account name. For example, nancy-cyberark-testing-refid.
For example,
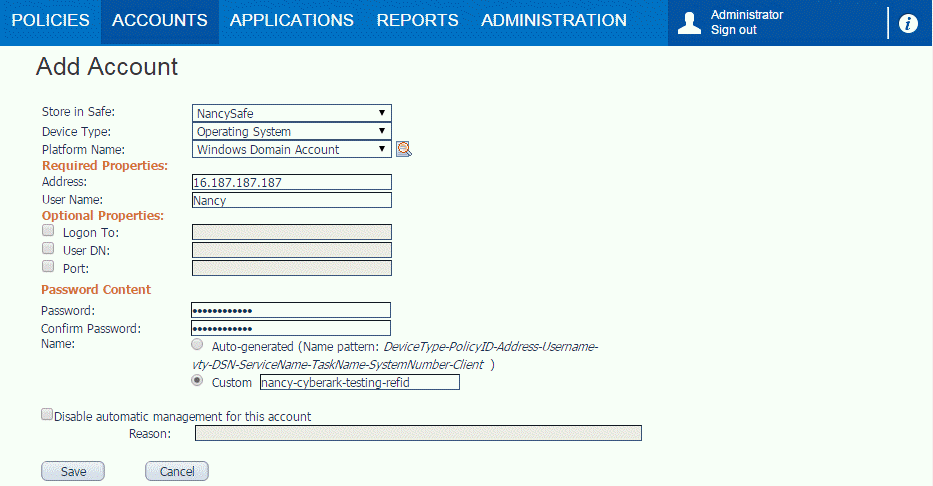
- Click Save.
-
-
Create and configure an application ID
-
Go to the APPLICATIONS tab and create an application ID.
- On the APPLICATIONS tab, click
 .
. -
In the Add Application dialog, provide values as described below:
- Name: Specify UniversalDiscovery as the application ID for UCMDB.
- Description: Provide a description for the application ID.
- Location: Select \Applications.
- Other fields: Provide values as necessary.
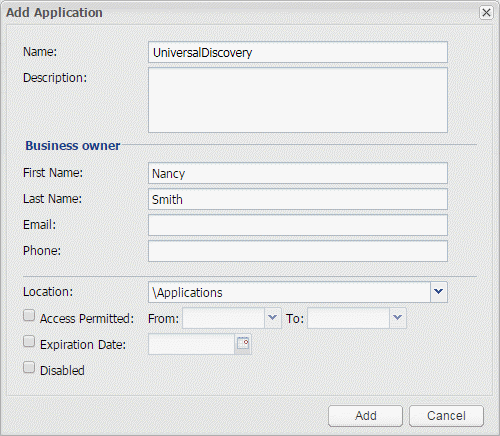
- Click Add.
- On the APPLICATIONS tab, click
-
Add the new application ID to the Safe members list.
- Go to the POLICIES tab, from the navigation pane select Access Control (Safes), and then select NancySafe from the Safe Name list.
- Click Members
 in the lower right corner of the page.
 - On the Safe Details: NancySafe page, click Add Member.
- In the Add Safe Member dialog, select UniversalDiscovery.
- Click Add.
-
Add the full name of the Credential Provider Servers to the Allowed Machines list.
- Go to the APPLICATIONS tab, select UniversalDiscovery.
- On the Application Details: UniversalDiscovery page, go to the Allowed Machines tab.
- Click Add Machine
 .
. - In the Add allowed machine dialog, enter IP, host name, or DNS.
- Click Add.
-
Add path authentication for UniversalDiscovery.
- Go to the Authentication tab, click Add authentication details
 , and then select Path.
 -
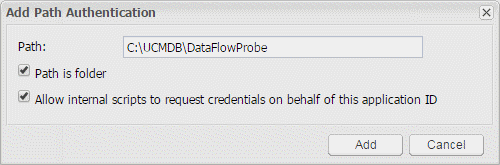
In the Add Path Authentication dialog,
- In the Path field, enter the path, for example, C:\UCMDB\DataFlowProbe.
-
Make sure you select the check box for both of the following options:
- Path is folder
- Allow internal scripts to request credential on behalf of this application ID.
For example,
-
Click Add.
- Go to the Authentication tab, click Add authentication details
-
Add operating system user authentication for the new application ID.
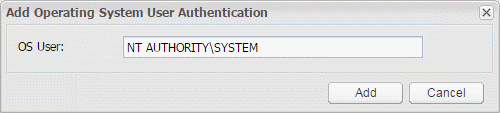
- On the Authentication tab, click Add authentication details , and then select OS user.
-
In the Add Operating System User Authentication dialog, provide OS user information, for example, NT AUTHORITY\SYSTEM.
Note
-
If the Probe is running as a service, specify NT AUTHORITY\SYSTEM as OS user.
- If the Probe is running as console, specify <hostname\username> as OS User. For example, HPSWVM0999\Administrator.
-
- Click Add.
- On the Authentication tab, click Add authentication details
-