


Create and manage organizations
At HPE ITOC installation, a single public organization is set up. Use the Create and Manage Your Organizations Administration UI to create consumer organizations, as needed.
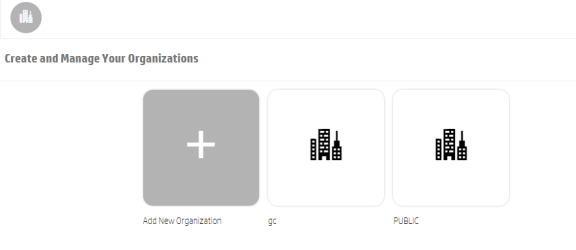
From this view, you can:
- Add a new organization - Click Add New Organization, and provide a name for the organization. See Create a new organization for more details.
- Navigate to an organization - Click the tile name of the organization to which you want to navigate.
Create a new organization
The administrator can create one or many consumer organizations. Everything in production state and all resources in the public organization are shared with all consumer organizations. Objects created in consumer organizations are only known to users in that organization. Consumer organization users can use public organization objects, such as shared controls, policies, and resources.
Authentication, groups, and business roles need to be configured for each organization. They work together for users to perform authentication and authorization functions in the HPE ITOC UI.
- Authentication - Configure and manage multiple LDAP identity servers for each organization
- Groups - Add groups to help manage what roles can be assigned to its users (see Add groups and associate business roles).
- Business roles - Associate groups with roles or roles with groups, giving users permissions to view and access information in the HPE ITOC UI (see Add groups and associate business roles).
Note that the URL for the organization is automatically assigned and generated using server location information and the name of the organization to create the URL. Once generated, it is not editable.
To create a new organization:
- From your browser, log in to the Organizations Administration UI using port 9200. For example:
https://<ITOC_hostname>:9200 -
The Create and Manage Your Organizations view opens, and the current organizations in the system are shown.
-
Click the Add New Organization widget.
- In the Create Organization window, type in your new Organization Name. The system creates a unique organization ID based on your organization name, which is a unique identifier in HPE ITOC.
- Click Create.
-
A dialog page appears, with the following page links:
- General Information
- Authentication
- Customization
- Groups
- Business Roles
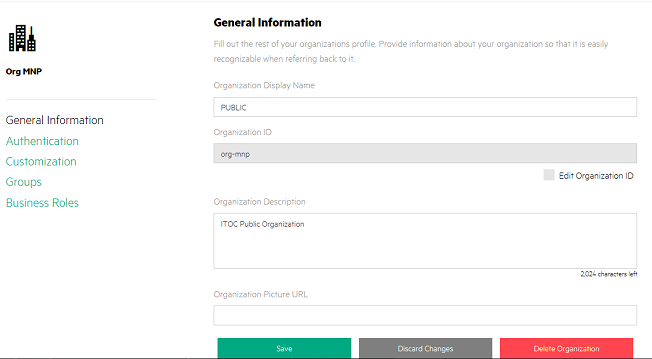
- Click the General Information view.
- Note that the organization name used to create the organization is now the Organization Display Name. In this view, you can edit your organization display name.
- Enter a full description of your new organization.
- You can use a default image to represent the organization, or you can use the organization picture URL field to input an image from any live URL.
- Click the Save button.
If you have if have not saved your last change while creating an organization, a screen called Unsaved Changes appears. This feature allows you to Return to Page where you can edit and save your most recent changes, or Discard Changes to proceed to the Authentication section.
- The Organization ID is grayed out, as it is uneditable by end users. This is the unique organization name used to identify your organization.
-
Click the Authentication tab, and enter your LDAP information. You will set your LDAP attributes and privileges for users, groups, and other basic authentication information for integration with your organization. For information on authentication and setting up LDAP, see Configure and manage authentication
-
Click the Customization tab to customize the organization.
- Click Save.
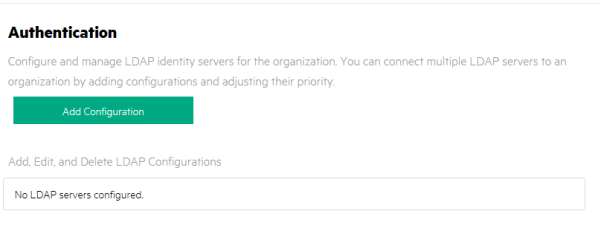
Configure and manage authentication
You can connect multiple LDAP servers by adding configurations and adjusting their relative priority within an organization.
LDAP is used to:
- Authenticate a user's login
- Authenticate a user's access to information
- Authorize a user's access to information
To completely configure access to HPE ITOC, you must configure LDAP to authenticate a user's login, configure LDAP for an organization to authenticate a user's access to information, and configure access control for an organization to authorize a user's access to information.
To configure LDAP for an organization:
- Click the Authentication link.
- To add a configuration, click the Add Configuration button.
Or
To edit a configuration, click on the display named of an existing LDAP.
Add or edit the following information:
LDAP server information
Item Description Display Name Display name for the LDAP server Hostname Fully qualified LDAP server domain name (
server.domain.com) or IP address.Example:
ldap.xyz.comPort Port used to connect to the LDAP server (by default,
389).Example:
389SSL Connection If the LDAP server is configured to require LDAPS (LDAP over SSL), select the SSL Connection check box. Base DN Base distinguished name. Base DN is the top level of the LDAP directory that is used as the basis of a search.
Example:
o=xyz.comUser ID
(Full DN)Fully distinguished name of any user with authentication rights to the LDAP server. If the LDAP server does not require a user ID or password for authentication, this value can be omitted.
Example:
uid=admin@xyz.com,ou=People,o=xyz.comPassword Password of the user ID. If the LDAP server does not require a user ID or password for authentication, this value can be omitted. Retype Password Retype the password of the user ID. LDAP attributes
Enter the names of the attributes whose values are used for email notifications, authentication, and approvals in HPE ITOC.
Item Description User Email Name of the attribute of a user object that designates the email address of the user. The email address is used for notifications. If a value for this attribute does not exist for a user, the user does not receive email notifications.
Default:
mailGroup Membership Name of the attribute(s) of a group object that identifies a user as belonging to the group. If multiple attributes convey group membership, the attribute names should be separated by a comma.
Default:
member,uniqueMemberManager Identifier Name of the attribute of a user object that identifies the manager of the user.
Default:
managerManager Identifier Value Name of the attribute of a user object that describes the value of the Manager Identifier's attribute. For example, if the value of the Manager Identifier attribute is a distinguished name (such as
cn=John Smith,ou=People,o=xyz.com) then the value of this field could bedn. Or, if the Manager Identifier is an email address (such asadmin@xyz.com), then the value of this field could beemail.Default:
dnUser Avatar LDAP attribute whose value is the URL to a user avatar image that will display for the logged in user portal. If no avatar is specified, a default avatar is used. User login settings
A user search-based login method is used to authenticate access to information.
Item Description User Name Attributes Name of the attribute of a user object that contains the username that will be used to log in. The value for this field can be determined by looking at one or more user objects in the LDAP directory to determine which attribute consistently contains a unique user name. Often, you will want a User Name Attribute whose value in a user object is an email address.
Examples:
userPrincipalNameorsAMAccountNameoruidUser Searchbase Location in the LDAP directory where users' records are located. This location must be specified relative to the base DN. If users are not located in a common directory under the base DN, leave this field blank.
Examples:
cn=Usersorou=PeopleUser Search Filter Specifies the general form of the LDAP query used to identify users during login. It must include the pattern
{0}, which represents the user name entered by the user when logging in. The filter is generally of the form<attribute>= {0}, with<attribute>typically corresponding to the value entered for User Name Attribute.Examples:
userPrincipalName={0}orsAMAccountName={0} or uid={0}Search Option (Search Subtree) When a user logs in, the LDAP directory is queried to find the user’s account. The Search Subtree setting controls the depth of the search under User Search Base. If you want to search for a matching user in the User Search Base and all subtrees under the User Search Base, make sure the Search Subtree checkbox is selected. If you want to restrict the search for a matching user to only the User Search Base, excluding any subtrees, unselect the Search Subtree checkbox.
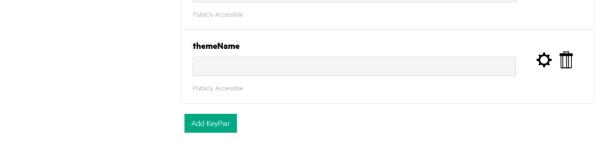
Customize a consumer organization
From the Customization screen, you can customize various aspects of a consumer organization by adding and labeling KeyPair Values.
To customize a consumer organization:
- Click the Customization view.
- Click Add KeyPair. The Create KeyPair dialog appears.
- Name - Enter a required display name for the KeyPair.
- Value - Enter a value for the KeyPair.
- Publicly Accessible - Check the box to make the organization publicly accessible.
- Click Save.
Application labeling
| KeyPair Value | Description |
|---|---|
| portalTitle | Type a name that displays on the login screen and header of your organization's portal. |
| portalWelcomeMsg | Type a welcome message that displays below the application name when a user logs into your organization's portal. |
| portalFooterMsg | Type a footer message that displays below the login screen and header of your organization's portal. |
Add groups and associate business roles
You can map LDAP groups in the organization administration, giving users in the LDAP groups login authentication in the HPE ITOC UI. The Available Groups list in this view shows groups associated with this organization.
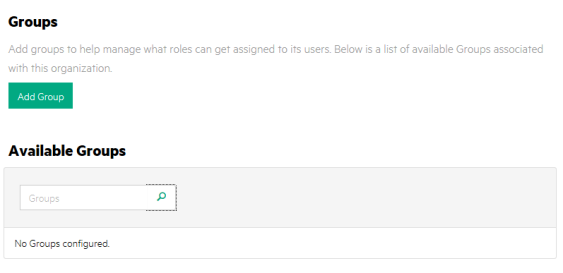
Add a group
- Click the Groups view.
- Click the Add Group button.
- Provide a Group Name and Distinguished Name. Both fields are required to create a group.
- Press Create.
There are two ways to associate roles with the group:
- From Groups, click the Group name link, which brings you to the Groups view.
- Search for a role to associate with the group.
- Select a role and click Add Role.
-
Click Save to make the association.
Or
- After you create a group, go to the Business Roles link below Groups.
- To associate a group with a role, click Add Group below the desired role.
- Select a group to be associated with the chosen role from the dropdown list.
- Click Save to make the association.
Validate that your group has a newly associated role:
-
Click on the group link for the group you want to view.
-
In the Groups view, you should see the new role association for your group listed in the Associated Roles section.
Repeat this process as needed to associate additional groups and roles in your organization.
Edit groups
You can edit the group name and distinguished name of a group in the Groups view. Click on the group name link, make your name changes in the Group Name and Distinguished Name fields, then click the Save button.
Delete associated roles
There are two ways to delete an role association from a group:
- In the Groups view, click on the link for the group. Under Associated Roles, click the 'X' to the right of the role to delete this association, or:
- In the Business Roles view, click the 'X' to the right of the group to delete this association.
- The following message appears: No roles associated with this group.
Remove groups
- Click on the Groups link to bring up the Groups view, click on the trashcan icon to the right of the Group name.
- A warning window appears, allowing you to either Remove Group or Cancel the deletion.
- Click Remove Group.
Business roles
From the Business Roles view, you can associate a group with a business role or delete an association from a role.
Delete an organization
- Click the General Information link.
- Click the Delete Organization button. The following dialog appears:
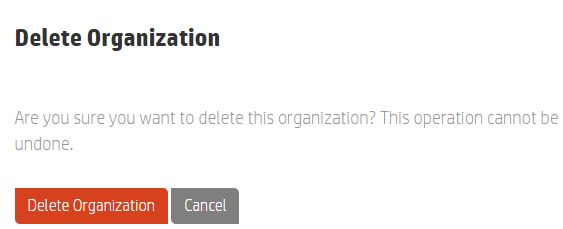
- Click the Delete Organization button.