


List view columns
The Columns feature on the list view toolbar enables you to customize your view of the available fields in each record.
![]()
To customize:
-
Click
 Columns. Service Management displays a list of fields that are displayed in the view.
 -
To add a column to the view:
-
Select a field from the combo box at the top of the list.
-
Click Add.
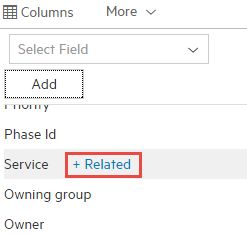
Note If the field you select to add is a record type itself, you can click the +Related link to select a property of that field. For example, if you selected Owner as the column to add, you can select Email as the secondary field. Then the column added to the grid is Owner.Email.
You can also click the +Related link next to fields already selected in the list of columns to change the column to display a property of the field.
-
-
To remove a column from the view, select the column name in the list, and click X.
- To format the columns, click Format columns. Select the Force fit columns check box to display all selected columns on the screen. Clear the check box to restore the columns to their default size.
To sort:
- Click a column header to perform an ascending sort of the list by the selected column.
- Click the column header again to perform a descending sort of the list by the selected column.
- Press the Shift button and click a second column header to perform a secondary (ascending) sort of the list by the selected column. Press Shift again and click another column header to add a third level search, and so on. The sort order follows the order the columns were selected.
- Press the Ctrl button and click one of the sort columns to remove it from the sort.
Related topics


