


Filters
Filters help you filter record lists or define filters for a report.
You can use the following methods to create a filter:
Filter by field value
-
Click the Add filter
 button.
- In record lists, this button is located above the list of records.
- When you create a report, this button appears when you select the record type for the report.
Tip If there are more than 4,000 records, the Filter wizard is displayed. The Add Filter
button is located above the Filter wizard. For information about using the Filter wizard, see Filters below. -
From the Select field list, select a field and a value, by which to filter the list:
Note
- The fields that are initially available in the filter are searchable fields. After you select the first searchable field, fields that are not defined as searchable fields become available for filtering as well. Searchable fields are defined in the metadata for the record type.
- If all searchable fields are removed from the filter, the non-searchable fields are removed as well.
- Filtering is not supported for encrypted fields.
-
For fields that have defined sets of values, the values are displayed and you can select one or more values by which to filter the records. For example, select the Priority field, and select Critical and High to show only critical and high changes in the filtered list.
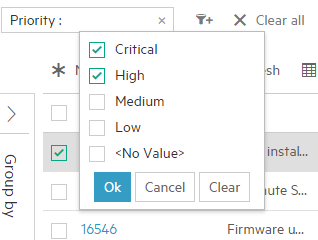
You can click the
 button and select Is to apply a positive filter or Is not to apply a negative filter (which filters by all options except the selected ones).
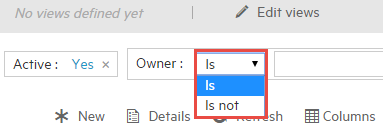
The filter definition must include at least one positive filter. Therefore, the
button does not appear initially in the first filter you select. It appears in the next filter you select. If you select a positive filter for the second one and then click the first filter, the button appears in that filter and you can select Is or Is not.Note
- The default filter is the positive filter.
- This option is not available in the filter in the History tab.
-
For fields whose values are derived from record lists, click the list box, and select one or more values from the list. For example, in Change Management, in the filter, select the Owner field, and select one or more owners to show in the filtered list.

Alternatively, you can filter the records by a particular field of the selected record type. At the bottom of the list of fields, click By <record type> fields.
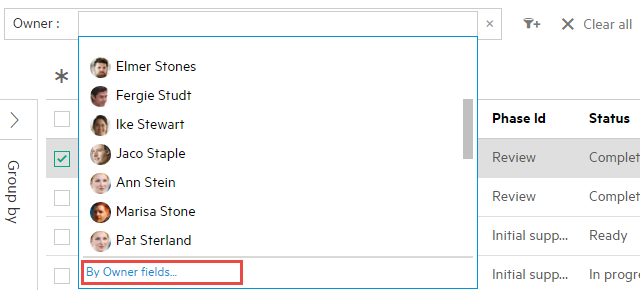
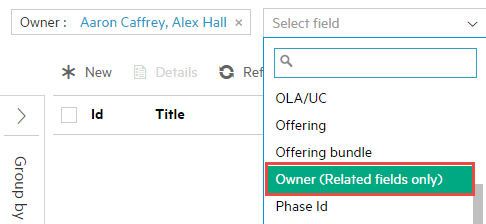
Fields related to the record type are displayed.
Select a property by which to filter the records. For example, Location. Then select values for the filter, according to the type of field you selected. For example, France and Netherlands.
You can click the
button and select Is to apply a positive filter or Is not to apply a negative filter (which filters by all options except the selected ones).
The filter definition must include at least one positive filter. Therefore, the
button does not appear initially in the first filter you select. It appears in the next filter you select. If you select a positive filter for the second one and then click the first filter, the button appears in that filter and you can select Is or Is not.Note
- The default filter is the positive filter.
- This option is not available in the filter in the History tab.
The filters by different record fields cannot be applied in the same filter. For example, the filter by Owner, the filter by Owner.Location, and the filter by Owner.First name must be in separate filters.
Once you have added a filter by a record field of a selected record type, when you select that record type as a filter again, only the related fields options is available.
Note If the field selected for the filter is a text or numeric value that is not selected from a list, for example First name or Global Id, it is not possible to enter multiple values for the filter.
-
For free text fields, select the field, click the
button and select one of the following options:-
Starts with. Type free text in the text box and press Enter. For example, select Title, and type upgrade.
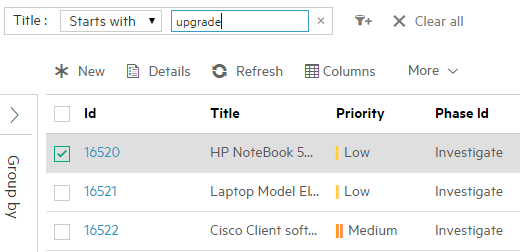
The search string upgrade returns records whose Title starts with upgrade or Upgrade.
-
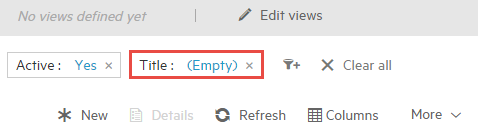
Is empty. Returns only records with no value in the text field. For example, if you select Title and Is empty, the filter returns only records with no value in the Title field.
-
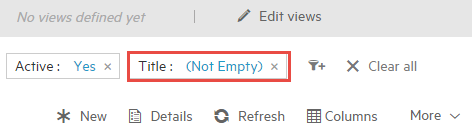
Is not empty. Returns only records with a value (not a null value) in the text field. For example, if you select Title and Is not empty, the filter returns only records with a value in the Title field. Records with no value in the Title field are excluded.
-
-
For date fields, select the field. The following dialog box is displayed:

Select either of the following:
-
One of the ready-to-use values. For example, Past month.
-
Choose dates.... A dialog box is displayed in which you can enter either of the following:
-
A single date

-
A range of dates

-
-
-
Click outside of the filter area. In the record list, the records matching the filter criteria are displayed.
-
Repeat to add more fields to the filter.
Tip
-
To clear an individual filter, click the Delete
 button on that filter's box.
To clear all the filters simultaneously and re-display the complete set of records, click Clear All.
- When you clear one or more filters, the record list is automatically refreshed.
Filter by user options
- For the Request record type, if the Filter by field contains only one offering, its user options can be selected as one of the filters.
- For the Incident record type, if the Filter by field contains only one model, its user options can be selected as one of the filters.
- For the Change record type, if the Filter by field contains only one model, its user options can be selected as one of the filters.
Filter by column
-
Move your mouse over any column in the record list until the Filter
 button appears.
 -
Click the Filter button to display a Filter selection dialog box above the toolbar. For example, select Created by to create a filter for records created by a particular user.
Note The Filter
button initially appears only for columns of searchable fields. After at least one searchable field has been added to the filter panel, the Filter button also appears over columns of non-searchable fields. - To set filters, see Filters above.
Filter wizard
Record lists can display up to 4,000 records. If there are more than 4,000 records in a record list, you are given the option to filter the records as discussed above, using the Add filter ![]() button as described above, or alternatively, using the Filter wizard.
button as described above, or alternatively, using the Filter wizard.
Depending on the module you are viewing, the Filter wizard filters records by area of relevance which can be sorted by quantity, or other relevant sort orders.
-
To filter the records by a different field, select the field from the Show tiles by list.
Note A subset of the filterable fields are displayed in the Show tiles by list.
- To change the sort options, click the relevant Sort by option.
For example, in Change > Changes, if there are more than 4,000 changes, Service Management gives you the option to filter the changes using the Filter wizard.
When you click the Filter wizard button, the Filter wizard logically breaks the changes down into the changes that are active, and changes that are not active, sorted by quantity.
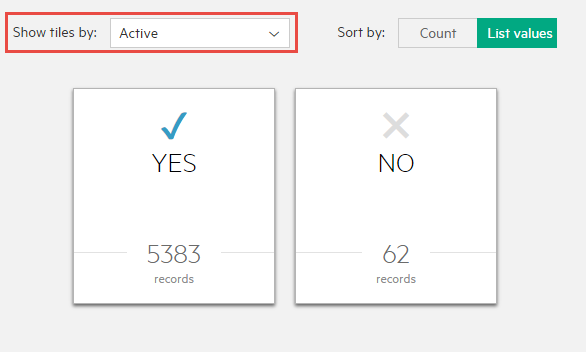
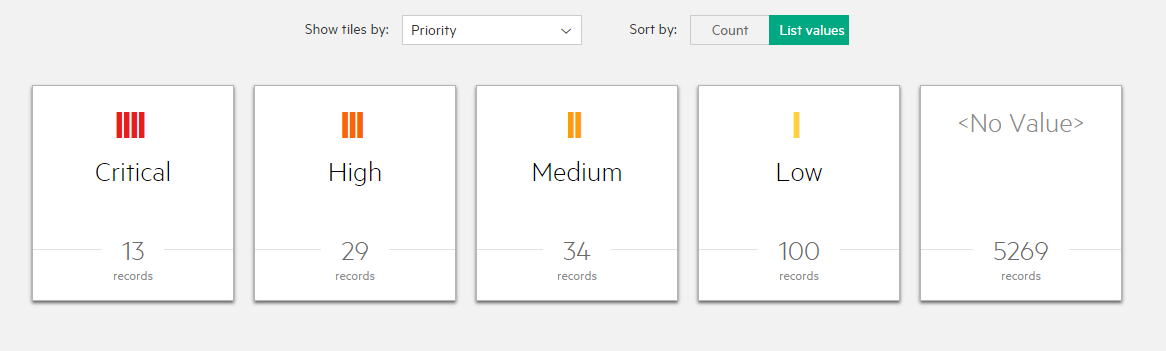
Clicking the tile that says Yes filters the active changes further by Priority, and sorts them by descending number of changes per priority.
You can sort by priority by clicking List value.
Click the tile representing the list of records to view. The Changes record list displays only these records.
Grouping records
- Click the Expand
 button on the left of the record list.
 - Click the Pin
 button to pin the grouping pane open.
 - Click the Group
 button.
 -
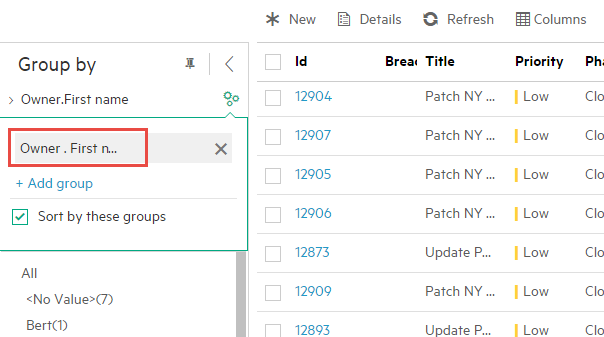
Select the primary field by which to group the records. For example, in Change > Changes click +Add group and select Owner. The Groups tree at the bottom of the grouping pane displays the groups in a tree. Click a group to see records in that group only.

If the field you select is record type field, for example, if you selected Owner, you can group the records by a particular Owner property. When you hover over the field, a +Related link appears next to the field name.

Click the link and select a related property by which to group the records. For example, select First name.
Note If no filter is applied, only searchable fields are displayed in the +Related field list.
-
If Sort by these groups is selected, the records are automatically grouped. The tree below the field selection area displays the groups.
-
To group the records further, click +Add group and select another field in the field selection box.
For example, select Change model to group the records by change model.
Note
- You can select up to three grouping levels.
- You can group by more than one property of a record type field.
- As you add more grouping levels, the Groups tree displays the number of records that meet the criteria specified for each grouping level.
- If you select an encrypted field for the grouping, part of the Groups tree may not be displayed.
-
To change the order of the grouping levels, click a group and use the arrow buttons to move it up or down in the grouping levels.
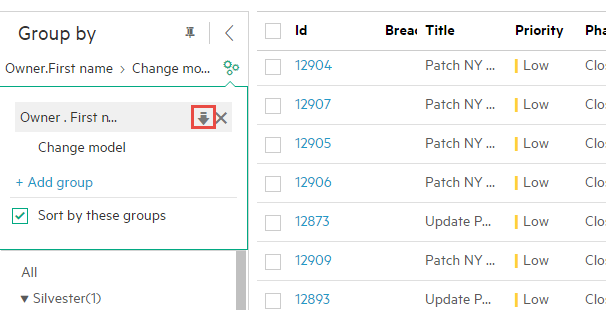
The Groups tree is realigned to reflect the change in the grouping level order.
-
To remove a grouping level, click the group by field and click the Delete
button.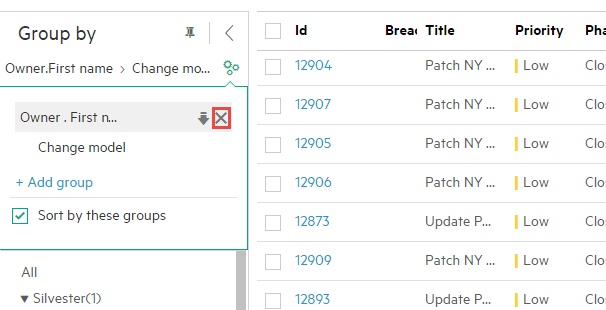
When you remove a grouping level, the grouping level below it is automatically promoted and the record list is refreshed.
Note If the grouping results in more than 200 groups, you must refine your filter.
Note
- For the Request record type, if the Filter by field contains only one offering, its user options can be selected as one of the group-by fields.
- For the Incident record type, if the Filter by field contains only one model, its user options can be selected as one of the group-by fields.
- For the Change record type, if the Filter by field contains only one model, its user options can be selected as one of the group-by fields.
Sort order view
The sort order view shows the results of the following sort-by values. The number of records with that sort value appears in parentheses ( ).
| All | ||
|
|
Critical (1) | |
|
|
||
| Initial Support (1) | ||
|
|
Low (5) | |
|
|
||
| Initial support (2) | ||
| Validate (1) | ||
| Classify (2) |
Related topics


