


Configure the SA DHCP IPv4 server for SA Provisioning
The DHCP Network Configuration Tool for IPv4 is installed with the Boot Server. Perform the following steps to configure networks for Provisioning:
- Log in as root to the server running the Boot Server.
- (Optional) Make a backup copy of the configuration file with the following commands:
cd /etc/opt/opsware/dhcpdcp dhcpd_subnets.conf dhcpd_subnets.conf.orig - Run the DHCP Network Configuration Tool with the following command:
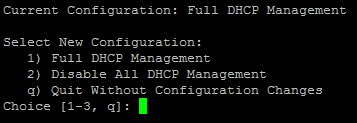
/opt/opsware/dhcpd/sbin/dhcpdtoolThe following DHCP Network Configuration Tool main menu appears:
-
To perform full DHCP Management, enter
1at the Choice prompt. - To add a new network, enter
aat the following prompt.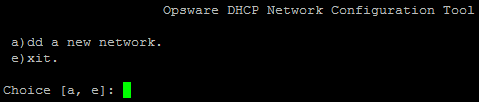
-
To configure the DHCP service on the local network, enter
1at the following prompt. Local networks are detected automatically and displayed.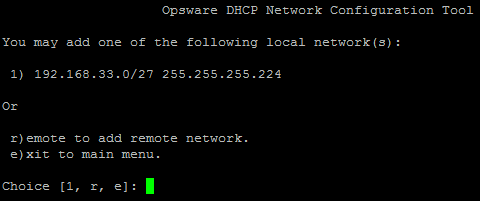
-
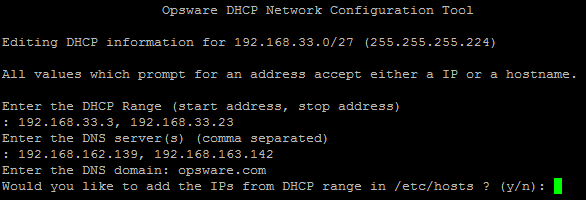
If you are adding a local network, you need to enter the IP addresses or host names of the DHCP range and the DNS servers. In the following two figures, note that the IP addresses are separated by a comma and a space.
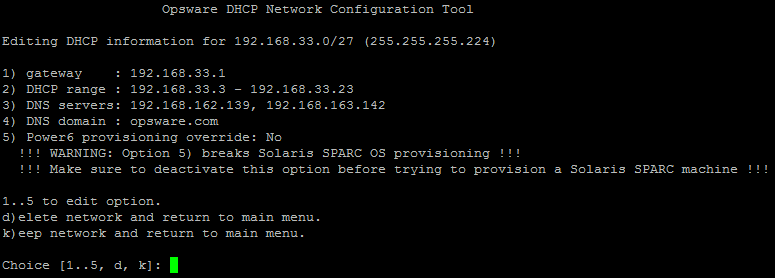
-
If the displayed information is correct, enter
kto keep the network and return to the main menu. -
At the main menu, to save the information you have entered, enter
sor
to edit a configured network, enter the corresponding integer and return to step 3
or
to add more networks, enter
aand return to step 3. -
To exit the DHCP Network Configuration Tool, enter
e. You are prompted to start (or restart) the DHCP server process. -
To start (or restart) the DHCP server process, enter
y. The DHCP Network Configuration Tool displays diagnostic output as part of its startup.