Phase 2: Prepare target servers
This section describes setting up and configuring your provisioning target servers.
- Target server requirements
- Choosing how to boot servers
- Network booting
- Managed boot clients
- Smart boot
- SA provisioning-supplied CD boot images
- Embedded OS booting (Intelligent Provisioning)
- iLO support
- Customizing a target server for Build Plans
Target server requirements
Before you can discover servers for SA Provisioning, you must ensure that the servers are set up properly and meet the following requirements:
- Ensure that at least one network interface is configured. If you are going to network boot, the deployment interface must be on the same network as the SA Boot infrastructure. Otherwise, at least one SA Agent Gateway must be reachable.
- There can be only one network interface (NIC) attached to the deployment network.
- For HPE ProLiant servers, ensure that the iLO is connected to the network and is reachable by SA through the same SA Realm as the server it controls.
Note Realms are an SA construct that allow SA to manage servers on different networks in the same Facility without fear of IP address conflicts. A realm is a unique identifier, appended to the IP address of a device in a Facility's network, that allows SA Gateways to uniquely identify devices on different networks in a Multimaster Mesh that may have conflicting IP addresses. See the SA Key Concepts Guide.
Choosing how to boot servers
SA Provisioning supports the following methods to boot a server:
- Network booting: suitable for fully automated deployments on heterogeneous hardware and virtual machines. This requires that the server be on the same network as the SA Boot Server and that the SA network boot infrastructure is configured (DHCP and PXE server is running).
-
CD booting: (IPv4 only) targeted for environments where network booting and DHCP are not configured or the server is not in the same network as the SA boot server.
- CDs are available for both IPv4 and IPv6.
- The IPv6 CDs need a response file hpsa_response_file.txt, containing the network configuration, to be mounted as floppy. For the content of the response file see Personalize Network Settings > Where is hpsa_netconfig used?
- Embedded OS booting: eliminates the need to configure an SA network boot infrastructure without sacrificing automation. Only available for HPE ProLiant Gen8 or newer servers and is also known as Intelligent Provisioning.
When do I add servers using iLO registration?
- You have an HPE ProLiant server with iLO 3 or newer remote management available.
- You have the iLO credentials for your target server.
- You have an HPE ProLiant Gen8 or newer server and you do not want to use DHCP and network boot.
- You do not want a special access account automatically created on your iLOs. See iLO support.
When should I network boot using iLO?
- You want to discover all the server information so you can see it and use it for search in the SA Client prior to provisioning.
- You want to verify the server network connection before running a Build Plan.
- You want to see the server listed by its default DNS name.
- You do not have iLO credentials for your target servers.
- You do not want to use Intelligent Provisioning on your ProLiant Gen8 or newer servers.
- You prefer the simplicity of a power-on discovery because your servers automatically network boot.
- You have a large number of servers and you find it more practical than compiling a list of iLO network addresses and credentials.
When do I use intelligent provisioning?
- You want to run a Build Plan immediately and do not want to manually boot the server.
- You want to leave the server powered off until you are ready to install it.
- All your servers are of the same type so you do not need the full properties information.
Network booting
SA provisioning supports network booting X86 and X86_64 target servers. For information about IPv4 and IPv6 support, see SA Support Matrix. UEFI network booting support is also available on UEFI-capable HPE ProLiant servers and Hyper-V Gen2 VMs.
Network booting using IPv6 only is not currently supported. However, you can network-boot using IPv4 into an IPv6-only service OS, making it possible to leverage IPv6-only infrastructure, such as accessing an IPv6 media server. The Linux 7 based maintenance OS in dual-stack (it is both ipv6 and ipv4 enabled) by default. It uses the "pxe_net_arguments" Custom Attribute whose value will be appended as kernel boot argument, if the Custom Attribute is unset, the default value of "ipv6=auto" is used. For an ipv4 only Linux 7 maintenance OS when network booting, the "pxe_net_arguments" Custom Attribute must be set to "ipv6.disable=1". If you need to set the Custom Attribute with different values, refer the RHEL 7 kernel arguments list to check the values that are supported. Note that the "Personalize Network Settings of Installed System" can also be used to enable and disable networking stacks, so IPv6 can also be enabled after the OS is installed.
SA, by default, is configured to network boot servers that are not yet registered with the SA Core into the "Linux" boot option. For SPARC servers, it will always be a Solaris SPARC Service OS instead. This enables you to bring a server into Maintenance mode simply by ensuring that the target server requirements are met and powering on the server. Subsequent boots will default to the "Local disk" boot option.
You can network-boot manually to a required maintenance OS, but booting can also be controlled using the "Managed Boot Clients Web Extension" or by adding a "Boot" step to a Build Plan.
Note You cannot use the "Managed Boot Clients Web Extension", or the "Boot" step in a Build Plan for SPARC servers.
If iLO support is available, selecting the desired network boot option and powering on the server is also handled by the "Boot" step. For servers without iLO, HPE recommends specifying the "Network" boot option in the boot order first, so you can boot a server to a maintenance OS without intervention.
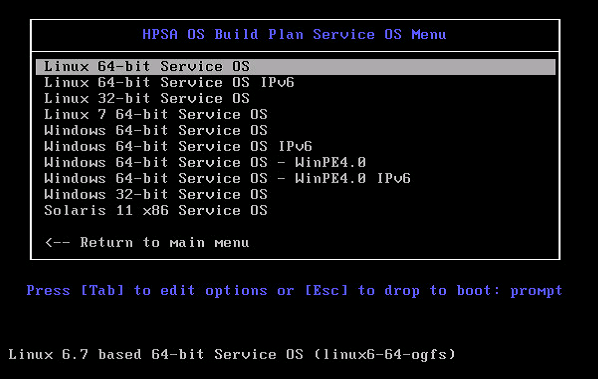
-
From the network boot menu for a legacy BIOS server, you can boot a 32/64-bit Linux, Windows PE, or Solaris maintenance OS.
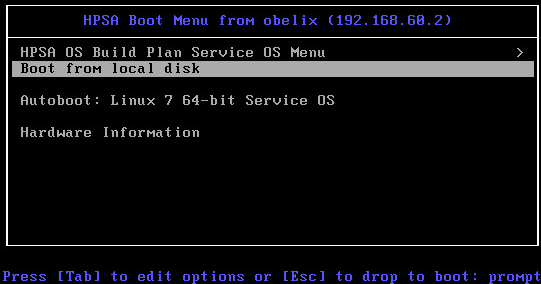
SA OS Build Plan Service OS Menu.
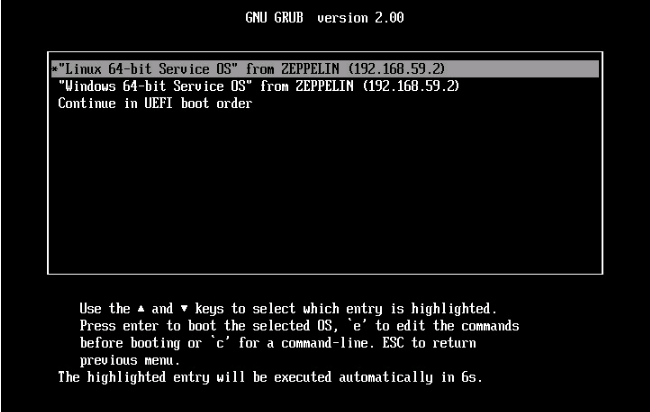
-
From the network boot menu for a UEFI server, you can boot 64-bit Linux or Windows PE maintenance OS.
- In third-party certificate mode, when the server shows a Please wait for the server to register with the HPSA core message, go to the SA Client and approve the server registration request. For more information on this approval step, see the Bring a server into Maintenance when working in third-party certificate mode section.
-
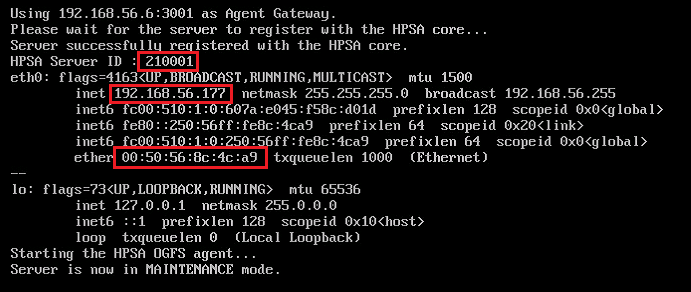
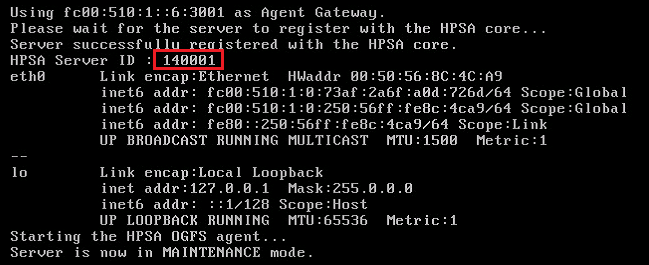
After Enter Maintenance mode:
for IPv4:
for IPv6:
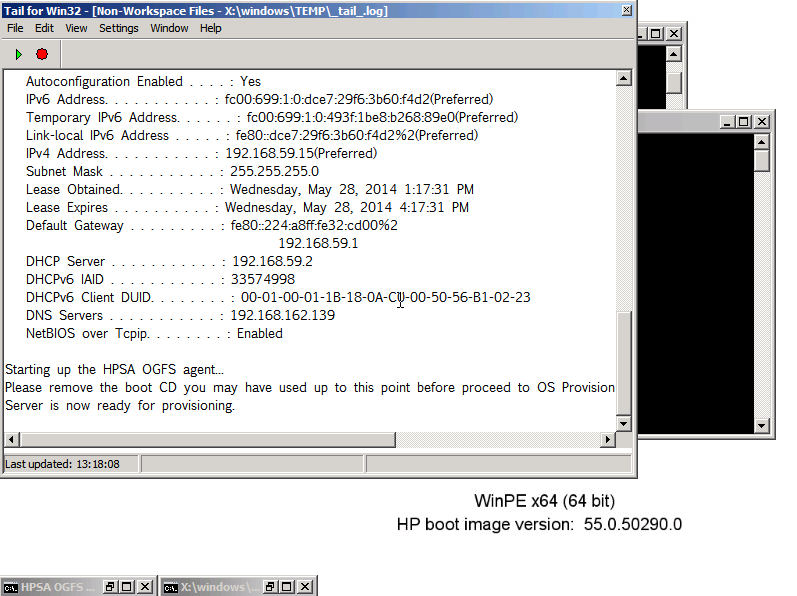
on Windows PE OS: (IPv4 or IPv6)
for IPv4:
for IPv6:
IPv6 Notes
Service OS IPv6: Because of some limitations, in an IPv6 scenario the Service OS PXE boots using IPv4, and after that IPv6 is configured.
Difference between IPv6 install and IPv4 + PINP IPv6 install: In an IPv6 installation, the entire installation process is performed in an IPv6 environment, so you need an IPv6 media server. For IPv4 + PINP IPv6, the installation is performed in an IPv4 environment, and after installation is complete, the server is configured for IPv6.
SPARC Notes
For SPARC servers, network booting is supported using DHCP only.
There is no network boot menu for SPARC servers. They will boot in one of the Solaris Service OSs we have available depending on their model or will boot using the specified miniroot (or boot_archive) file if provided manually in the open boot console (with the -F option).
There are 4 Solaris SPARC miniroots available for Build Plan Provisioning:
- sparc.miniroot_s10u11 (based on Solaris SPARC 10 update 11)
- sparc.miniroot_s11.0 (based on Solaris SPARC 11.0 (or Solaris 11 11/11))
- sparc.miniroot_s11.1 (based on Solaris SPARC 11.1)
- sparc.miniroot_s11.2 (based on Solaris SPARC 11.2)
You can specify one of them with the -F option in the open boot console as part of the boot command:
Example: {0} ok boot net:dhcp -F **sparc.miniroot_s11.1**.
If you want to change the root password of the Solaris SPARC Service OSs (default is 'opsware'), you have to update the hash in the /opt/opsware/boot/jumpstart-sparc-ogfs/Conf/sysidcfg file.
Managed boot clients
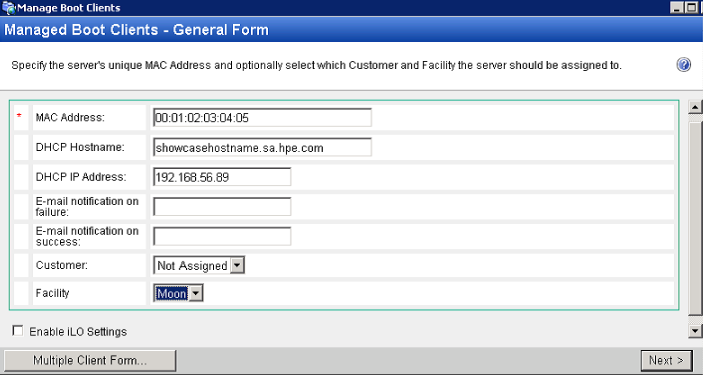
The Managed Boot Clients Web Extension allows you to create a server record with a pre-configured network boot option or configure network booting for an existing server record matched by a MAC address. It also enables you to select a Build Plan to run automatically when the server reaches Maintenance mode. To do this, run the extension and perform the steps below.
To do this, run the extension and follow the steps below.
- Define a server.
You can also register an iLO with the target server during this step. Select “Enabled iLO Settings” for additional input.
- Select a boot image and a Build Plan
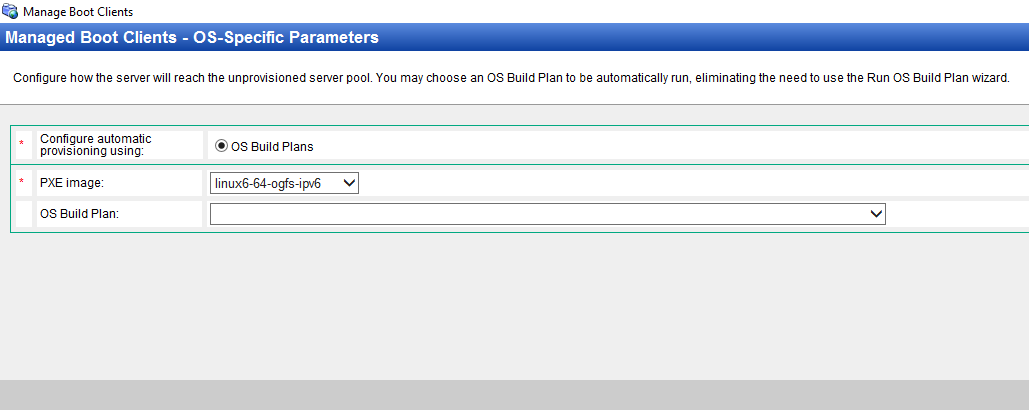
- Customize by adding custom attributes, if required, and press Start.
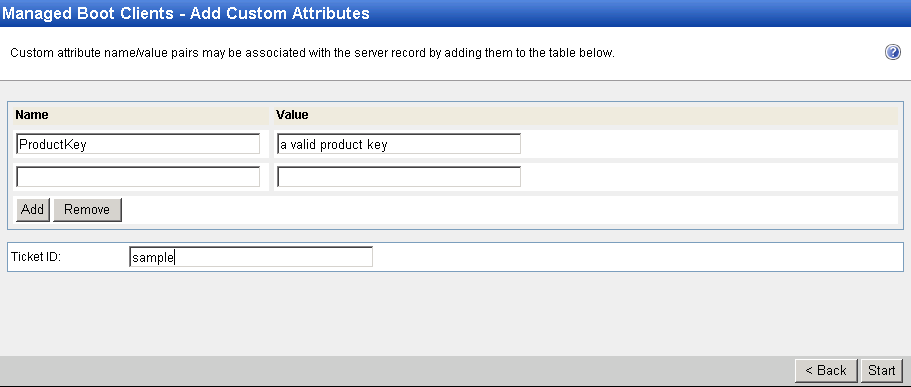
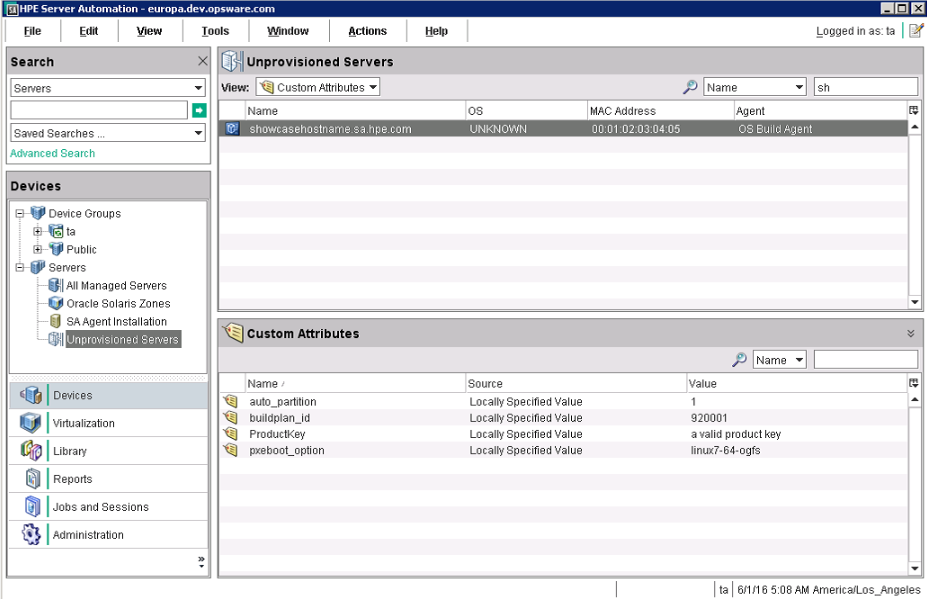
After the Build Plan job completes, a Pre-Unprovisioned server record is created with any defined Custom Attributes.
The Managed Boot Clients Web Extension configures DCHP only on request. It does not support concurrent configuration for one or multiple devices. When configuring multiple devices, the same Managed Boot Clients process must be used.
For the example above, the following CSV was used:
`00:13:E8:9A:93:AA,pxe_image=winpe32,dhcp.ip=10.2.3.10,dhcp.hostname=m0010,customer=Opsware,dns_server=10.6.4.2,root_password=wealth`
`00:13:E8:9A:93:AB,pxe_image=winpe32,dhcp.ip=10.2.3.11,dhcp.hostname=m0011,customer=Opsware,dns_server=10.6.4.2,root_password=wealth`
`00:13:E8:9A:93:AC,pxe_image=winpe32,dhcp.ip=10.2.3.12,dhcp.hostname=m0012,customer=Opsware,dns_server=10.6.4.2,root_password=wealth`
`00:13:E8:9A:93:AD,pxe_image=winpe32,dhcp.ip=10.2.3.13,dhcp.hostname=m0013,customer=Opsware,dns_server=10.6.4.2,root_password=wealth`
The Managed Boot Clients Web Extension returned:

Additionally, DHCP is configured in
/etc/opt/opsware/dhcpd/dhcpd_mbc.conf:# Begin Opsware added hosts (do not edit)host showcasehostnamedevsahpcom {hardware ethernet 00:01:03:04:05:06;option host-name showcasehostname;fixed-address 192.168.59.13;}# End Opsware added hosts (do not edit)Smart boot
This feature enables you to configure PXE boot for servers before registering or when already registered to an SA Core.
PXE boot default option
- The default PXE boot option for new servers connecting to SA is linux7-64-ogfs.
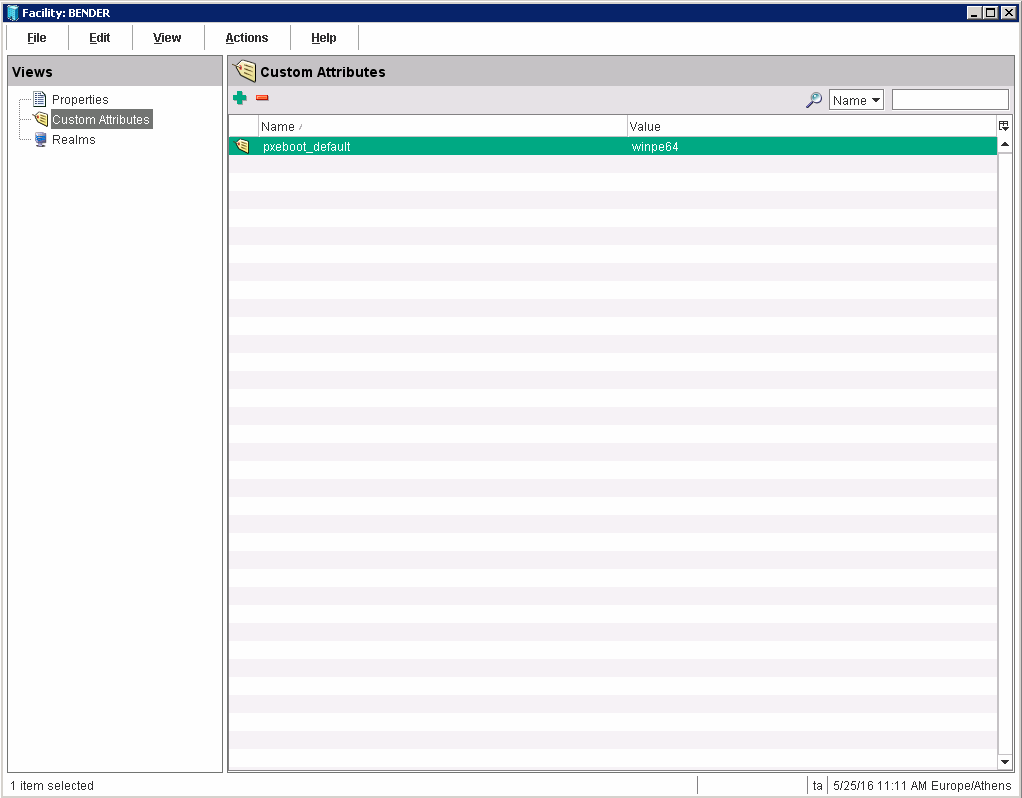
- This is configurable in SA by setting a Custom Attribute on each facility in NGUI Administration. Open the Facility and under Custom Attributes add pxeboot_default by providing the default PXE option as value.
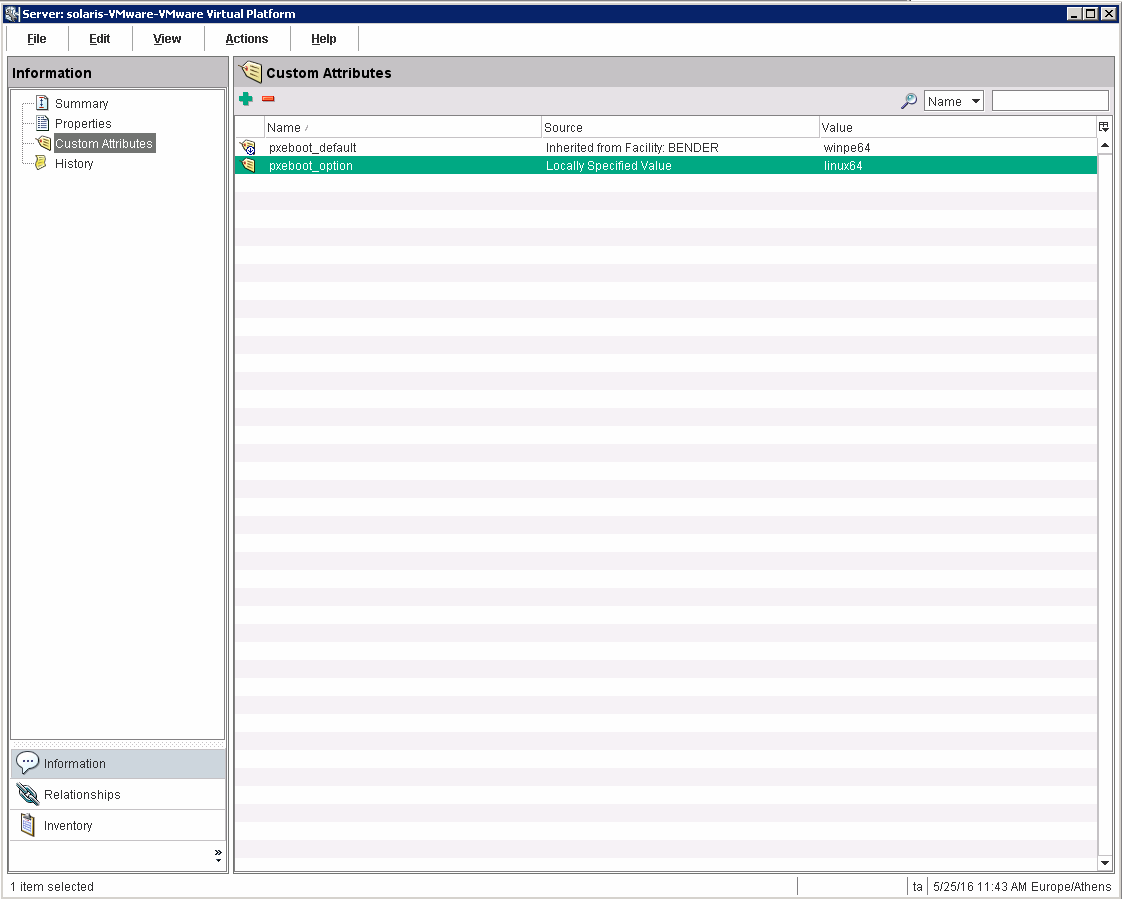
PXE boot option for a server
- The PXE Boot option can be set as a Custom Attribute by MBC (while creating a new server record) or manually from NGUI (on an existing server record). This Custom Attribute specifies the PXE Boot option in which the server will boot.
- A server known by SA will be local booted if it doesn't have the Custom Attribute set.
To enable this functionality, add or modify the pxeboot_option Custom Attribute on a server with the pxe option as value.
SA provisioning-supplied CD boot images
SA Provisioning provides several service operating system boot CD images (ISOs) that you can burn to CD/DVD. These images enable you to bring a server into maintenance without having configured DHCP.
You can also configure these ISO images in virtual machine CD-ROM drives or mount them using iLO Virtual Media or similar technology.
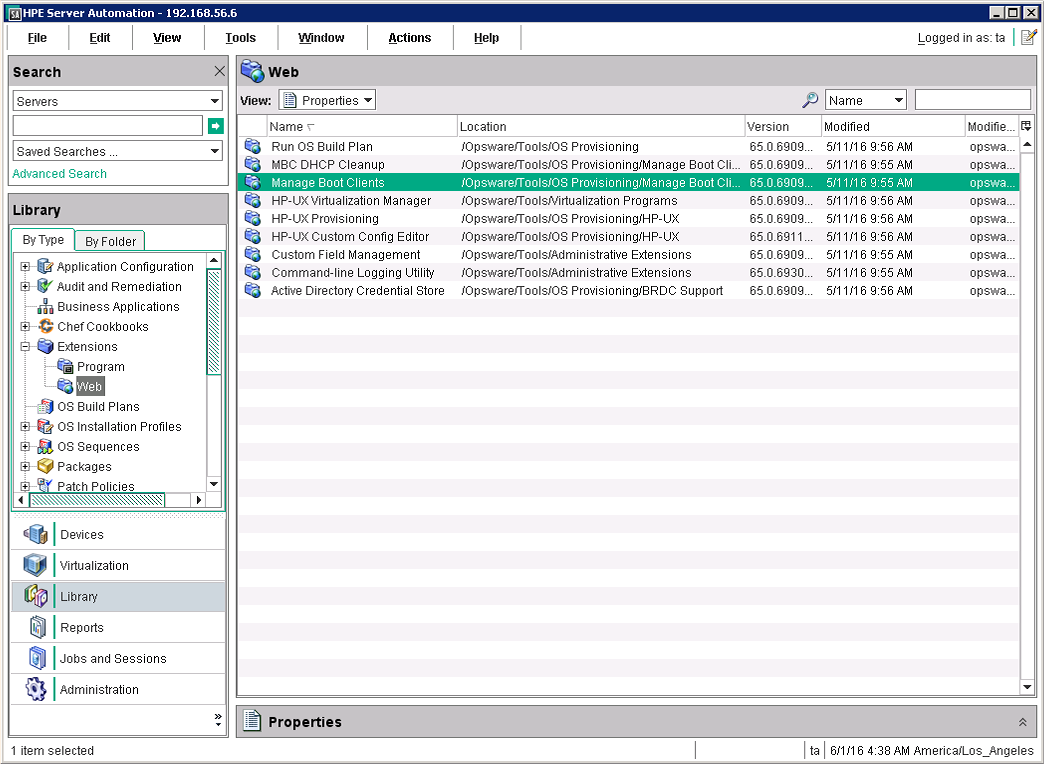
To download the desired ISO, open the SA Client and in the Navigation Pane, go to the Library tab then select the “By Folder” view and navigate to:
/Opsware/Tools/OS Provisioning//Opsware/Tools/OS Provisioning/WinPESelect the desired ISO image and from the Actions menu select Export software...
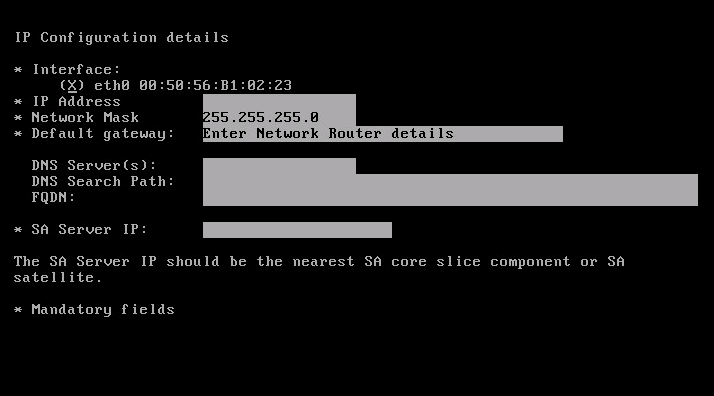
After booting the CD, you can use the boot configuration screen to enter all the information needed to bring a server into Maintenance mode. The settings that you specify here are preserved on the server in the
hpsa_netconfigcustom attribute. However, the settings will not be preserved if the same interface is present in the 'hpsa_netconfig' custom attribute.Maintenance mode Linux OS static boot configuration screen:
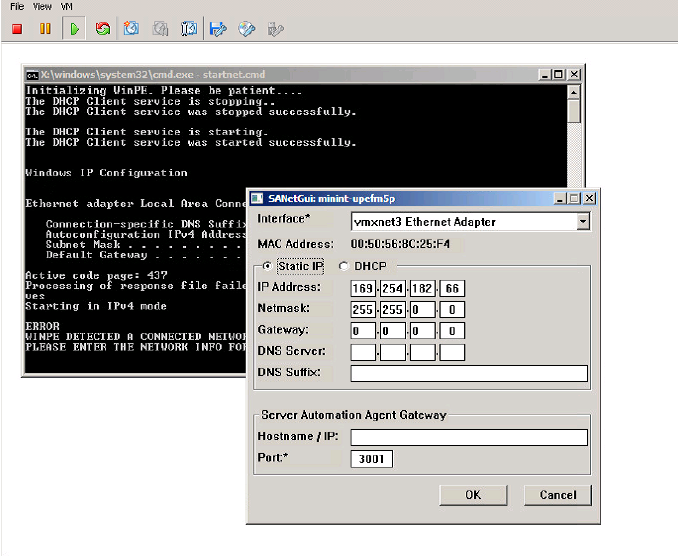
Maintenance mode Windows PE OS static boot configuration screen:
Embedded OS booting (Intelligent Provisioning)
Embedded OS booting is supported only for HPE ProLiant Gen8 or newer models. This boot method's advantage is that you can move a server into Maintenance mode without enabling network booting or configuring DHCP as long as you provide static IP information.
Note that embedded OS booting must be initiated from the SA-provided "Boot" step and you can boot either a 64-bit maintenance mode Windows PE or Linux OS. See the "Boot" step description for more details.
iLO support
iLO support is provided by SA to enable operations like:
- Power control
- Querying or changing the one-time boot option
- Querying or changing the server boot mode (Legacy or UEFI) for UEFI capable HPE ProLiants
- Instructing HPE ProLiant Gen8 or newer model servers to boot from the embedded OS (Intelligent Provisioning)
iLO support is enabled in SA, either automatically (see iLO Auto-discovery) or through manual registration when an iLO manager is associated with a server.
When bringing an HPE ProLiant server with iLO 3 or newer into a Maintenance mode OS, SA automatically starts an iLO registration job to associate an iLO manager with that server.
As part of this process, a new iLO user is created,
hp_automatic_integration_user, with a strong random password. If the iLO is unregistered or the server record is deleted, this iLO user will also be removed (if connectivity to the iLO is still available).Note that if the iLo port is changed from 443 you must configure twist to bypass the SA gateway by adding twist.ilo.direct_connection=true in /etc/opt/opsware/twist/twist_custom.conf.
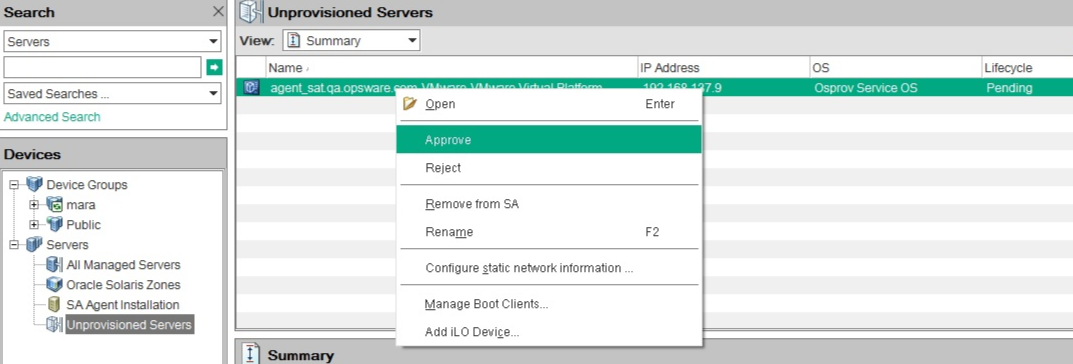
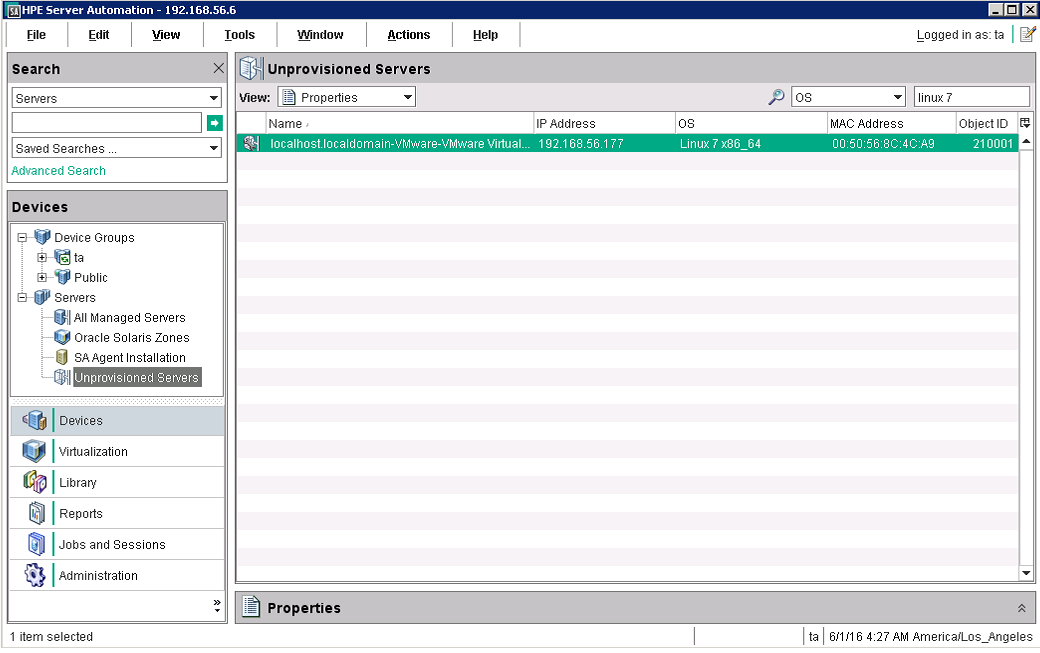
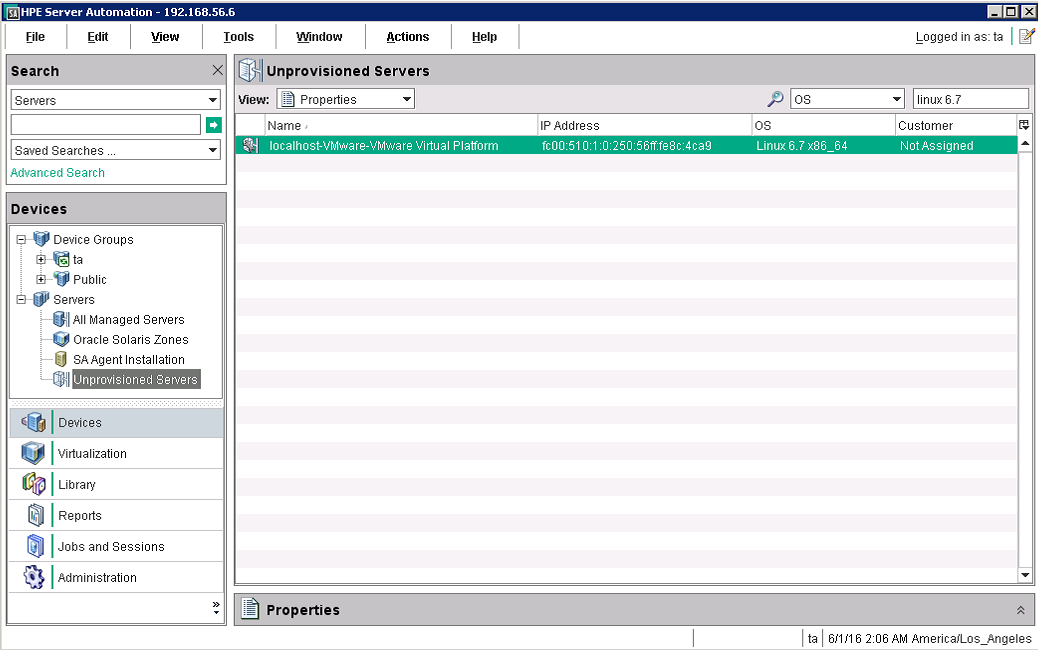
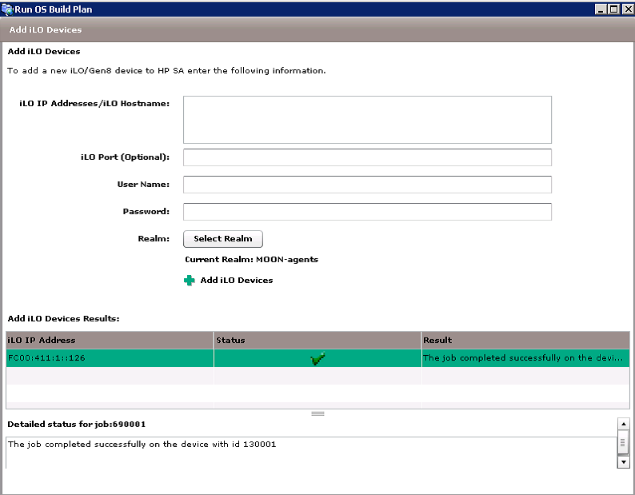
To register iLOs manually:
- Select Add iLO Device from the drop-down menu in the SA Client’s Unprovisioned Servers list:
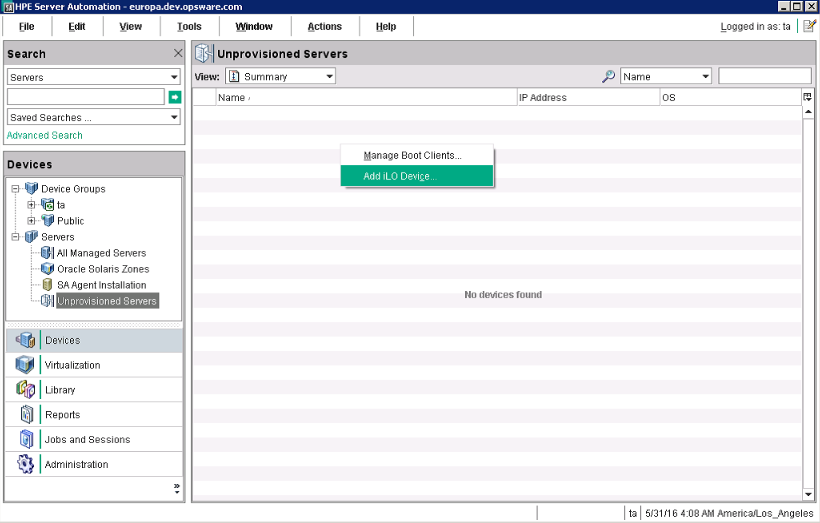
Specify the iLO IP address or hostname, port and credentials. You may also need to select a different SA Realm if iLO connectivity is only available to SA Agent gateways from a specific realm. Note also that you can register multiple iLOs if they share credentials.

After iLO registration completes, a new server record is created and associated with an iLO manager. However, a new server record will not be created if an existing server matches the one discovered by the iLO.
For IPv4:

For IPv6:
Customizing a target server for Build Plans
Before you perform SA Provisioning on a target server, you can do some customization for the target server.
Custom attributes allow you to control the behavior or outcome of a Build Plan without modifying the SA provided baseline Build Plans.
To see the list of supported Custom Attributes, in the SA Client Navigation pane, set the View to By Type and open a Build Plan. In the Views pane, select the Custom Attributes view to see each set of custom attributes with a blank value. Depending on the customization the attribute targets, you may want to set it to different resources.
Note that a Custom attribute must have a non-blank value in order for it to be considered present on a resource.
During a Build Plan execution, custom attributes are searched in order on the following resources:
- Server
- Device Group
- Customer
- Realm
- Facility
- Build Plan
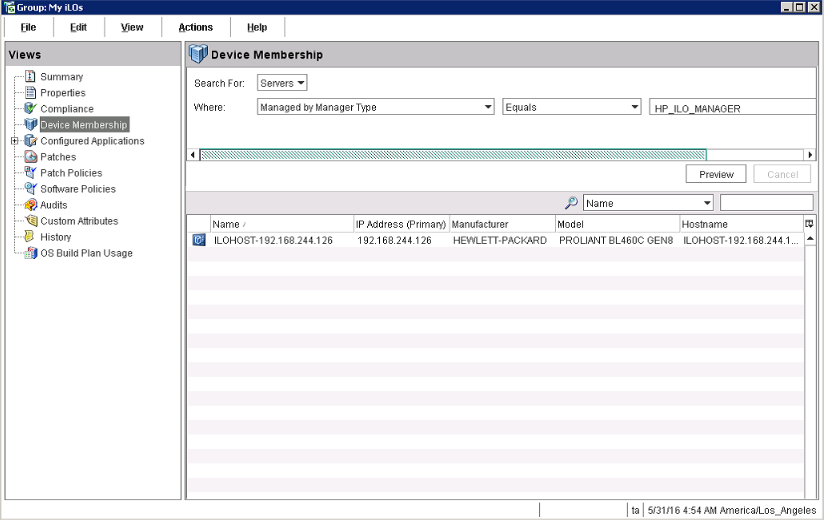
Device groups allow you to customize a Build Plan run using Custom Attributes on more than one server.
SA supports two types of device groups:
- Dynamic
Device membership in a dynamic device group is defined by a device membership policy from the beginning and its group membership is recalculated periodically. See “About Dynamic Device Groups” in the SA
- Static
Static device group device membership is based on your specification. Build Plans also support modifying the membership of a static device group using the
Add to Device Groupstep. See "About Static Device Groups” in the SA
The following example shows a dynamic device group that only targets servers that have an iLO manager: