


Install the SA Agent using ADT
This section describes how to install the SA Agent on servers using the Agent Deployment Tool (ADT).
The SA Client shows agentless servers with the server icon  . See Server status iconsand Discovering agentless servers.
Agentless servers may be physical servers that are not running the agent, or they may be virtual machines (VMs) not running the agent, but managed by a virtualization service. For more information, see Virtualization management.
- In the SA Client, select the servers on which you want to install the SA agent:
- under Devices > Servers > SA Agent Installation
- under Devices > Servers > All Managed Servers
- under the Virtualization tab, select the VMs on which you want to install the agent. All VMs are managed under a virtualization service.
server icon indicates agentless servers. The servers must be powered on. Otherwise the Install SA Agent menu item will be disabled. See Server status icons. -
From the Actions menu, select Install SA Agent. This displays the Install SA Agent wizard:
-
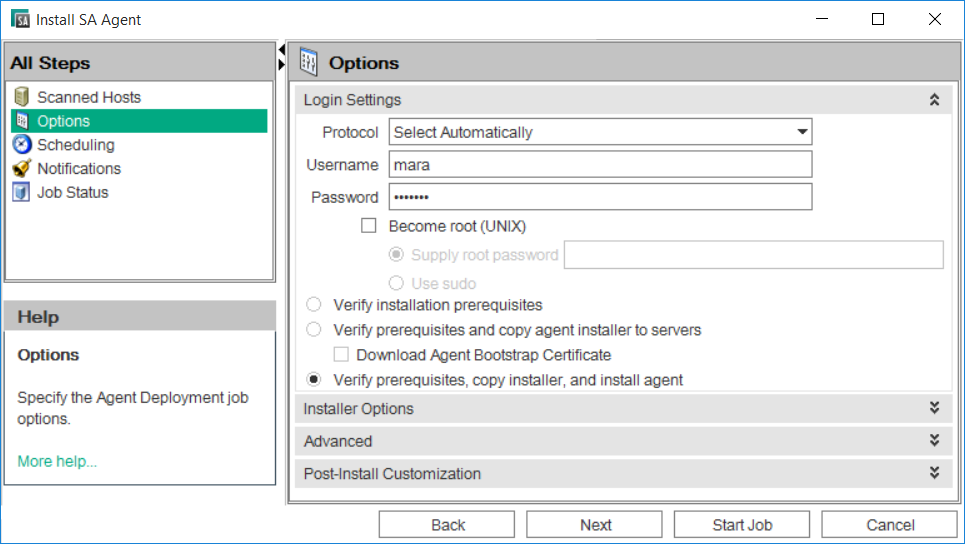
Select a network protocol to use for connecting to the server from the drop-down list.
In most cases, choosing Select Automatically to allow SA to select an appropriate protocol for each server is recommended.
-
Enter a user name and password to use for logging into the managed server.
-
For Windows-based systems, specify the Windows administrator user name and password.
-
For UNIX systems, specify a root user and password.
If you are unable to deploy the agent to a UNIX server by logging in as root, the system you are deploying to may be configured to disallow direct root logins. In such cases, allows you to log in as a non-root user and escalates your privileges using either the
suorsudo command.To deploy agents as non-root users:
-
Enter the non-root user name in the Username field to log into the server.
-
Enter the non-root password in the Password field.
-
Select the Become root (UNIX) checkbox. Select Supply root password and enter the password or select Use sudo. If you use sudo, the non-root account must be able to run any command as root.
-
-
Select one of the following deployment actions:
-
Verify installation prerequisites
-
Verify prerequisites and copy agent installer to servers
Enable the Download Agent Bootstrap Certificate option to make the bootstrap certificate available in the same location as the Agent installer.
-
Verify prerequisites, copy installer, and install agent
-
-
Optionally, specify the agent installer options and advanced options to control the way the agent is installed on a server. For more information, see SA Agent installation - Installer options and SA Agent installation - Advanced options.
-
Click Start Job to perform your selected actions.
-
After the agent installation is complete, the SA Client displays the results and updates the status icons for the servers. You can view information on a managed server and generate reports on agent installation status. See View SA Agent information.
-
You will see a checkbox for enabling the
--roption. Resets the Agent configuration file to the default settings. Specifies the path to the RPM handler to use for RPM operations. Use this option, when an RPM handler is already installed on the server. If an RPM handler is not already installed on the server, use the--withrpmoption instead to install one. It is not necessary to use this option with the--withrpmoption.