


Work with components
Components represent the content of an application. Each component deploys a part of the application.
Components are configured using the right pane of the Applications screen. Components belong to specific tiers—which represent the structure of an application.
Although the properties vary depending on the type of component that you are configuring, the process for creating and accessing components is similar.
You can add and modify components only if you have permission to edit the application.
Example of a code component
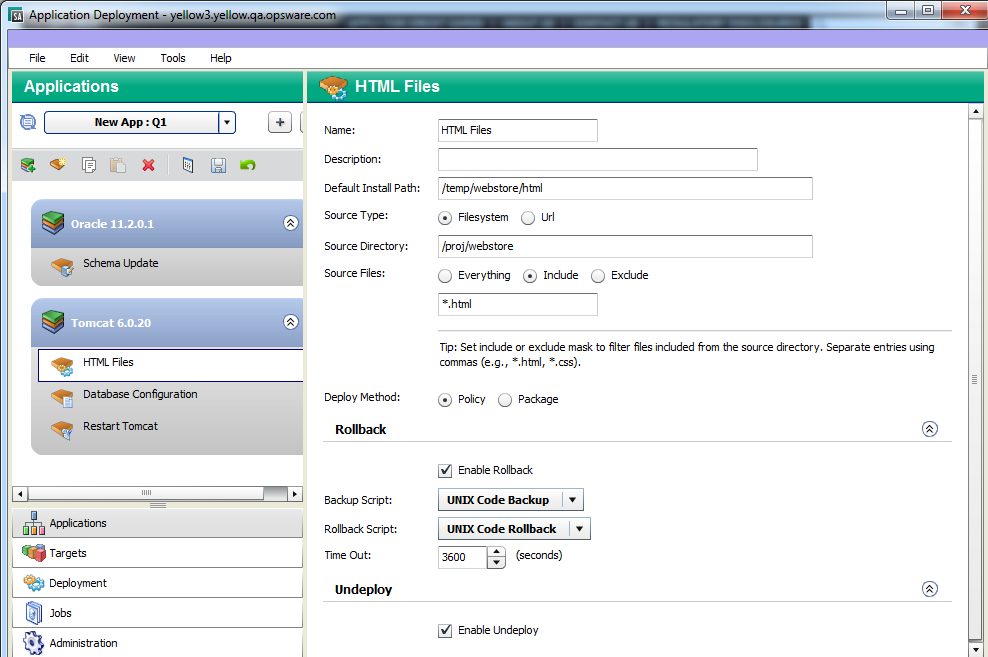
All components include three sets of properties:
The functional properties (located at the top of the pane) uniquely identify the component, specify its behavior, and tell Application Deployment where to find any items that this component includes.
The rollback properties tell Application Deployment what to do with this component in the event that a deployment fails and an orderly rollback is required.
For certain types of components, you must specify a rollback action if you enable rollback. This is either a script, a flow, or a set of explicit instructions, depending on the component type. You may also need to specify a backup action. In this case, the backup action is executed before the component is deployed; the rollback action restores the backed up items if the deployment fails.
The undeploy properties tell Application Deployment how to uninstall this component in the event that an instruction to undeploy the application is given.
Rollback and undeploy scripts are managed by the Application Deployment administrator (see Administer scripts).
Creating a new component
The New Component dialog is used to create a new application component. You can create new components for applications that you have permission to edit (see Application permissions).
A component is associated with a specific tier. You can only create a new component when a tier is selected. The platform to which a tier pertains determines the types of components that you can create.
To create a new component:
- Select the tier that will contain the new component. There are two ways to select a tier:
- Click the tier name.
- Select any component within that tier.
- Click New Component tool bar.
- In the New Component dialog, specify the Component Name and Component Type. Component names must be unique within an application.
- Click OK.
- Fill in the appropriate values for the properties of your new component. See Types of components for details.
- Click Save to save your changes.
If you attempt to leave the Applications screen without saving your changes, you will be reminded to save or discard them.
Modifying an existing component
If you have permission to edit an application, you can modify its components (see Application Deployment permissions). When you select a component in the left pane, you can modify its properties in the right pane. The types of modifications that you can make depend on the type of component.
To modify an existing component:
- Select that component in the tier.
- Modify its properties using the tools in the right pane.
- Click Save to save your changes.
If you attempt to leave the Applications screen without saving your changes, you will be reminded to save or discard them.
Changing the deployment order of components
If you have permission to edit an application, you can change the order in which its components are deployed to targets (see Application permissions). To do this, you must change the left pane from the tier view (the default) to the deployment order view, as shown here.
Component views
|
Tier View |
Deployment Order View |
|
|
|

For example, you might need to start an application after its files have been deployed. In this case, you would make sure the Script Component that starts the application comes later in the deployment order than the Code Component that deploys the files.
Unless you change their order, components are deployed in the order in which they were created.
To modify the component deployment order:
- Click Edit Component Deployment Order.
The left pane changes to show all the components associated with the current application. They are listed in the order in which they will be deployed: - Select a component, and use the green arrows (
 and
and  ) to move the component up or down in the list. In this view, the tier is shown in parentheses after the component name. When you move components using the arrow buttons, they remain in their original tiers.
 - To return to the tier view, click the “Edit Properties” button:

In the tier view, you can drag and drop a component from one tier to another. Note that certain types of components can only be used in tiers designed for a particular operating system. For example, a Registry component can only be used in a Windows tier.
If you drag and drop a component into a different tier, be sure to check the deployment order. By default, components are placed at the end of the tier.
Copying and pasting a component
You can copy an existing component and then paste that component into a compatible tier in the same application or another application. Compatible tiers run on the same OS platform.
When you copy and paste a component, all the properties of the existing component are copied into the new component.
You can only copy and paste one component at a time, and you can only copy and paste components in applications that you have permission to edit (see Application permissions).
To copy and paste a component:
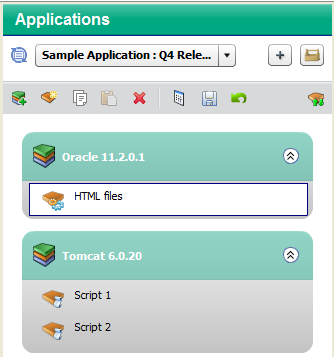
- Select the component that you want to copy.
This activates the tier that contains this component and makes the Copy button available on the tool bar.
If the Copy button is not available, you do not have permission to edit this application. - Click Copy on the tool bar.
- Optional: If you want to paste the component into a different application, open that application for editing.
- Select the tier where you want to paste the component.
If you are pasting into the same tier where you performed the copy, you do not need to select it. - Click Paste on the tool bar.The name of the pasted component will have a number appended to it as shown in the following figure:
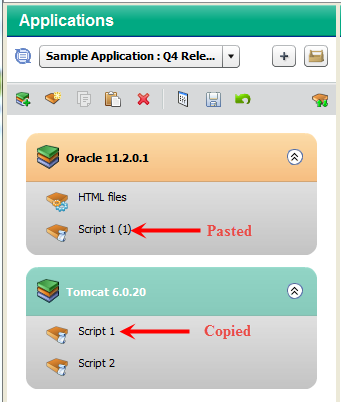
If Paste is not available, you do not have permission to edit this application. - Click Save to save your changes.
Moving a component
You can use “drag and drop” to move a component from one tier to another compatible tier in the same application. Compatible tiers run on the same OS platform
You can only move one component at a time, and you can only move components in applications that you have permission to edit (see Application permissions).
To move a component using drag and drop:
- Drag the component that you want to move into the component area in a compatible tier.
A green plus sign appears if the new tier is compatible with the original tier.
A red X appears if the new tier is incompatible—or if you attempt to drop the component into the same tier.
 - Drop the component into the new tier.
- Click Save to save your changes.
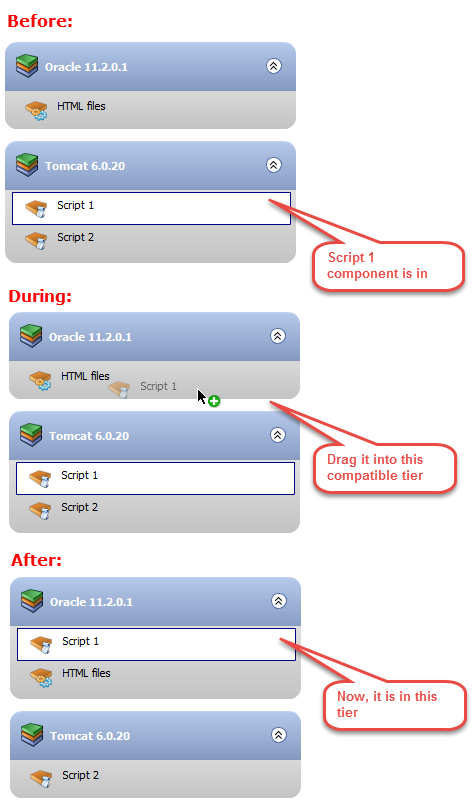
The following example shows the HTML Files component being moved from the Tomcat 6.0.20 tier into the Oracle 11.2.0.1 tier.
Example of moving a component to a different tier
Deleting a component
You can delete components that belong to applications that you have permission to edit (see Application permissions).
To delete a component:
- Select the component.
- Click Delete Selected Item on the tool bar.
- Click Yes to confirm.
Note that you can only delete one component at a time.
Finding and selecting an item in the library
The following information applies to the following types of components:
- Application Configuration components
- Software Policy components
- Package components
- Use cases: SA-OO flows
In each case, you use a dialog like this one to search the pertinent library (SA OO) for a particular item.
Library Item Selection window – Search tab
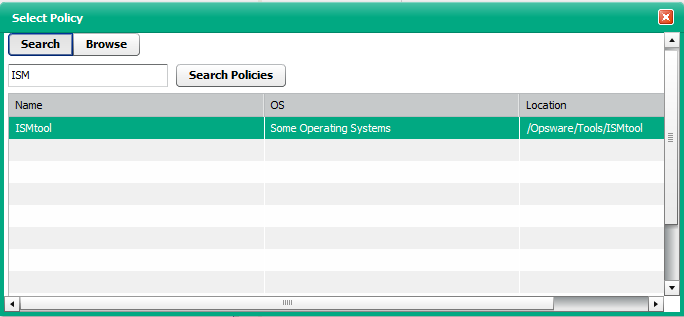
In this case, we are searching the SA Library for a policy whose name contains “ISM.” You can search the library by using the table view, as shown above, or you can browse through the folder hierarchy of the library.
Library Item Selection window – Browse tab
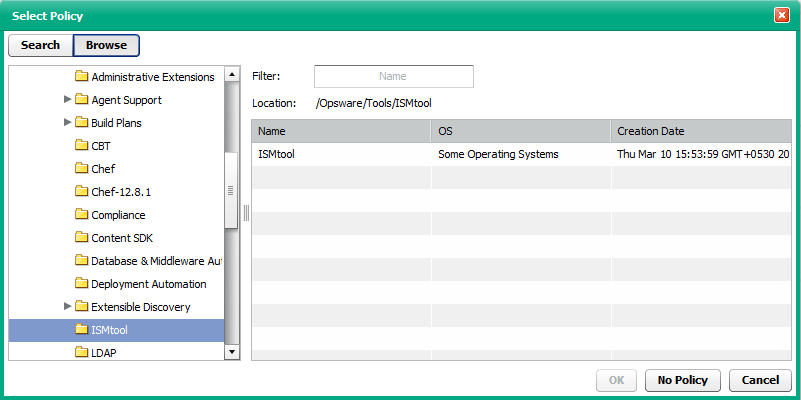
In this case, the search has matched all policies in the /Opsware/Tools/ISMtool folder that have “Linux” in their names.
The following instructions assume that you have selected a Release on the Applications screen. The placeholder “Item” refers to one of the library items listed above.
To find and select an item in a library:
- In the left pane, select one of the types of components for editing (or create a new component):
- Click Change for the item (or the
 icon, if you are working with a Package component).
The Select Item dialog opens. - Optional: If you are specifying a Package, select the type of package from the list: RPM, ZIP, MSI (available for Windows tiers only), or All Types.
- T o search using the table view, follow these steps:
- In the text box, type the search string that you want to match. To list all the items in the library, leave the text box empty.
If you are searching for an OO Flow, you can dramatically speed up your search by specifying a full word in the text box. The search only matches full words. For example, “start” does not match “restart” in this context. - Click Search Item.
To search using the folder hierarchy, follow these steps:
- Click the Browse button. You will see all the folders that you have permission to view.
- Optional: Specify a filter.
- In the text box, type the search string that you want to match. To list all the items in the library, leave the text box empty.
- In the table, select the item that you want.
- Click OK.
If you want to remove a library item from an existing component, click the No Item button. This button is available for Software Policyand OO Flow components. To remove a previously specified policy, for example, you would click No Policy.