


Provisioning Solaris-based servers
The following topics are discussed in this section:
Provisioning Solaris 11.1 x86
- Network boot a server, as described in Network booting.
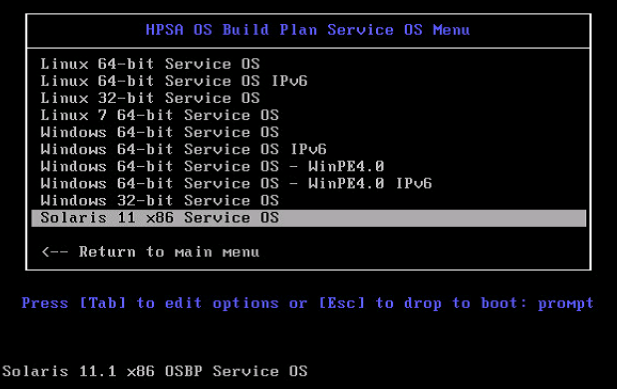
- On the network boot menu, select
SA OS Service OS Menu.
- Select
Solaris 11 x86 Service OS.
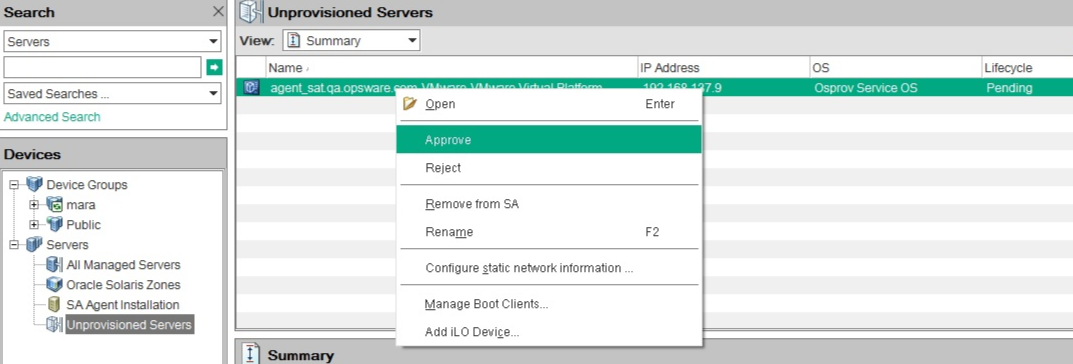
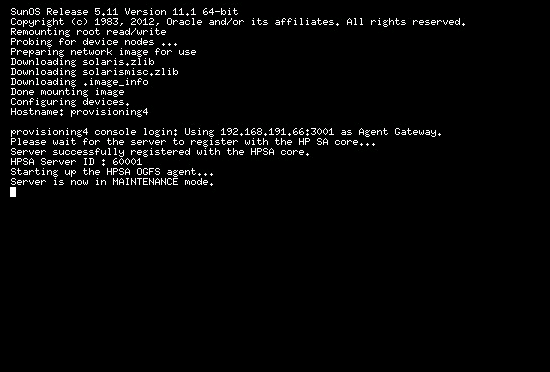
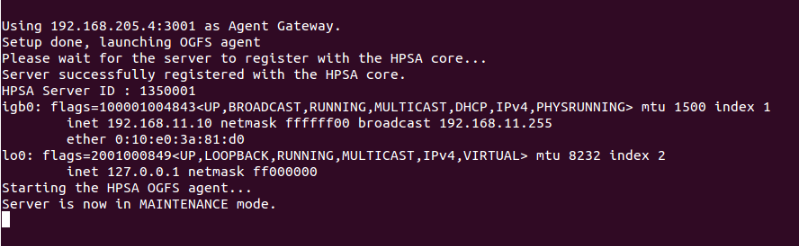
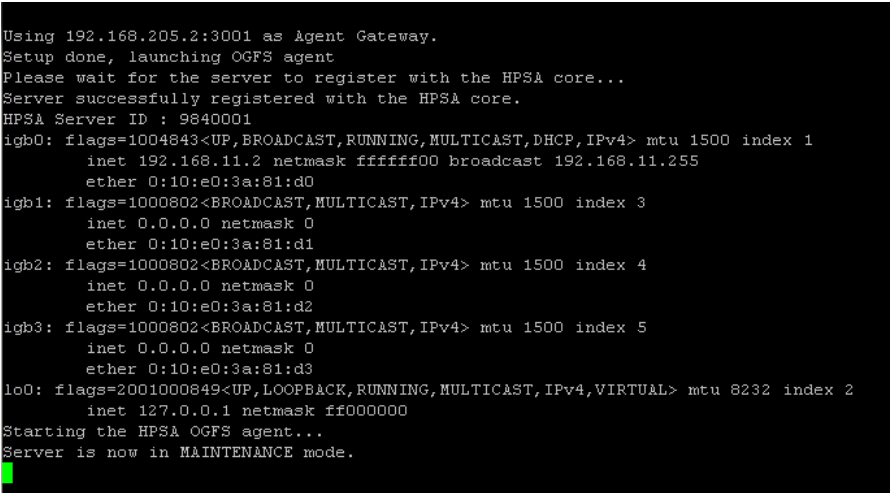
- In third-party certificate mode, when the server shows a Please wait for the server to register with the HPSA core message, go to the SA Client and approve the server registration request. For more information on this approval step, see the Bring a server into Maintenance when working in third-party certificate mode section.
- Wait for the server to enter Maintenance mode.
-
Note the server's SA Server ID. This will help you identify the machine later on.
-
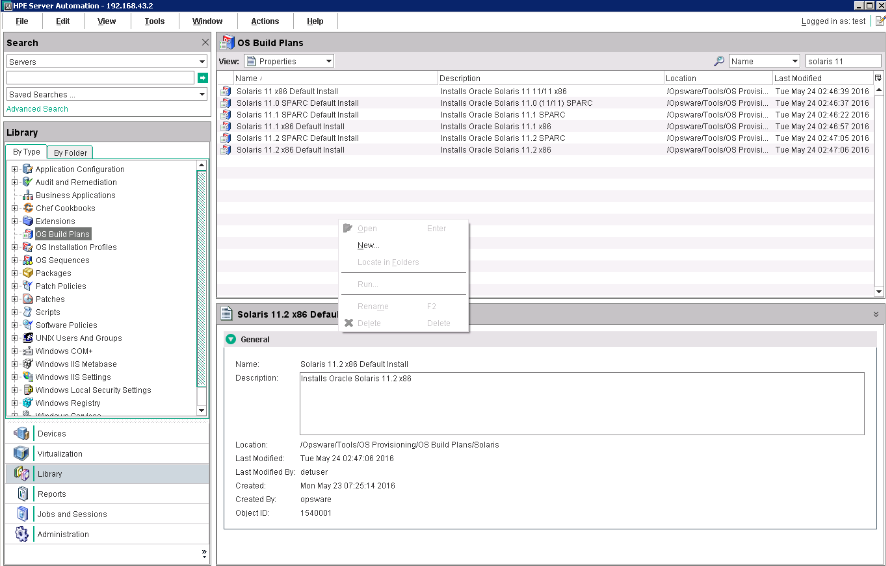
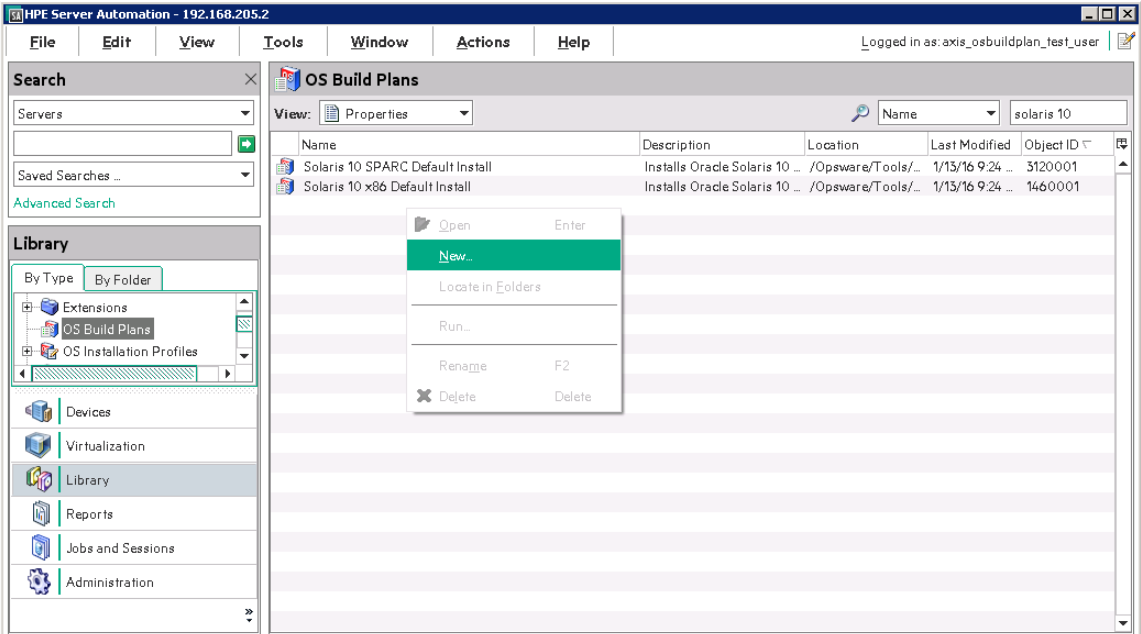
Start the SA Client and in the Navigation pane, select Library and set the view to By Type and select the OS Build Plans folder.
-
Create a new Build Plan. (Right click New). Name it accordingly and provide some description.
-
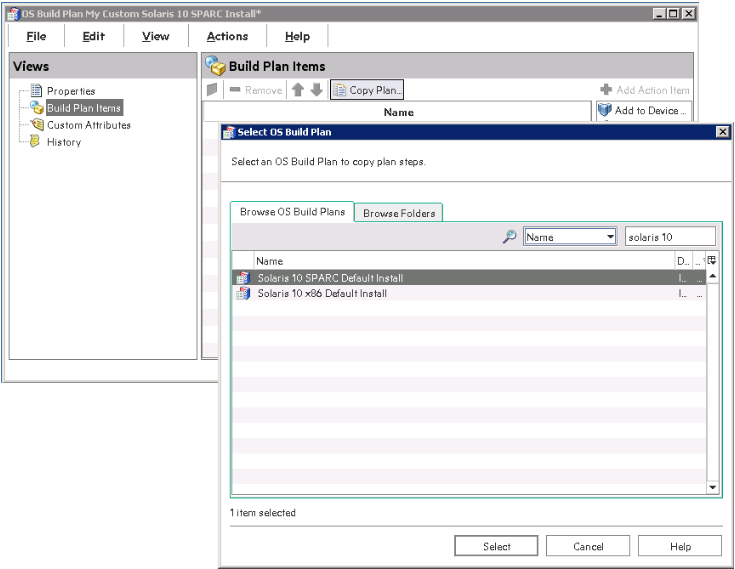
From the Views panel tree, select Build Plan Items view, click Copy Plan ... and select Solaris 11.1 x86 Default Install Build Plan.

- In the Build Plan Edit window, from the Views panel tree, select Build Plan Items. A list of Build Plan steps is displayed.
- From the listed steps, select Set Media Source. The Run Script panel displays the Parameter setting for this step. Note the protocol,
NFS, and the media path/mnt/share/solaris/Solaris11.1-x86.

-
Prepare an NFS share with the Solaris 11.1 x86 AI Install CD extracted under
/mnt/share/solaris/Solaris11.1-x86. - Ensure that your network has access to a Solaris 11.1 IPS package repository, either:
- The official Oracle repository at http://pkg.oracle.com/solaris/release/.
- A self-hosted repository available through HTTP (see your Oracle documentation for set up information).
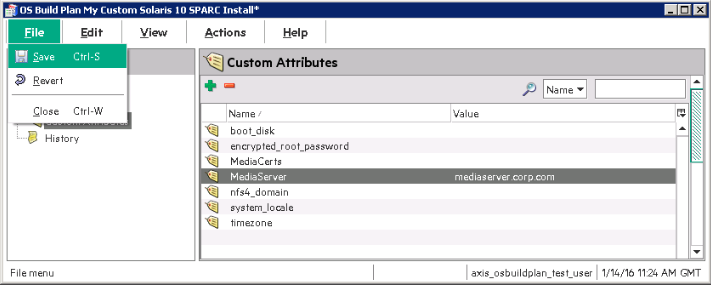
- In the Edit Build Plan Views pane, select Custom Attributes.
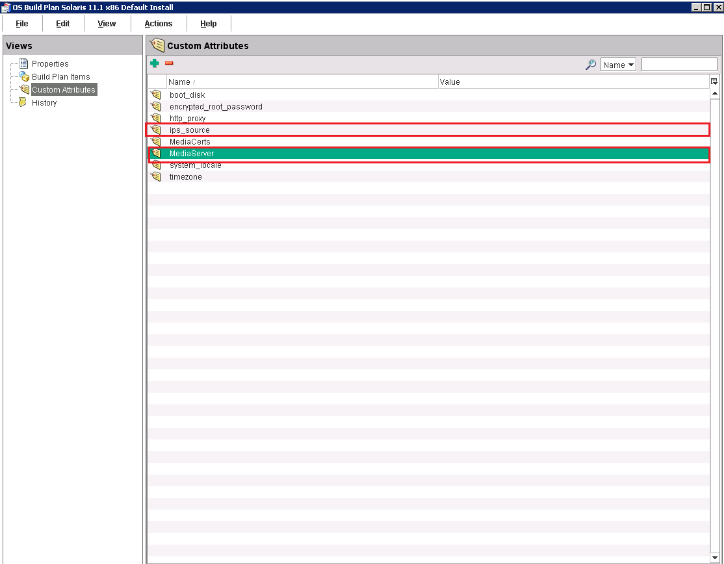
- Complete the
MediaServerandIP_sourcecustom attribute field:MediaServermust be the hostname or IP address of the NFS share you set up earlier.ips_sourcemust be the complete URL for accessing a Solaris 11.1 IPS package repository.- Optional: specify the http_proxy custom attribute if the IPS repository is only accessible through a proxy.
- Save the Build Plan by pressing Ctrl+S or using File > Save.
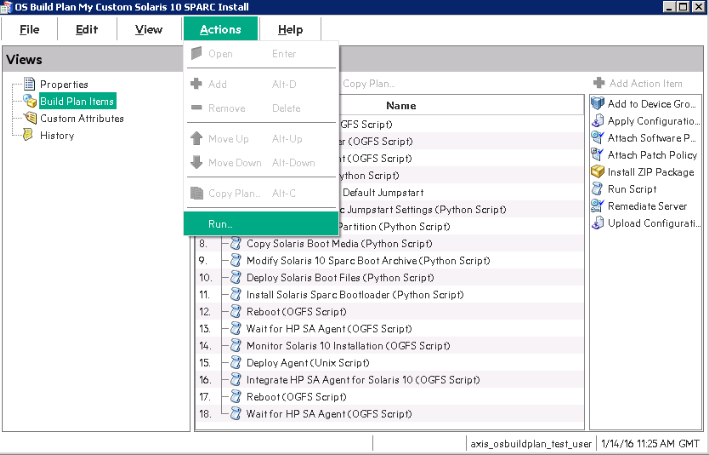
- From the Actions menu select Run...

-
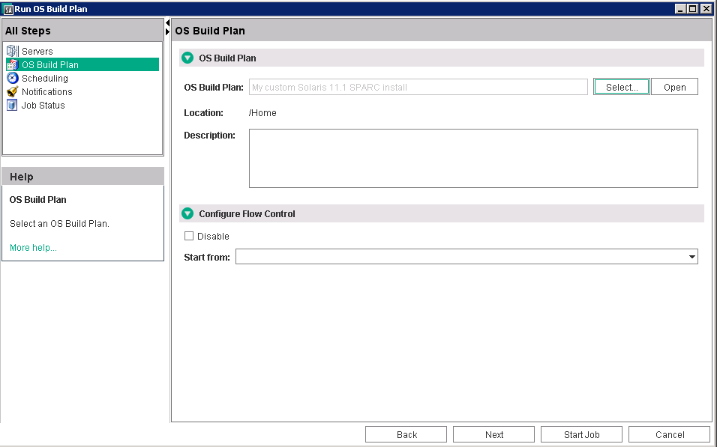
The Run OS Build Plan window is displayed. Refer to the Starting the Build Plan section for the detailed procedure.
The Build Plan you specified will show up as selected in the OS Build Plan pane.
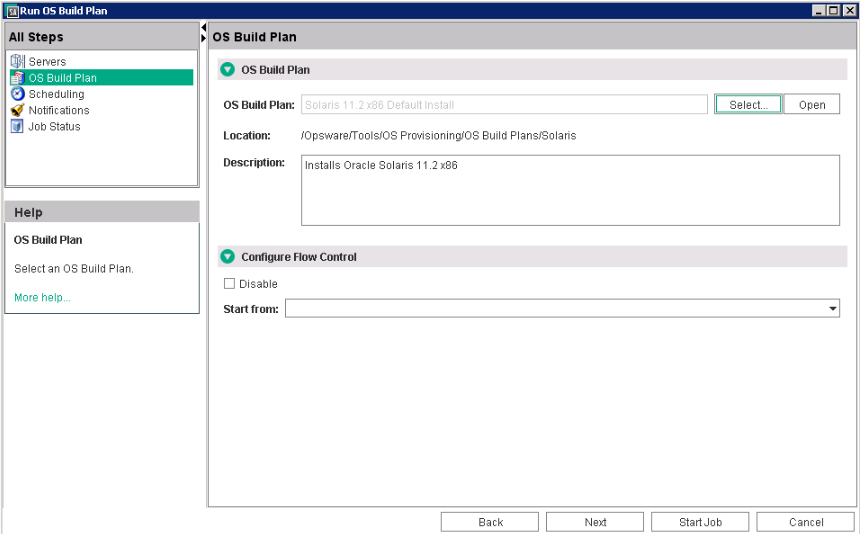
When the Run Build Plan job is complete, the server should be up-and-running and managed by SA.
Provisioning Solaris 11.X SPARC
- Network boot a server, as described in Network booting.
- In third-party certificate mode, when the server shows a Please wait for the server to register with the HPSA core message, go to the SA Client and approve the server registration request. For more information on this approval step, see the Bring a server into Maintenance when working in third-party certificate mode section.
-
Wait for the server to enter Maintenance mode.
-
Note the server's SA Server ID and MAC address.
-
Start the SA Client and in the Navigation pane, select Library , and set the view to By Type and select the OS Build Plans folder.
-
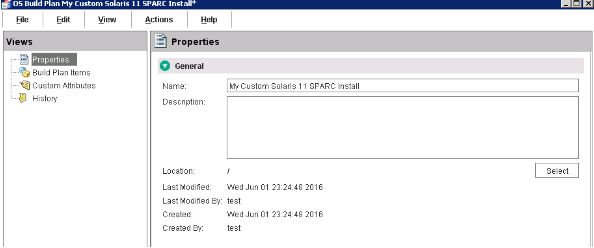
Create a new Build Plan. (right click New).
-
Name it accordingly to your needs. Some description details are also recommended.
-
From the Views panel tree, select Build Plan Items view and then click Copy Plan ....
-
Select the most appropriate
Solaris 11.X SPARC Default InstallBuild Plan available.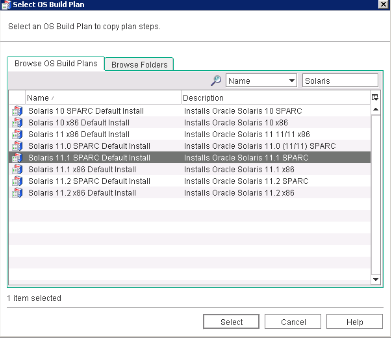
- In the Build Plan Edit window, from the Views panel tree, select Build Plan Items. A list of Build Plan steps is displayed.
-
Select Set Media Source step. The Run Script panel displays the Parameter setting for this step. Note the protocol, NFS, and the media path
/mnt/share/solaris/Solaris11.X-SPARC.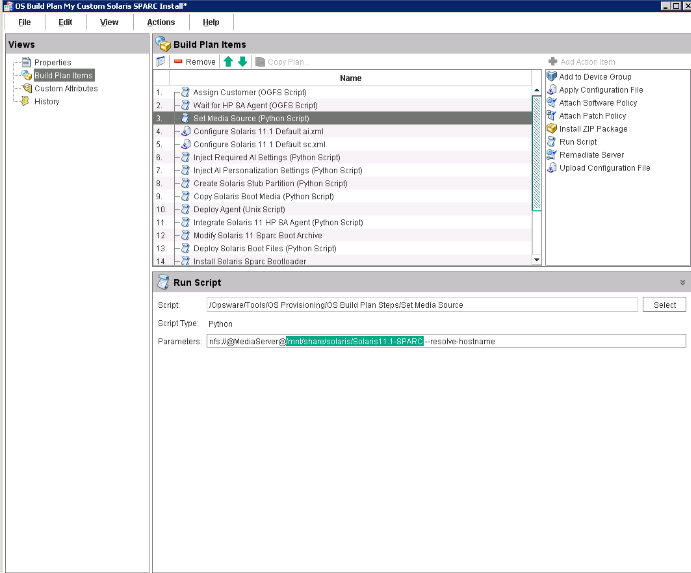
-
Prepare an NFS share with the
Solaris 11.X SPARCAI Install CD extracted under/mnt/share/solaris/Solaris11.X-SPARC.. -
Ensure that your network has access to a Solaris 11.X IPS package repository, either
-
The official Oracle repository at http://pkg.oracle.com/solaris/release/.
-
A self-hosted repository available through HTTP (see Oracle documentation on how to set one up).
-
-
In the Edit Build Plan Views pane, select Custom Attributes.
-
Complete the
MediaServerandIP_sourcefields.-
MediaServermust be the hostname or IP address of the NFS share you set up earlier. -
ips_sourcemust be the complete URL for accessing a Solaris 11.X IPS package repository. -
Optional: specify the http_proxy Custom Attribute if the IPS repository is only accessible through a proxy. -
Save the Build Plan.

-
-
From the Actions menu select Run...

-
The Run OS Build Plan window is displayed. Refer to the Starting the Build Plan section for the detailed procedure.
The Build Plan you specified will show up as selected in the OS Build Plan pane.
When the Run Build Plan job is complete, the server should be up-and-running and managed by SA.

Note SA supports Solaris 11.0 (11 11/11), 11.1, and 11.2 on SPARC servers. When you see Solaris 11.X, it stands for all three supported versions. The main difference between the Solaris SPARC Provisioning Build Plans is in the ai.xml file; that is the package build number, which is different for each version of Solaris 11.X.
Provisioning Solaris 10 SPARC
-
Network boot a SPARC server in to Solaris 10 SOS, as described in Network booting.
- In third-party certificate mode, when the server shows a Please wait for the server to register with the HPSA core message, go to the SA Client and approve the server registration request. For more information on this approval step, see the Bring a server into Maintenance when working in third-party certificate mode section.
-
Wait for the server to enter Maintenance mode.
-
Make a note of the server's SA Server ID. This helps you identify the machine later.
-
Start the SA Client. In the Navigation pane, select Library, set view to By Type and select the OS Build Plans folder.
-
Right click New to create a Build Plan.
-
Provide a name of your choice. You can also provide some description.

-
From the Views panel tree, select Build Plan Items view and then click Copy Plan ....
-
Select the Solaris 10 SPARC Default Install Build Plan.
-
In the Build Plan Edit window, from the Views panel tree, select Build Plan Items. A list of Build Plan steps is displayed.
-
Select the Set Media Source step. The Run Script panel displays the Parameter setting for this step. Note the protocol, NFS, and the media path
/mnt/share/solaris/Solaris10-UX-SPARC.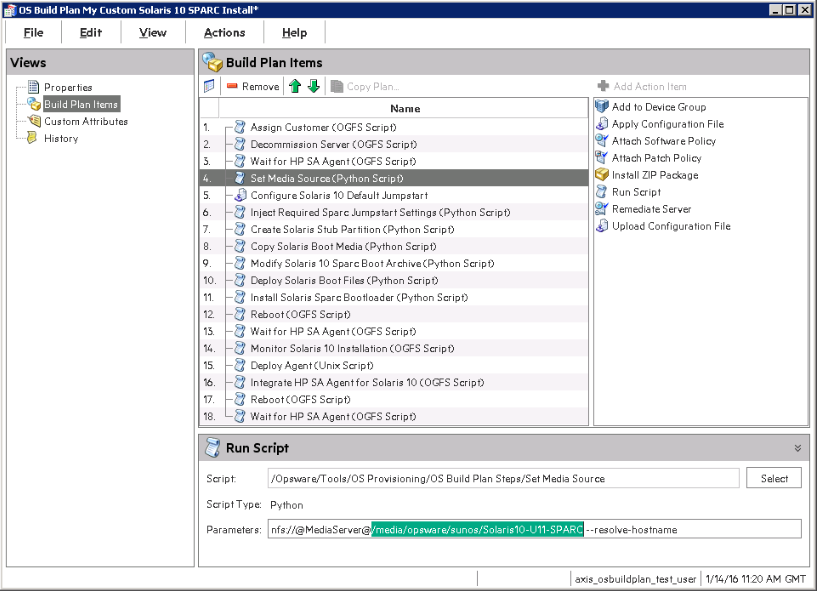
-
Prepare an NFS share with the Solaris 10 UX SPARC DVD iso extracted under
/mnt/share/solaris/Solaris10-UX-SPARC. -
In the Edit Build Plan Views pane, select Custom Attributes.
-
Enter the hostname or IP address of the NFS share that you have set previously in the MediaServer custom attribute field.
-
Save the Build Plan.
-
From the Actions menu, select Run....
The Run OS Build Plan window is displayed.
-
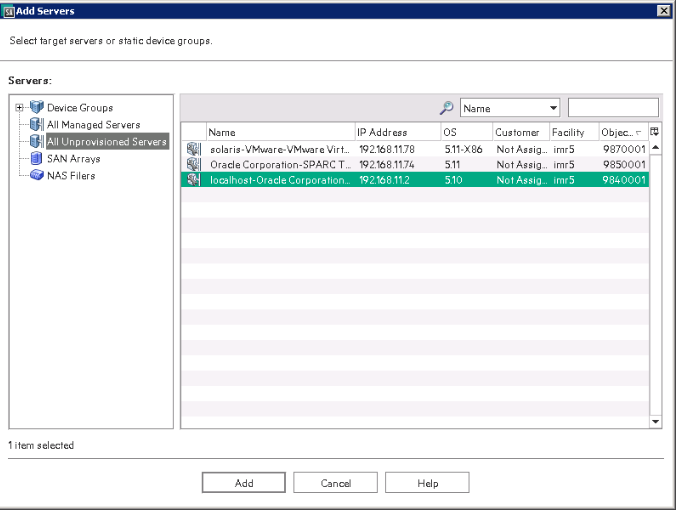
Add a server on which you need to run the Build Plan.

-
Select the server on which you need to run the Build Plan (the previously network booted machine) and add it. The filter can help you find the server if you know the ServerID for example.
-
Press Start Job. The progress of the Build Plan job is displayed.
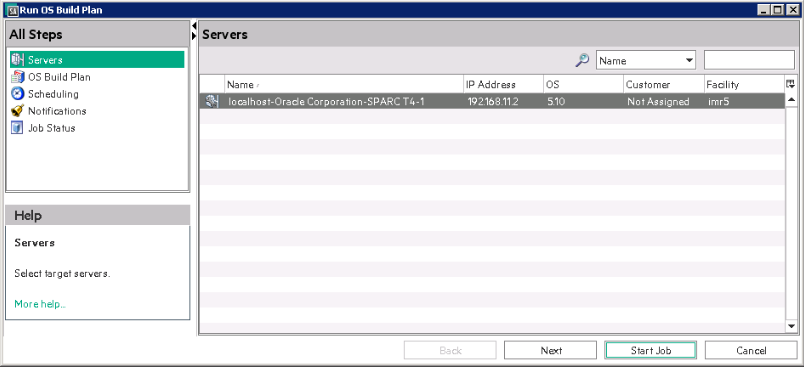
-
When the Build Plan is complete, the server should be provisioned.
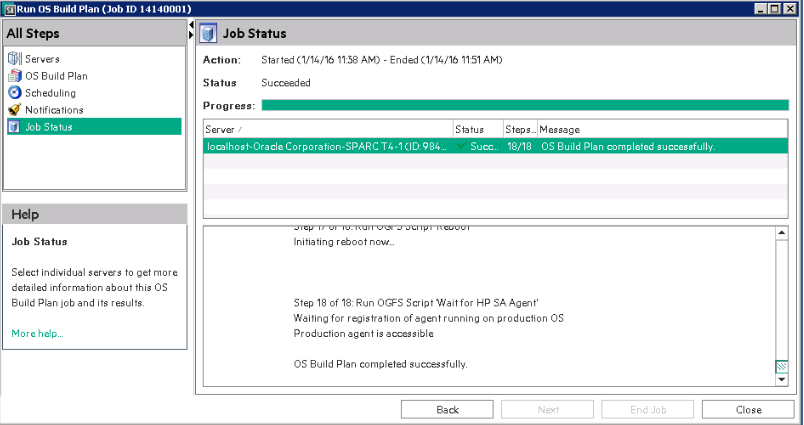
-
New server is now Managed by SA.

Note SA supports Solaris 10 deployments on SPARC servers using Build Plans starting with Solaris 10 U8 (10/09). - SA recommends not to use the "usedisk" and "dontuse" keywords in the jumpstart installation profile. Instead it recommends to use the boot_disk SA Custom Attribute, set on server side. Check the "Create Solaris Stub Partition" step description for more details. - "UX" stands for any of the U8 to U11 releases. - Solaris 10 deployments using Build Plans are now supported only over nfs.