


Step 4 - Deploy a version to a target
You deploy a version of your application to a target. This copies the application files to the target servers and executes any scripts that you provided with your application.
Deploying an application to a target

After you create a version, you can deploy that version to a target.
To deploy a version:
- Go to the Deployment screen (click Deployment in the lower left corner).
- From the Select Version drop-down list, select the version that you created—if you just created this version, it will already be selected.
- From the Select Target drop-down list, select the target that you created earlier. This specifies the target server (or servers) where you want the application to be deployed.
If you do not see your target in the list, make sure that the following conditions are true:- The tiers of the target match (or are a superset of) the application tiers.
- You have Deploy permission for this environment.
- Each tier contains at least one server.
- The life cycle for this release includes the environment where your target resides.
- The environment is not marked Not Ready in the life cycle.
For additional target options, click the ![]() button to the right of the Select Target drop-down list. See Deploy an application for more information about these options.
button to the right of the Select Target drop-down list. See Deploy an application for more information about these options.
After you select a version and a target, the Deployment screen looks like this—the left panel presents a preview of what will be deployed, and the right panel shows you the deployment job settings.
- Optional: Modify the deployment job settings in the right panel. See Deploy an application for details.
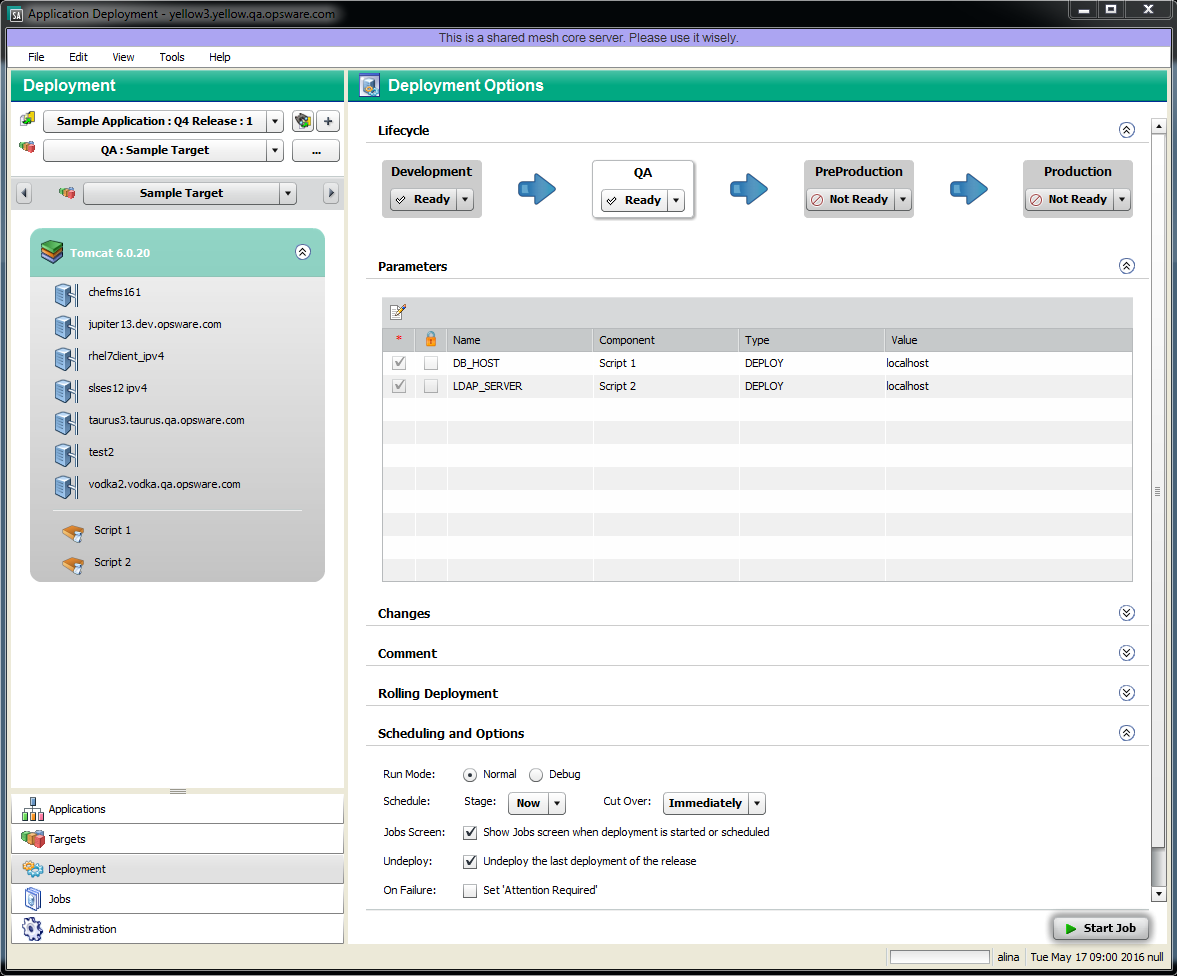
- Click Start Job. This launches a Deployment job that will copy your application components to the target server and run any necessary code and scripts.
You can see the status of the deployment on the Jobs screen.