Step 1: Define your application - Tiers and components
An application consists of one or more tiers. Each tier includes components, which implement the functionality of the application.
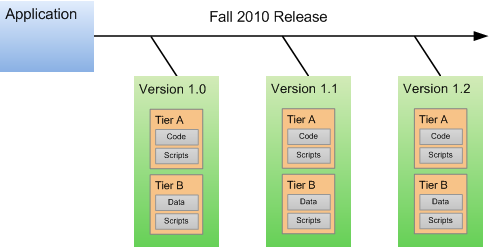
Applications exist in the form of one or more releases. Each release can have multiple versions. When you deploy your application, you create a version that consists of the components for each tier. A version is an immutable “snapshot” of a release at a particular point in time.
The following diagram shows an application made up of 2 tiers that has three versions of the Fall 2010 Release.
How applications are organized
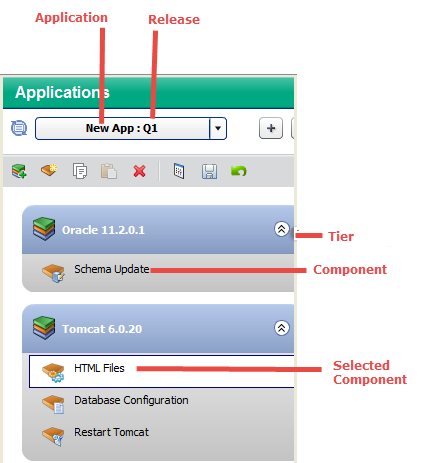
The following application, for example, has an Oracle 11.2.0.1 database tier and a Tomcat 6.0.20 application server tier. The components in the Tomcat tier are an HTML file, a configuration file, and a restart script. The component in the Oracle tier is a database script.
Example of a two tier application
The following instructions assume that you are creating a new application. If you want to work with an existing application, see Applications overview.
Before you can create an application, Your SA administrator must grant you permission to access the Application Deployment tool and to create applications. See Set permissions.
To start the Application Deployment tool:
- Start the SA Client.
- In the SA Client, select the Tools > Application Deployment menu item. The Application Deployment interface opens with the Applications screen visible, as shown here:
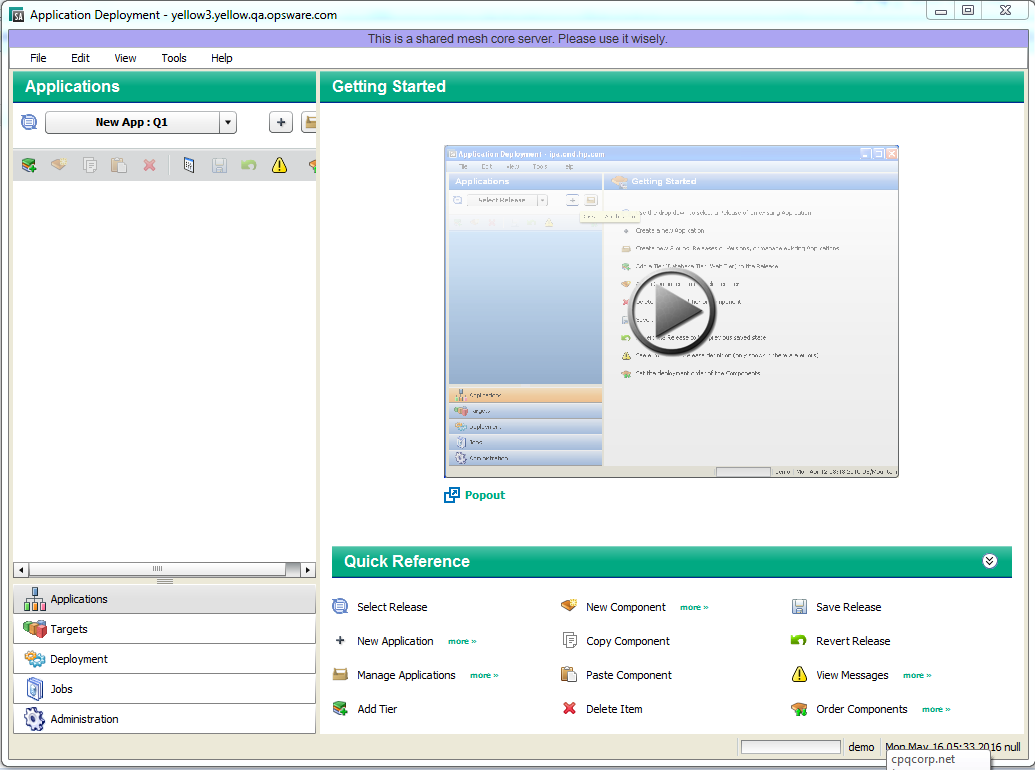
Click the ![]() button to start a short video demo that demonstrates the function of the Applications screen. To play the video in a separate window, click
button to start a short video demo that demonstrates the function of the Applications screen. To play the video in a separate window, click ![]() .
.
The Quick Reference area lists the functions of the tool bar buttons available on this screen. Click the more>> links to open related online help topics in a separate browser window.
To create and configure a new application:
- Go to the Applications screen (click Applications in the lower left corner).
- Click Create a New Application
 . The Create New Application dialog opens. Note that the ability to create applications is a specific action privilege in SA that needs to be assigned to a group to which you belong (see Set permissions).
- Enter the name of your new application.
- Optional: Assign your new application to an existing application group.
- Optional: Enter a description of your new application.
- In the Release Name field, enter the name of the current release that you are working on for this application.
For example, if you release quarterly, you could use Q3-2010, Q4-2010, Q1-2011, Q2-2011, and so forth as your release names. - Select a life cycle for this release. The life cycle specifies which phases your application goes through on its way from development to production.
For example, a common life cycle is Development QA Pre-Production Production. This is the default Standard life cycle. - Click OK to save the application information.
- Click Add Tier
 to add one or more tiers to your application.
- Select the type of tier to add.
A group of standard tiers are provided with your software. If a tier that you need is not available, your SA administrator may need to add it. See the SA - Click Add.
- Repeat steps (a) and (b) for each additional tier that you need.
- Select the type of tier to add.
- To add components to a tier, follow these steps:
- Select the tier.
- Click the “New Component” button
 to add components to this tier.
 - Enter a name for the new component.
- Select the component type. See Components for more information.
- Click OK.
- Enter the information required to fully specify the location and behavior of the new component.
The information that you must provide varies depending on the type of component that you are adding. Some component types require instructions for rollback and undeploy scenarios. See Types of components for more information. - Repeat steps (b) through (f) above to add more components to this tier.
- Click Save Release
 to save your changes.
- Repeat steps 3–4 above to add more tiers and add more components to each tier.
- Click Edit component deployment order
 .
. - Use the green arrow keys to arrange your components in the proper deployment order. See Changing the deployment order of components for details.
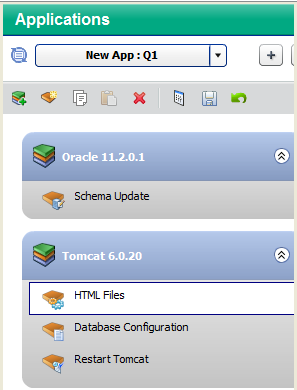
After you have added all tiers and components, your application is fully defined. Your application should look similar to the example shown in the following figure.
If the “Warning” sign ![]() appears on the tool bar, this indicates that a component is not fully defined or is incorrectly defined. For example, a Code component’s source location might reference a directory that does not exist.
appears on the tool bar, this indicates that a component is not fully defined or is incorrectly defined. For example, a Code component’s source location might reference a directory that does not exist.
Click the ![]() to determine what information or action is required.
to determine what information or action is required.
Example of an application with three tiers and seven components