


Administer > ITOC Reports > Use ITBA Web Intelligence to build reports > Merge objects from different classes
Merge objects from different classes
To create a report using multiple classes (ITOC inventory, ITOC compliance, and ITOC users and roles), perform the following steps:
- Log in to the BI launch pad:
https://<SAP-BO-IP-ADDRESS:port>/BOE/BI - Enter the HPE ITOC user name and password.
- Click Log On.
- From the Applications dropdown, select Web Intelligence. The SAP BusinessObjects Web Intelligence window opens.
- In the Web Intelligence bar, click the New (
 ) icon and select Universe. The Create a Document window opens.
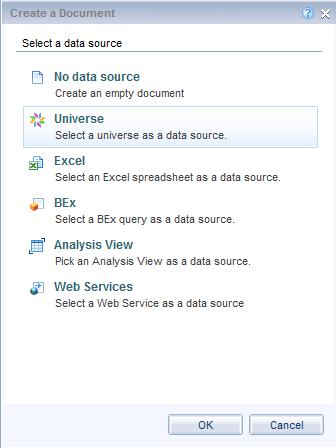
- Select Universe, and click OK.
- The Universe window opens. Select the universe for HPE ITOC.
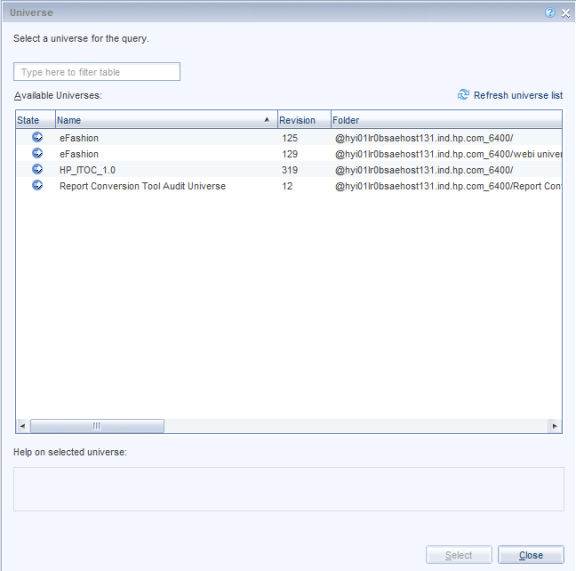
- Click Select. The Query Panel opens.
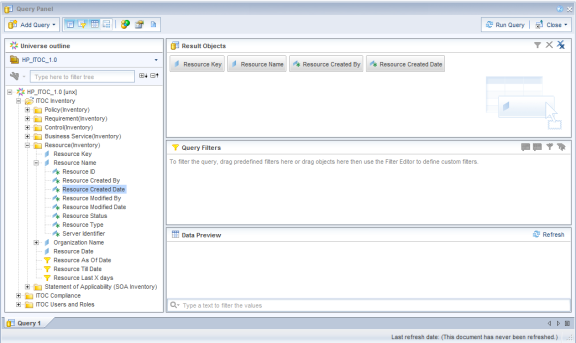
- In the left pane, expand the folder in the ITOC Inventory section. Double-click an object to add it to the report. You must select at least one key object.
- In the query pane, select Add Query > From Universe to select a second class (ITOC Compliance or ITOC Users and Roles in the example). The Add Query window opens.
- Select the second class (ITOC Compliance or ITOC Users and Roles in the example) you want to include in your report.
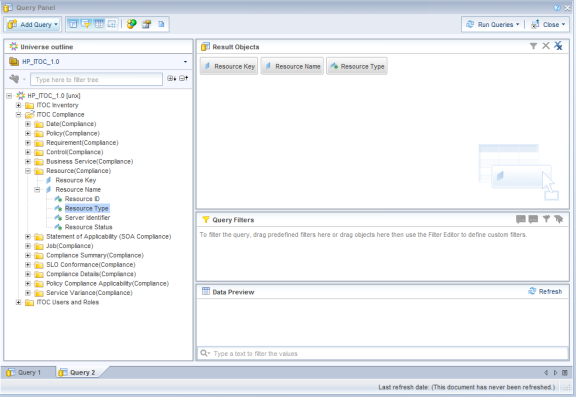
- In the left pane, expand the Objects folder. Double click an object to add it to the report. You must select at least one key object.
- Click Run Queries. If any user input prompts are required for the selected objects, the Prompts screen opens. Click the Refresh (
 ) icon to display a dropdown menu of user input.
 - In the Available Objects window, select the objects that are common to both universes you selected.
- In the Data Access tab, click Merge.

- In the Available Objects window, right-click the Variables folder and select New Variable.
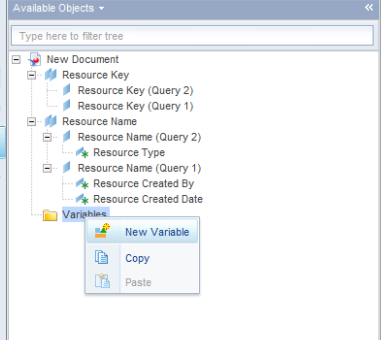
- The Create Variable window opens. Enter a name for the object variable and select Detail /Dimension in the Qualification dropdown menu and create other detail object to dimension objects, as necessary.
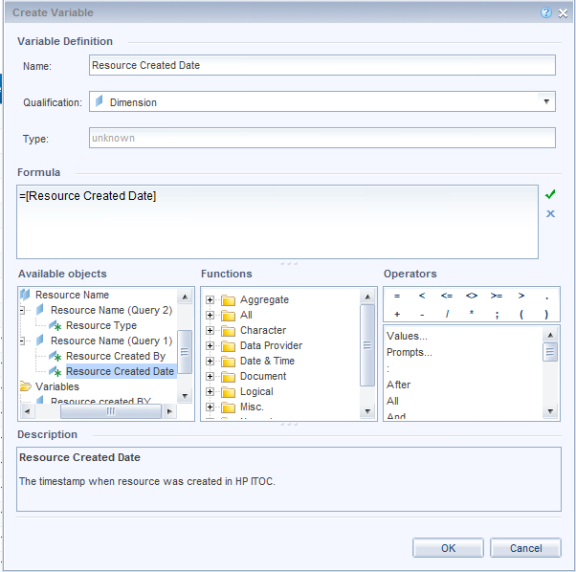
- Click the box next to the Associated Dimension field. The Available Objects window opens.
- Select the objects you want to convert. Click OK.
- Repeat steps 16 and 17 to create an object variable for each object you want to display in your report. This converts the dimension objects to detailed object and vice versa, so objects from the two classes can be synchronized.
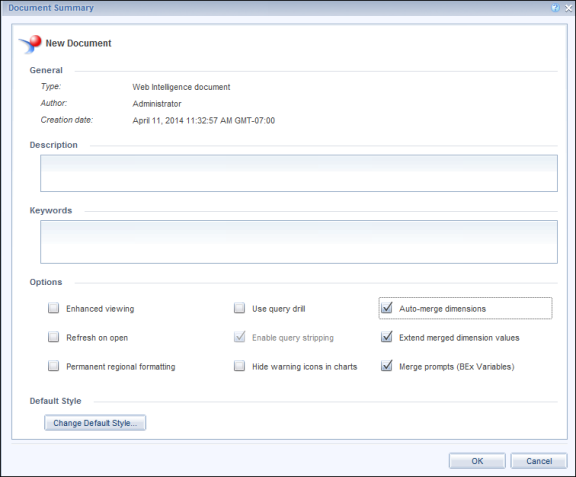
- (Optional) To merge dimensions from multiple classes, perform the following steps to modify the document summary:
- Click the Document Summary (
 ) icon.
 - Click Edit. The Document Summary window opens.
- Select the Auto-merge dimensions, Extend merged dimension values, and Merge prompts (BEx Variables) options.
- Click OK.
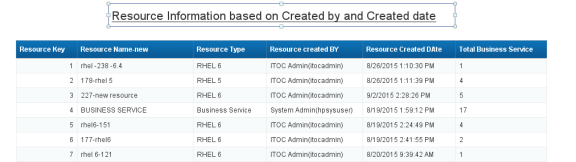
The following example shows a report that merges objects from different classes:
- Click the Document Summary (