How to Use Assisted Modeling in UCMDB Browser to Manage All Your Site Services
This end-to-end use case describes how a site manager can organize all services in the site by using the UCMDB Browser.
The use case assumes that all services follow this organization scheme: BusinessFunction [contains] BusinessService [contains] BusinessApplication.
This workflow includes the following tasks:
Task 1. Create BusinessApplications CIs
Follow these steps to create BusinessApplications CIs:
- Log in to UCMDB, and then go to Modeling > IT Universal Manager.
-
Create the following CIs if they do not exist:
- OutlookBA
- GmailBA
- ThunderbirdBA
- LyncBA
For more information about how to create a CI,
Task 2. Create a New Modeling Query
Follow these steps to create a new modeling query:
- Log in to UCMDB, and then go to Modeling > Modeling Studio.
-
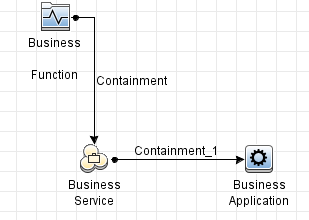
Create a new query with the following content and relationship:
BusinessFunction [contains] BusinessService [contains] BusinessApplication
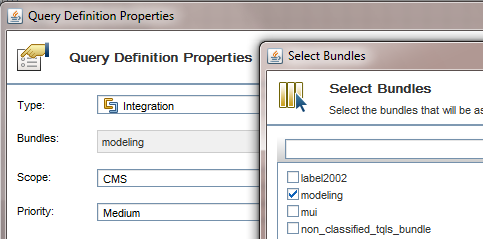
-
Add the query to the modeling bundle.
- Save the query and name it as ServiceHierarchy.
For more information about how to create a TQL Query, see How to Define a TQL Query.
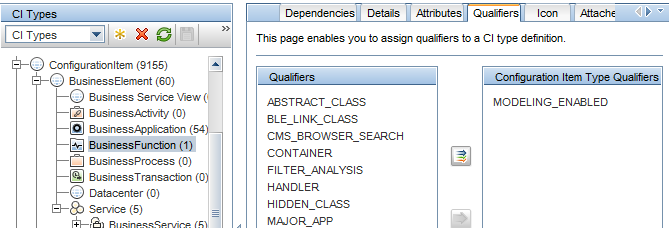
Task 3. Assign the MODELING_ENABLED Qualifier to the BusinessFunction and BusinessService CI Types
Make sure both the BusinessFunction and BusinessService CI Types have the MODELING_ENABLED qualifier, so that you can create these CI types by using the Assisted Modeling feature in the UCMDB Browser.
To do this, go to Modeling > CI Type Manager, select the CI Type, and then go to the Qualifiers tab. The MODELING_ENABLED qualifier should be in the right column.
Task 4. Organize Services by Using Assisted Modeling
Follow these steps to organize services by using Assisted Modeling in the UCMDB Browser:
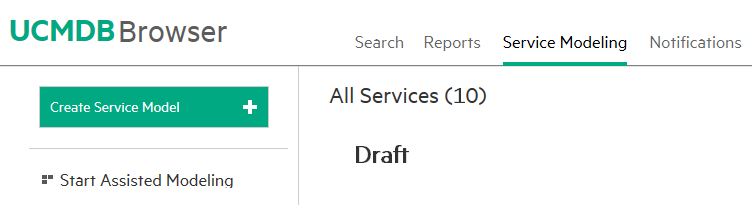
- Log in to the UCMDB Browser.
-
Select the Service Modeling tab, and then click the Start Assisted Modeling link.
Note If Service Modeling is not enabled, the Assisted Modeling tab appears. Select the Assisted Modeling tab.
-
From the Select template drop-down list, select ServiceHierarchy, which is the query just created.
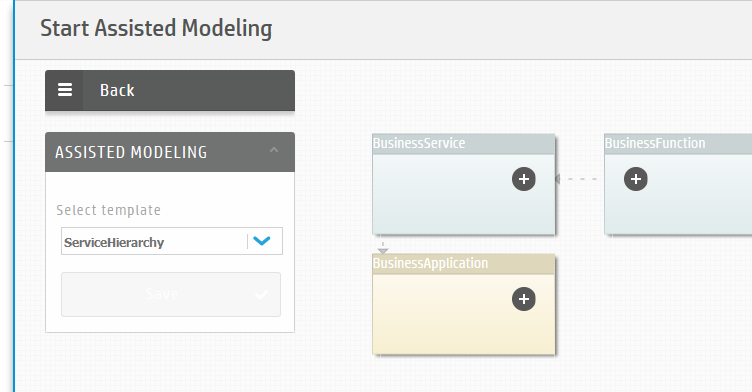
-
Create a new Communication CI of the BusinessFunction type. To do this, click the
 icon in the BusinessFunction node, and then click the Create New BusinessFunction link. Name the CI as Communication and then click Apply.
-
Create Mail Services and Chat Services CIs of the BusinessService type. To do this, follow the similar process as the previous step.
-
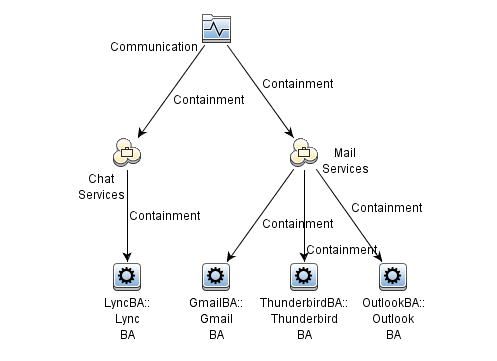
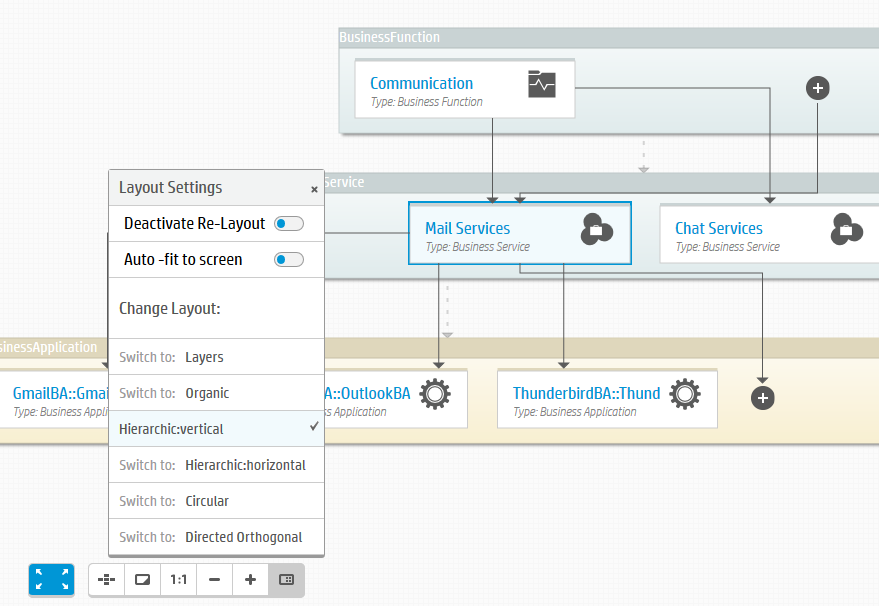
Examine if the topology graph now resembles the following example:
Note The following example uses the Hierarchical: vertical layout.

- Select Mail Services, click the icon inside the BusinessApplication node, and then click the Add existing BusinessApplication link.
-
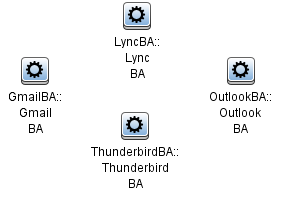
Type BA in the text field and then press Enter to filter the result (because the business application names end with BA). The result should be similar with the following example:

- Point to GmailBA, OutlookBA, and ThunderbirdBA, and then click the Add button that appears under each item.
-
Check whether the topology graph now resembles the following example:
Note The following example uses the Hierarchical: vertical layout.
-
Add the LyncBA CI inside the BusinessApplication node and links to Chat Services. To do this, follow the similar procedure as Step 7 to 9.
-
Click the Save button. The following message is displayed:
Topology saved successfully
Task 5. Verification
Log in to UCMDB and check if the created links and CIs are displayed as expected: