


How to Use the Generic Adapter Mapping UI to integrate UCMDB with Service Manager and Import CIs?
This end-to-end use case describes how to integrate UCMDB with Service Manager in order to import the newly discovered 3D Printer CIs into Service Manager.
This use case includes the following tasks:
Task 1. Create the new CI Type in UCMDB
Follow these steps to create the new 3D Printer CI Type in UCMDB:
- Log on to UCMDB, and then open the CI Type Manager.
-
Select the Node element in the CI Types tree, and then click New
 .
.The new 3D Printer CI Type will be a child of the existing Node CI type.
-
Follow the Create CI Type Wizard to create the new CI Type.
For more information about how to create a new CI Type,
Task 2. Import the new CIs into UCMDB
Import the new CIs into UCMDB either by integration population or by discovery. For more information about how to do this, see the following topics:
Task 3. Create the TQL query to view all the 3D Printer instances
Follow these steps to create the TQL query and view all the 3D Printer instances:
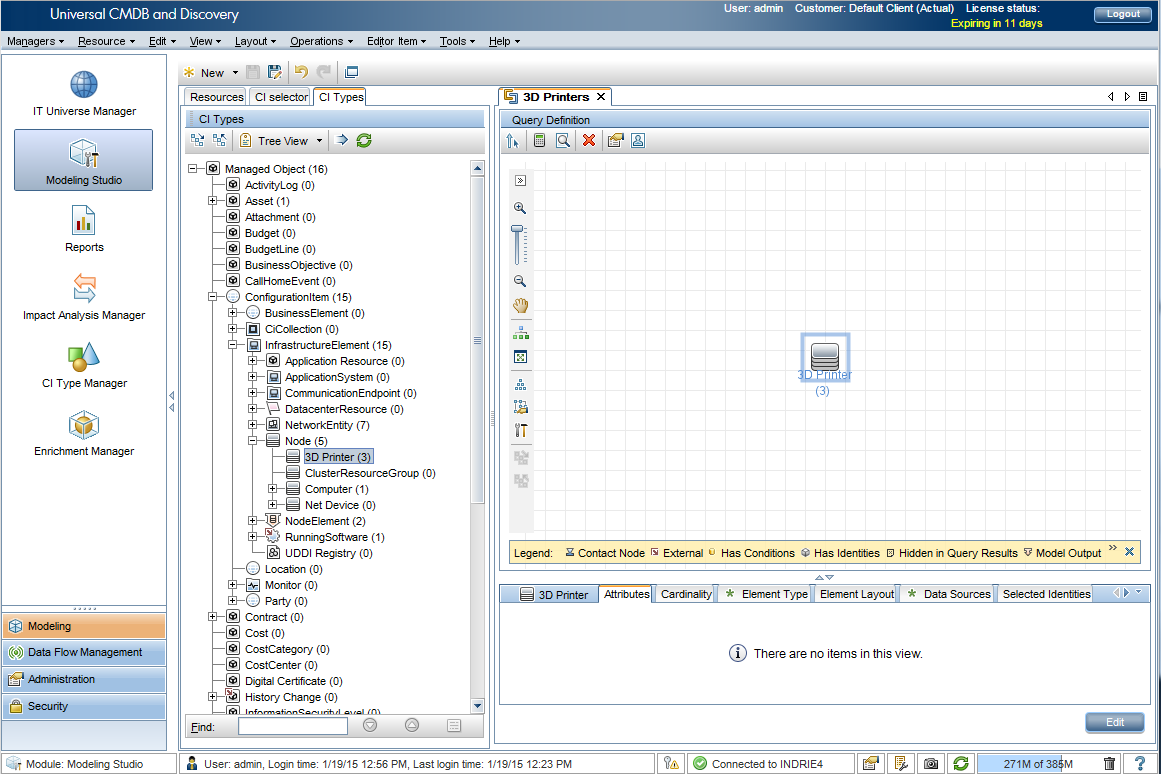
- Go to the Modeling Studio, click New , and then click Query.
-
From the CI Types pane, locate the 3D Printer CI type, and then drag and drop the 3D Printer CI type into the Query Definition canvas.
Note To preview the query result, click the Preview button
 .
.
-
Right-click the 3D Printer query node, and then click Query Node Properties.
-
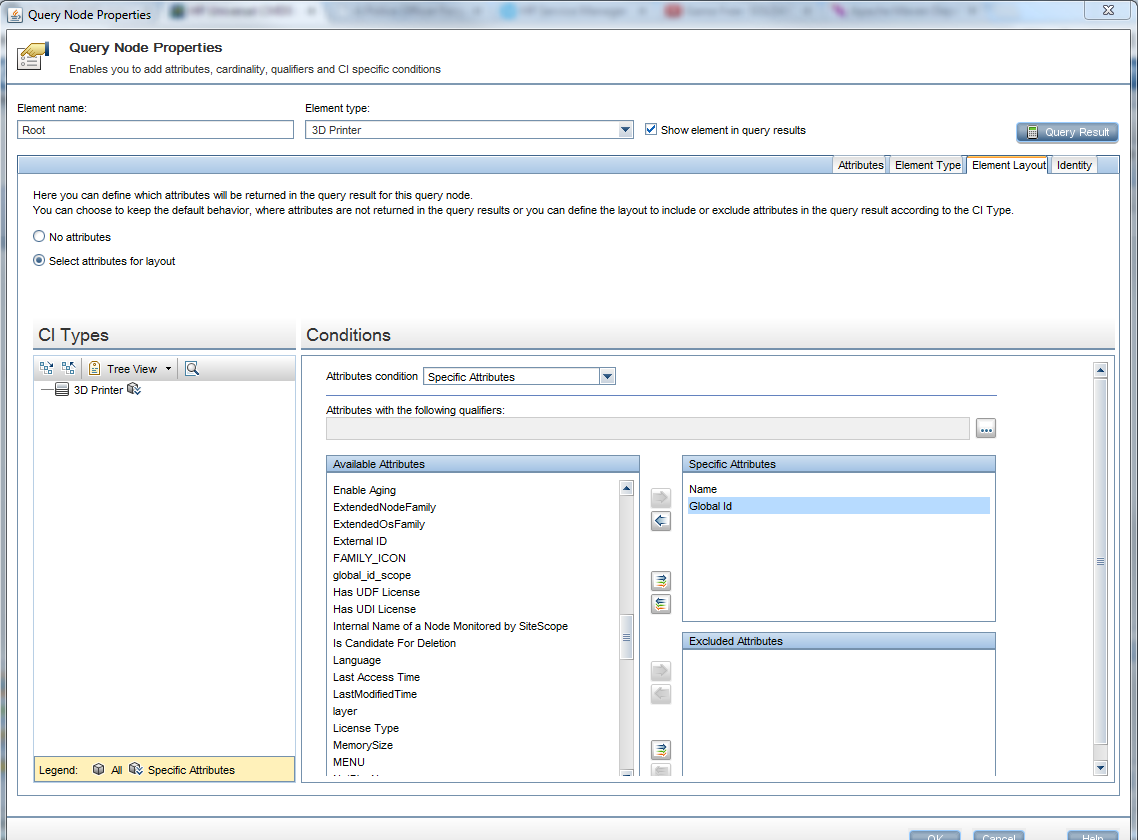
In the Query Node Properties window, make the following changes so that this TQL query can be used to push data to the Service Manager server.
- Change the element name to Root to indicate the root of the TQL query.
-
In the Element Layout tab, select the Select attributes for layout option, add the Name and Global Id attributes to the Specific Attributes column.
These attributes will be pushed to Service Manager. You can add other attributes if you want.
Task 4. Create the integration point with the Service Manager server
Follow these steps to create the integration point from UCMDB to the Service Manager server:
- Go to the Integration Studio, and then click New Integration Point .
- Specify the integration name.
-
Click Select Adapter
 , and then Select ServiceManagerEnhancedAdapter9.x.
 -
Enter the required information. The following screen shot shows an example.
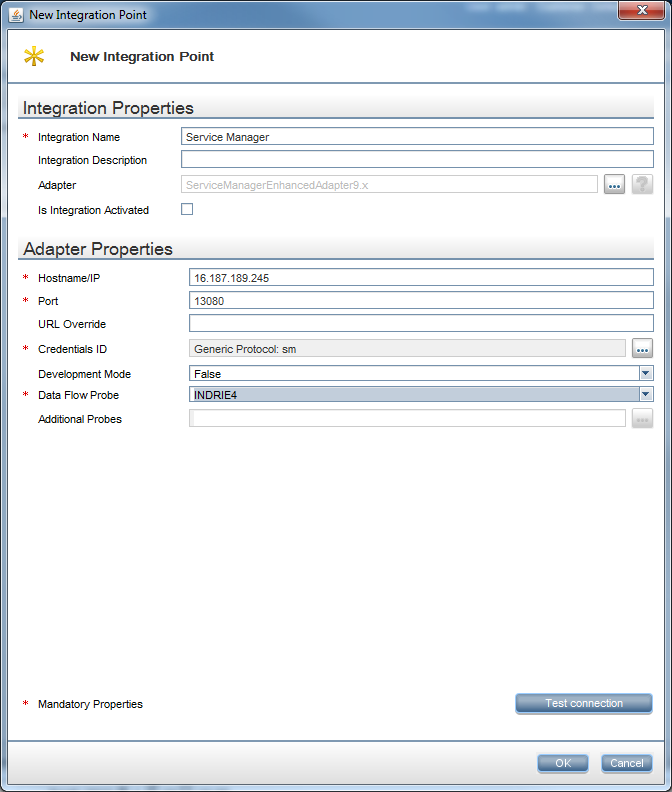
- Click the Test connection button to verify the connectivity to the Service Manager server.
- Click OK.
Task 5. Create the new CI Type and the mapping for the new CI Type in Service Manager
Follow these steps to create the new CI Type in Service Manager by using UCMDB’s Mapping Tool and to create a mapping for the new 3D Printer CI Type:
-
Right-click the newly created integration point, and then click Go to Adapter.
The ServiceManagerEnhancedAdapter9.x adapter opens in Adapter Management.
-
To create the mapping file, make sure the ServiceManagerEnhancedAdapter9-x adapter is selected, click New
, and then click New Configuration File. -
Enter the mapping file name in the Name field.
Note Include the full path in the Name field, for example:
ServiceManagerEnhancedAdapter9-x/mappings/push/SM 3D Printer Push.xml
-
Click OK, and then click Yes if you are prompted with the following message:
Do you want to open the configuration file with the new mapping tool editor?
The UI Mapping Tool opens.
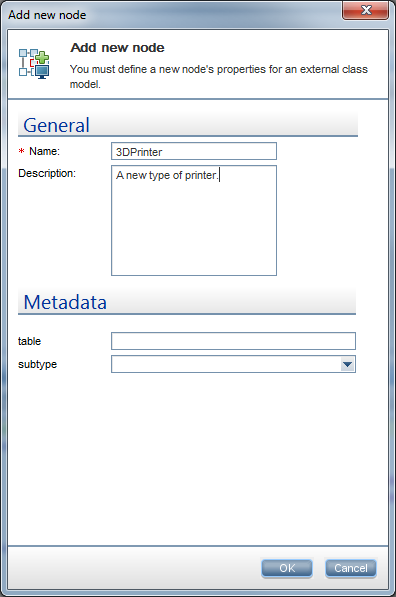
- Click Add New CI Type to External Class Model
 .
. -
Enter the required information for the new CI Type, and then click OK.
-
Define the TQL query that provides the CIs need be pushed to Service Manager. To do this, click Add TQL Queries
 in the Local Query pane, and then select the previously created 3D Printers TQL query.
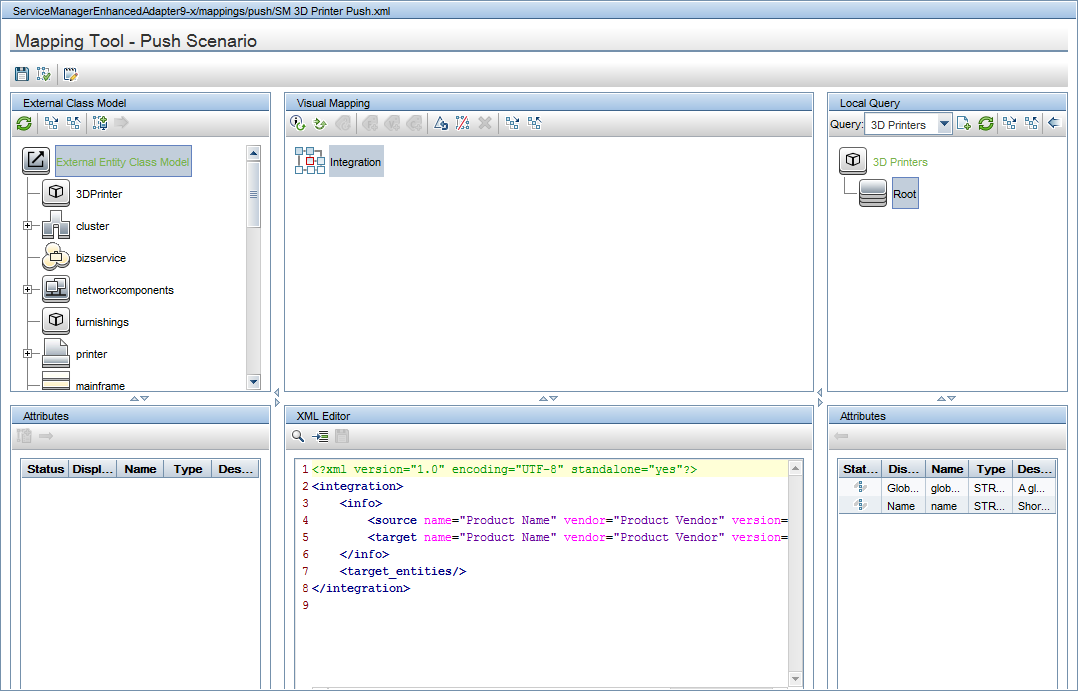
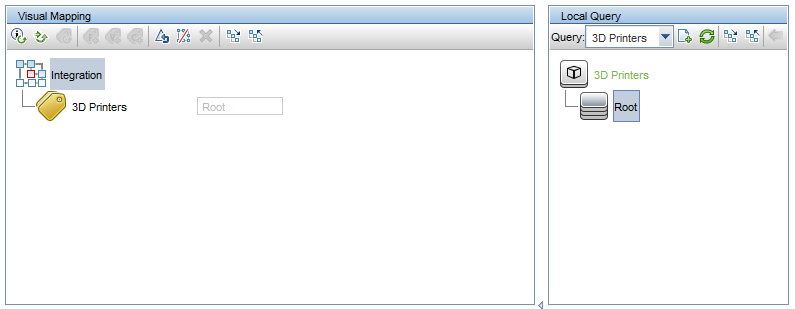
-
Select the Root node under the 3D Printers TQL query node in the Local Query pane, and then drag it onto the Integration node in the Visual Mapping pane.
This configuration indicates that the data source for this mapping is the 3D Printers TQL query rooted in the Root element.
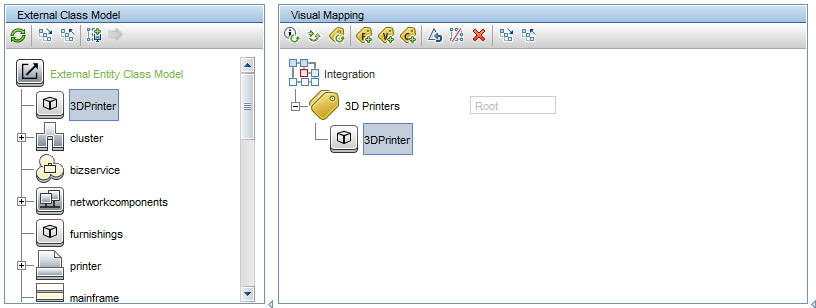
-
Select the Service Manager entities that will be created as a result of the mapping process. To do this, drag the 3DPrinter type from the External Class Model pane onto the 3D Printer TQL query node in the Visual Mapping pane.
-
Drag the needed attributes of the Service Manager 3DPrinter type from the Attributes pane onto the 3DPrinter node in the Visual Mapping pane. In this case, the Type attribute and two mandatory attributes: CIIdentifier and UCMDBId.
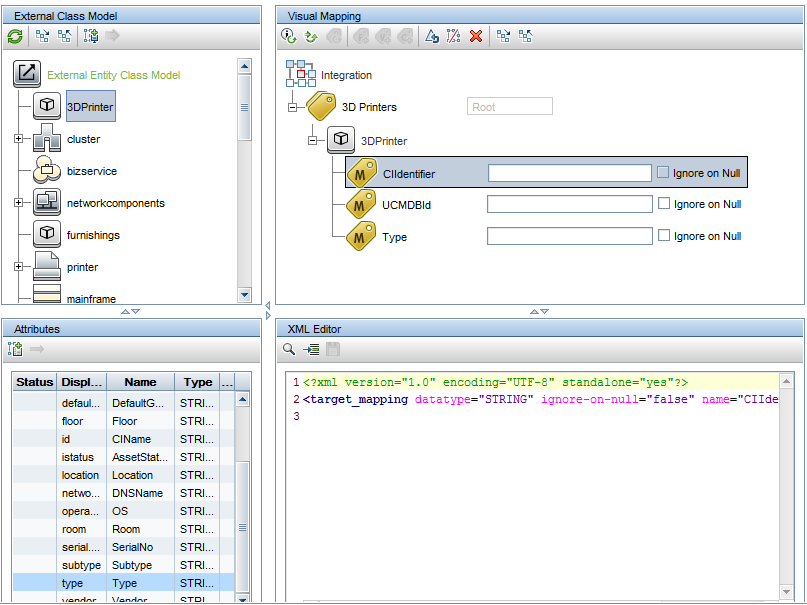
-
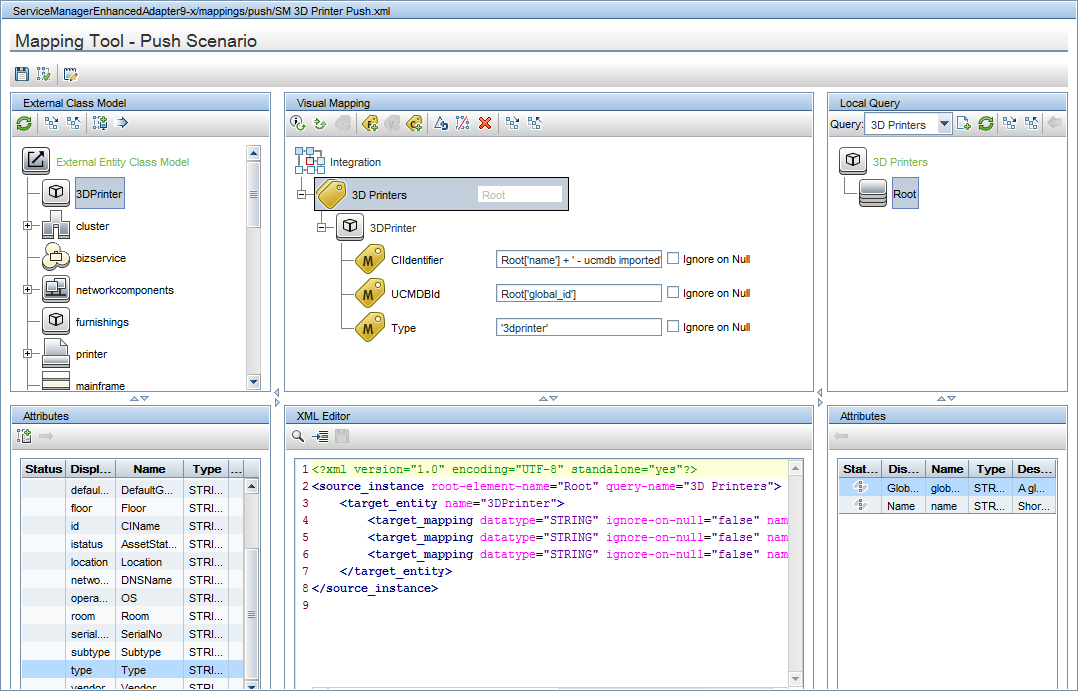
Double click each of the three attributes and enter the values as follows:
-
Type: ‘3dprinter’
The Type attribute need be passed to Service Manager as a string. Don not miss the single quotes, which are needed to differentiate a string constant from a variable.
-
UCMDBId: Use the Global Id attribute from UCMDB.
To do this, drag the Global Id attribute from the Attributes pane onto the UCMDBId element in the Visual Mapping pane.
-
CIIdentifier: Use the Name attribute from UCMDB and make a small customization.
To do this, follow these steps:
- Double-click the CIIdentifier element in the Visual Mapping pane, and then type Root[. A drop-down box appears and shows the available attributes for the Root TQL query element of the 3D Printer CI Type.
- Select Root[‘name’].
-
Continue type + ' - ucmdb imported'.
The final value is Root['name'] + ' - ucmdb imported'.
The following screen shot shows the result of the mapping process.
-
- Click Save
 .
.
Task 6. Create the push job for the new CI Type and push the CIs to Service Manager
Follow these steps to create the push job for the newly created 3D Printer CI Type and push the CIs to Service Manager:
- Go to Adapter Management.
-
Right-click the ServiceManagerEnhancedAdapter9-x adapter, click Go to Integration Point, and then click the newly created integration point for Service Manager.
The Integration Studio opens.
- Make sure the Service Manager integration point is selected, and then open the Data Push tab.
-
Click New Integration Job
, and add the 3D Printers TQL query as follows.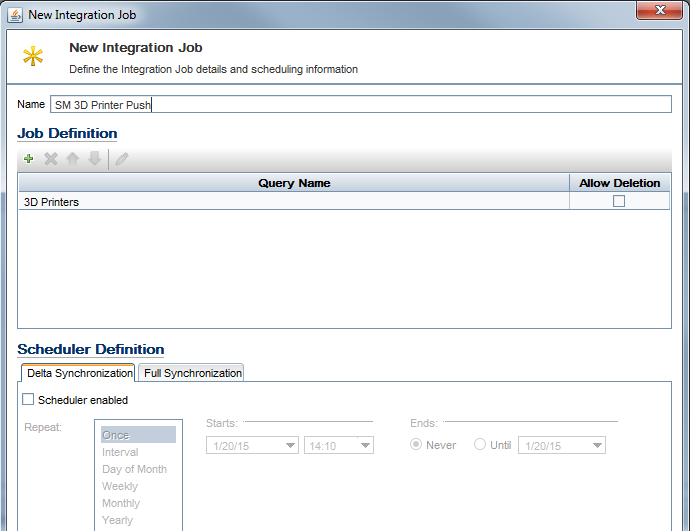
- Click Save Integration Point .
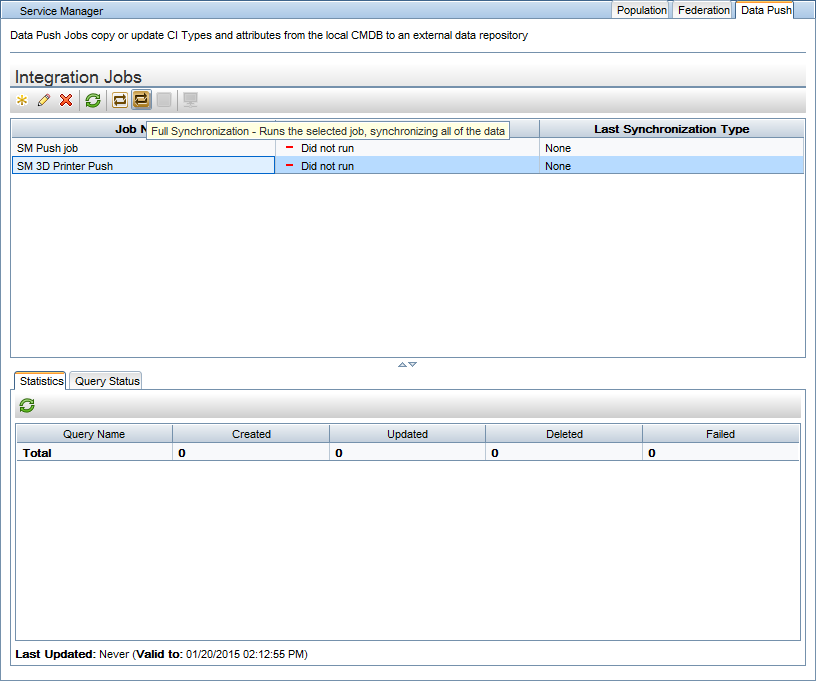
-
Select the newly created SM 3D Printer Push job, and then click Full Synchronization
 in the Integration Jobs section.
-
Click Refresh
 to check if the job is finished.