


How to Relate Two CIs from the UCMDB Browser
This end-to-end workflow walkthrough scenario describes how to relate two CIs from the UCMDB Browser. This walkthrough is based on UCMDB Browser 4.04, however, the instruction applies for other UCMDB Browser versions.
This document provides step-by-step instructions for two different approaches to relate two CIs:
Relate Two CIs by Using the Properties Widget
You can relate two CIs by using the Properties widget. For any selected CI, you can relate Owner CIs and Location CIs. To do this, follow these steps:
-
Make sure the Show Location Details and Show Owner Details options are set to true.
You can find these options in UCMDB UI > Administration > Infrastructure Settings Manager. The default values are true.
-
Go to the UCMDB Browser, select a CI, click PROPERTIES to expand the widget, and then switch to the edit mode.
-
Edit the corresponding fields to create relationships:
- To create a Membership relationship between the Locations and the selected CI, select one or more Locations.
- To create an Ownership relationship between the Owners and the selected CI, select one or more Owners (which are all Party CI Types).
Note If the selected CI is a Node, then, similar with Owner and Location, you will also be able to select IP Addresses. In this case, Containment relationships will be created between the selected CI and the entered IP Addresses.
- Click Save changes.
Relate CIs by Using Assisted Modeling
As you see, there are many limitations when relating CIs through the Properties widget. If your needs cannot be fulfilled because of these limitations, you can use Assisted Modeling.
Through Assisted Modeling, you can relate any kind of CIs; you can relate two or more existing CIs, or even create new CIs related to existing CIs.
There are already some OOTB modeling queries that you can use to create and relate CIs. In addition, you can create and use any number of custom modeling queries.
This section provides step-by-step instructions on how to relate an Owner and a Node through Assisted Modeling. Even though you can do the same task through the Properties widget, using Assisted Modeling is highly configurable and you can relate any kind of CIs in an identic manner.
Task 1. Create the modeling query from the UCMDB UI
- Go to UCMDB UI > Modeling Studio, click the New
 button, and then select Query.
 -
Create a query that resembles the following example:
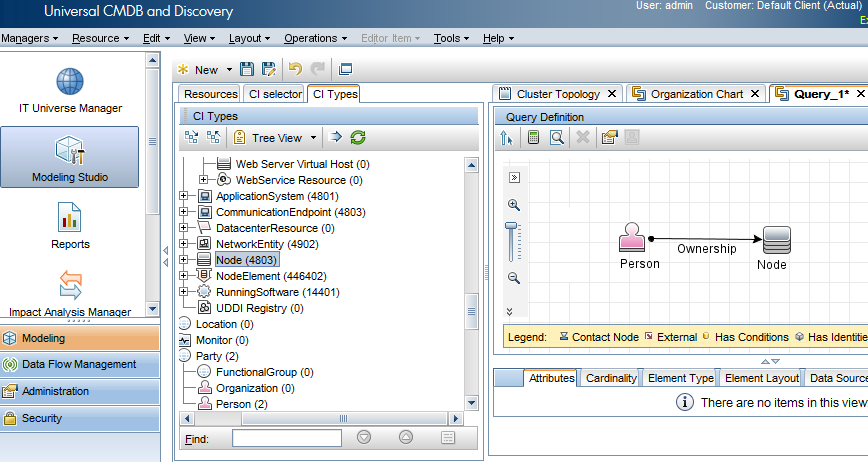
This query defines the kinds of CIs you want to relate. In this case, the query defines a Person CI and a Node CI with the Ownership relationship. For more information about how to create a query, see How to Define a TQL Query.
-
Add the query to the modeling bundle so that you can use it in Assisted Modeling. To do this, click the Query Definition Properties
 button, select modeling for the Bundles field, and then click OK.
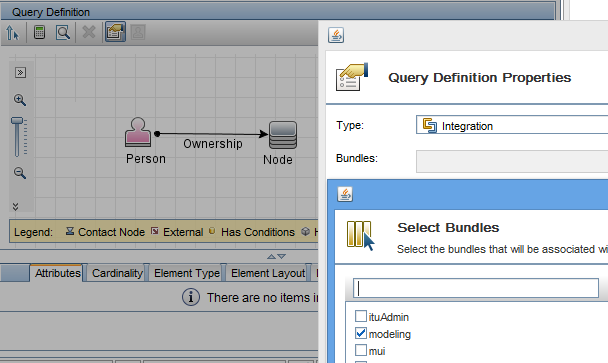
-
Click the Save
 button, type the name of the query, and then click OK.
Task 2. Relate CIs
Before you continue, keep in mind that the modeling queries are cached. You need to wait for a while before you can see the query you just created in the UCMDB Browser. The amount of time is specified in Infrastructure Setting Manager > Time for which information in the Browser cache is valid, which by default is 5 minutes.
Follow the steps below to relate CIs:
-
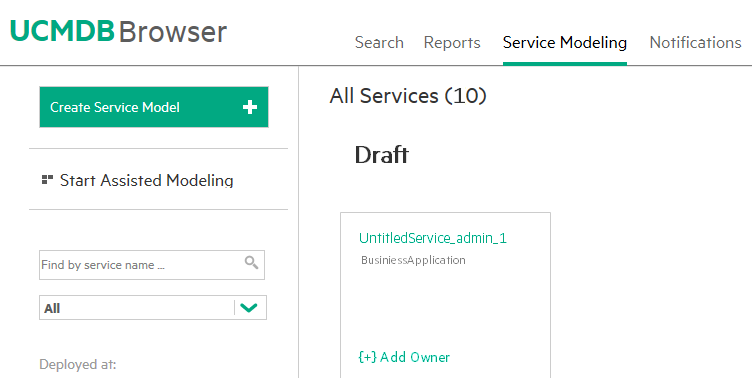
Open the UCMDB Browser, and then do one of the following according to what you see:
- Go to the Service Modeling tab, and then click Start Assisted Modeling.
- Go to the Assisted Modeling tab.
Note
- If you do not have the access right to the Service Modeling feature, you do not see the Service Modeling tab. Instead, you see the Assisted Modeling tab.
- You must have the View right to at least one modeling query (one query added to the modeling bundle) in order to see the link to access Assisted Modeling.
-
In the Select template drop-down list, select the query you just created.
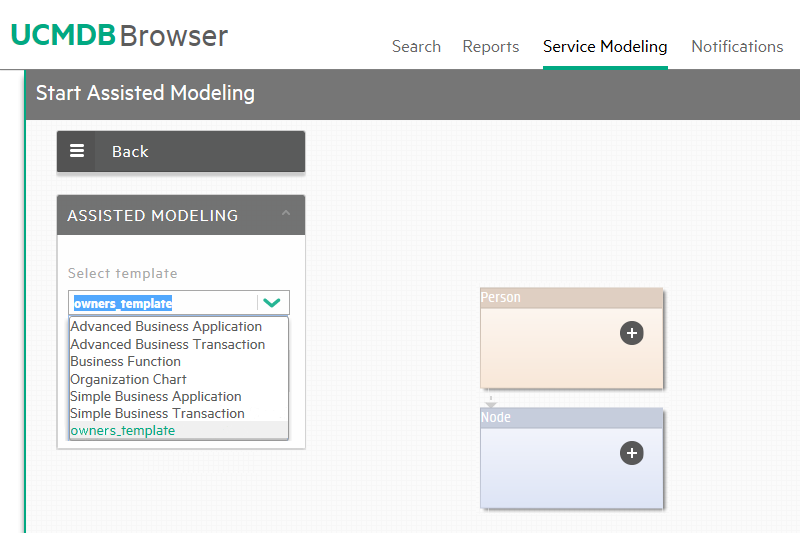
The topology map then loads the query. Both nodes have the Plus
 icon.
icon. -
Click the Plus
icon in the Person CI Type. -
In the Add new CI to the template panel, click Add Existing Person.
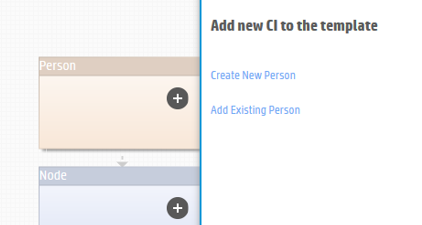
Note In this panel, a Create New Person link is also available to create a Person CI. If you do not see this link, you need to add the MODELING_ENABLED qualifier to the CI Type. To do this, go to UCMDB UI > Modeling > CI Types Manager, select the Person CI Type, go to the Qualifiers tab, and then add the SERVICE_MODEL qualifier to the Configuration Item Type Qualifiers pane.
-
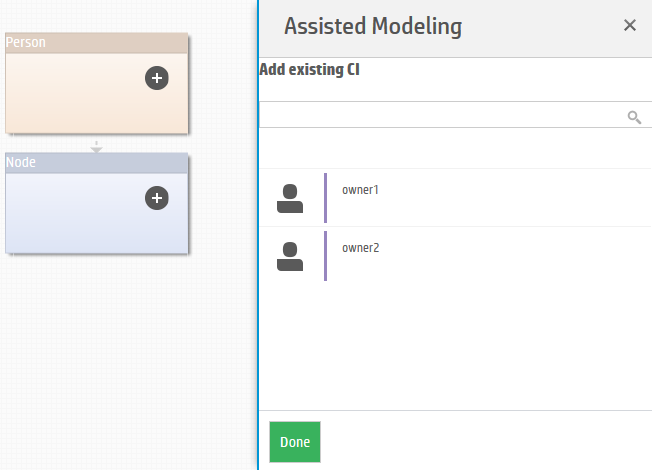
In the Add existing CI panel, type a keyword in the Search field. All the Person CIs with the display name that matches the keyword are displayed below the Search field.
If you do not type any keyword, all Person CIs are displayed.
-
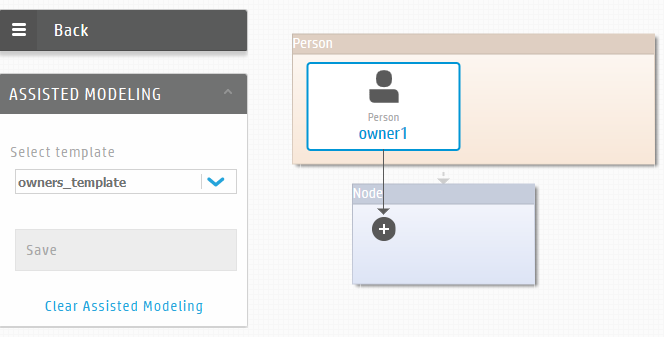
Point to the Person CI you want to relate, and then click the Add button that appears.
The Person CI is then added to the topology map.
-
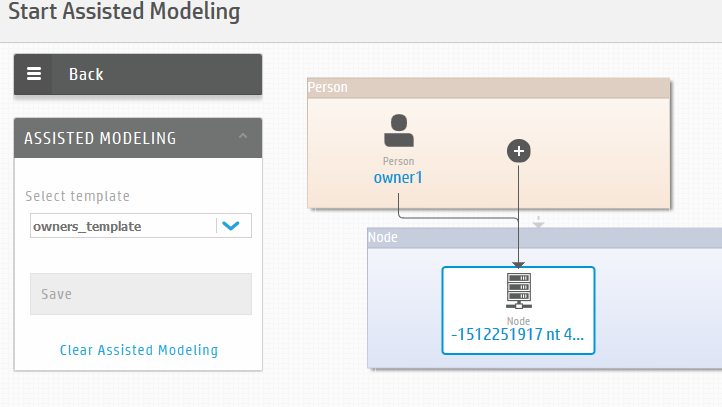
Click the Plus
icon in the Node CI Type, and then follow the similar steps (from Step 3 to Step 6) to add a Node CI. The added Node CI is automatically linked to the Person CI with the relationship that is specified in the query. The resulting topology map resembles the following.
Note From here, you can do a number of things:
- Relate more CIs to the existing CIs in the map. When you select an existing CI in the topology map, the Plus icon appears in the other CI Type. You can follow the similar steps to relate CIs.
- Edit the CI (instead of going through the Properties widget). When you select a CI, the panel that opens on the right allows you to edit the CI.
- Relate more CIs to the existing CIs in the map. When you select an existing CI in the topology map, the Plus
-
Click the Save button.
A message pops up and tells you if the template is properly saved.
You have successfully related two CIs using the UCMDB Browser. You can check the relationship between the two CIs by using one of the following methods:
- Use the Properties widget in the UCMDB Browser.
- Go to UCMDB UI > IT Universe Manager > Search CIs, search for the node you just related, and then click the Show Related CIs button.