


User interface mode
To launch the Cloud Content Capsule Installer in GUI mode for both Windows and Linux based systems, complete the following steps:
- Log on to the server as root or administrator user.
- Navigate to the directory where you have downloaded the installer.
- Double-click the installation file.
For example, the name of the installer file is CapsuleInstaller.jar
Or
- Open a command prompt window.
- Navigate to the directory that contains the installer.
- Launch the installation by entering the name of the installer:
For example, enter java -jar CapsuleInstaller.jar
The Installer will be launched.
Introduction Screen
On the Introduction screen, click Browse and navigate to the content capsule folder.
Select the Content Capsule(s), and then click Next.

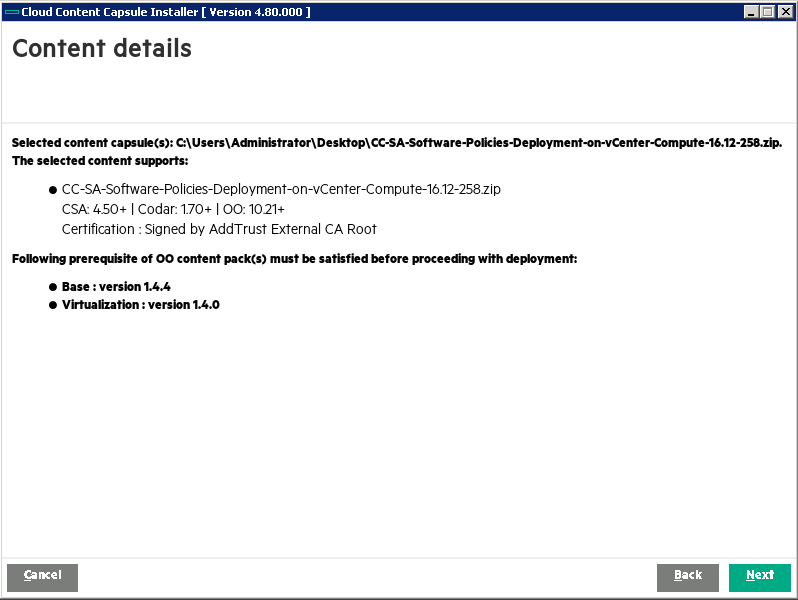
Content Details
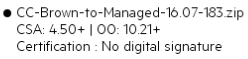
The Cloud Content Capsule Installer will display the Content details of the capsules to be installed along with certification and signature information. If you are installing the Capsule which is not signed, then the certification and signature information will display as follows:
However, if you are installing the Capsule which is signed, then the corresponding certification and signature information will be displayed as shown in the below.
The Capsule Installer will also validate the base OO contents defined in the capsule manifest by comparing the available OO jars with the base OOTB jars defined in the manifest.
- If the available base OO jar version is greater than or equal to the required base jars versions defined in the manifest, the installer will allow you to proceed with the content deployment.
- If the base OO jar version is less than the required base jars versions defined in the manifest, an error message is displayed. To proceed, you need to deploy the correct OO jar versions in OO Central and then re-run the installer.
Click Next to continue. The License Agreement screen will appear.
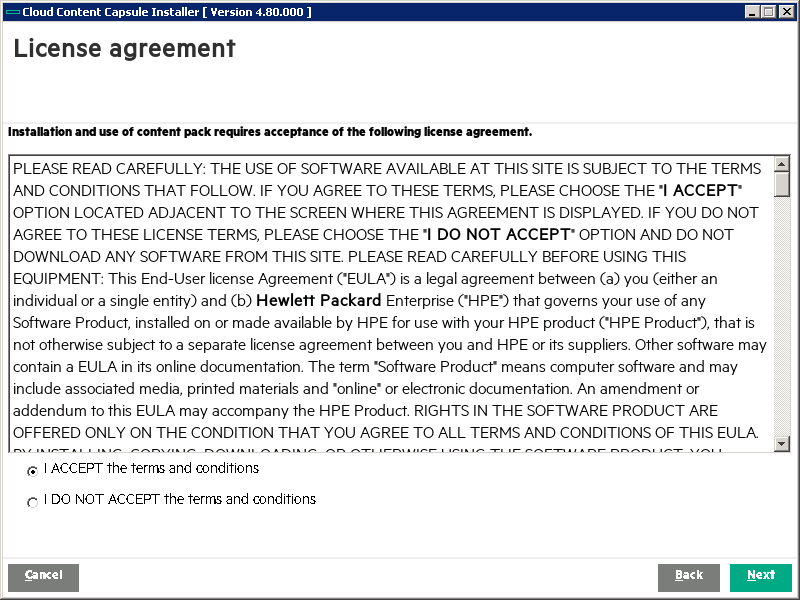
License Agreement
Read and select I ACCEPT the terms and conditions, and then click Next.
The Cloud Service Automation details screen will appear.
Cloud Service Automation Details
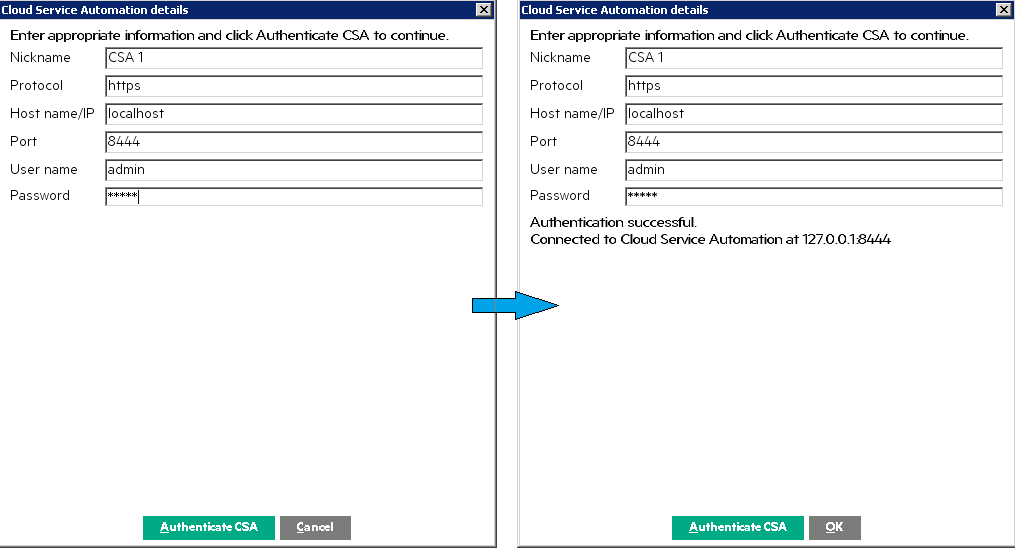
Enter required details including password in Password field, and then click Authenticate CSA. If authentication is successful, OK button will become active as shown above. Click OK, the Install options screen will appear as below.
Install Options
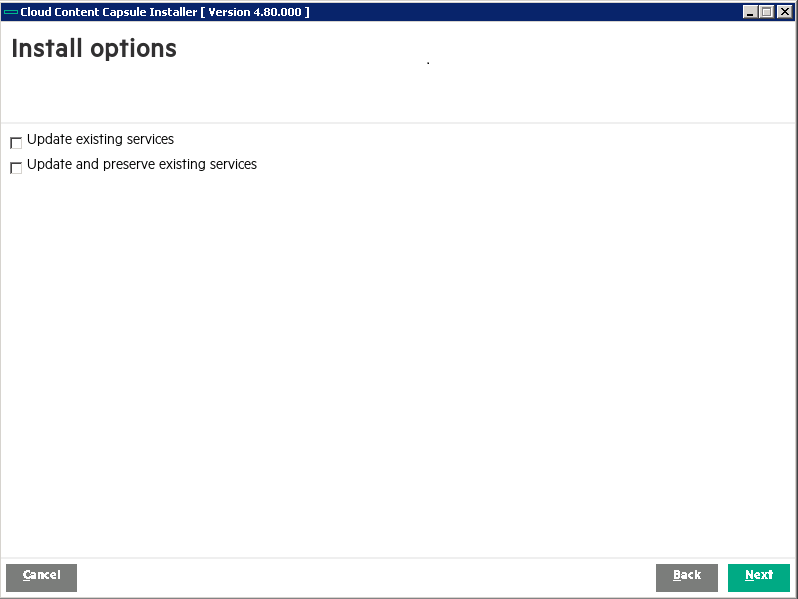
- Cloud Content Capsule Installer supports the option to Update existing services.
- If Update and preserve existing services option is selected, any existing artifacts of the same type and name will be preserved (not overwritten) and renamed. Existing references to these artifacts will automatically use the renamed artifacts. New artifacts are created from the archive.
- If both Update existing services and Update and preserve existing services options are selected, Update and preserve existing services will take the precedence.
To update services, select the content and check the Update existing services option. If service designs are already deployed on CSA, the installer updates the service designs.
<forceImportBlueprints> is defined to enable the force import option of service designs.<updatePreserveExisting> is defined to perform this task.Note The Update existing services and Update and preserve existing services options are only valid for service designs and not for OO jars.
Click Next. Pre-installation Summary screen will appear.
Pre-installation Summary
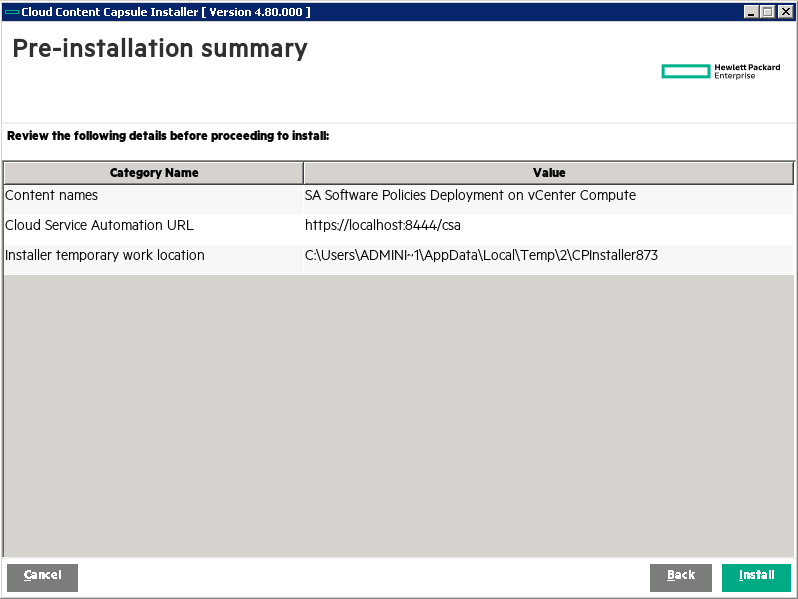
The Pre-installation summary window provides the details about the selected Content Capsule items, basic information regarding the running system, and the CSA machines designated for installation.
Click Install to begin the deployment process. The deployment process includes Call to the CSA API (/content/v1/capsule) for installation of capsule.
Installing and Configuring Content Pack(s)
The Installing and configuring content pack(s) window shows the progress of the installation.
To view the details of the installation, select the Click to show details option.
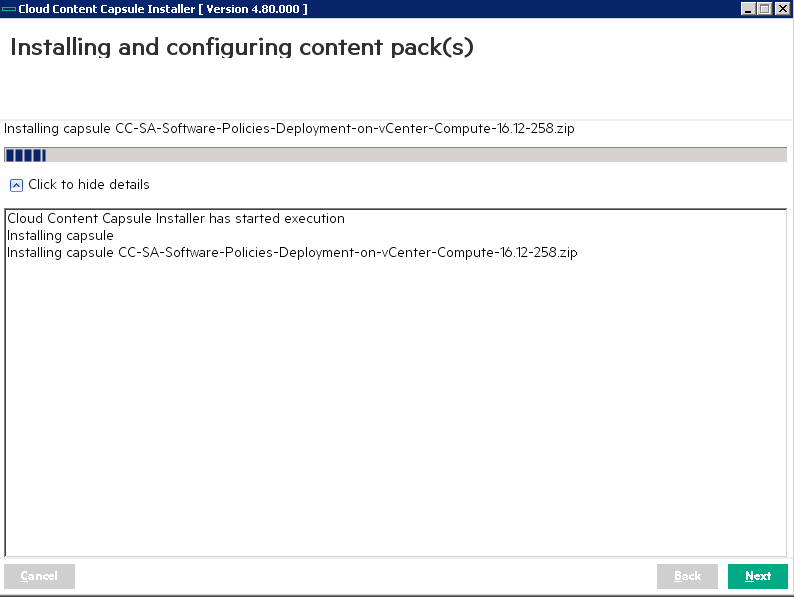
The details will show whether the rest call to the CSA install capsule API was successful or not. If successful, status code 202 is displayed for acceptance. If unsuccessful, it will display other failure code.
After the installation is completed, either successfully or with errors, click Next. The Post-installation summary screen will appear.
Post-Installation Summary
The user can view the detailed information about the installation in the installation log, which is available in the installer directory.
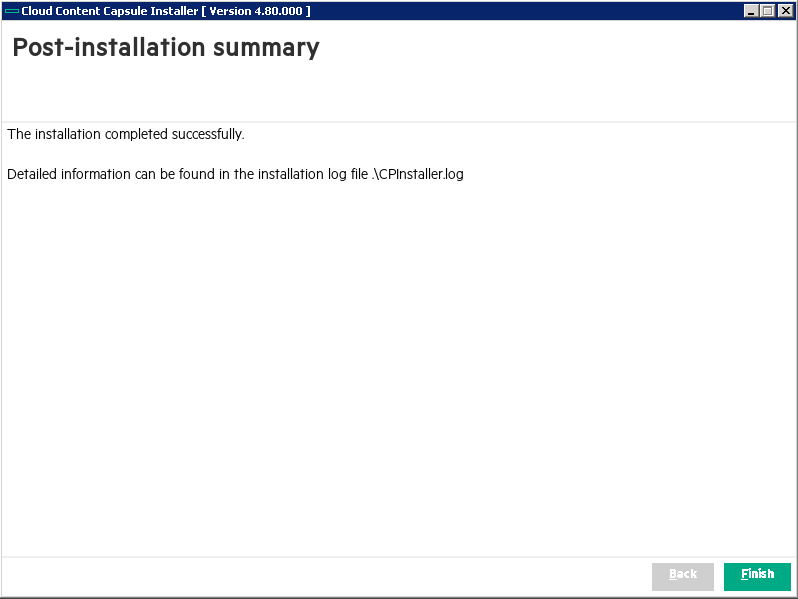
To complete the installation process, click Finish.
Post-Installation Activities
To view the details about the installation, check the CPInstaller.log file, which is available in the same directory where the installer is downloaded.
Subsequent run log will append to the end of the CPInstaller.log file with a starting timestamp pointer or marker. If the log file size is greater than 1 MB while starting the execution of CapsuleInstaller.jar, the existing log file is renamed with the latest timestamp and a new log file is created in the same location. You can use the command line JVM argument to create a log file in any specified location.
For example, java -DCCC_INSTALL_LOG_DESTINATION=<OTHER_PATH_TO_GENERATE_LOG_FILE> -jar CapsuleInstaller.jar
Codar Support
Cloud Content Capsule Installer 4.90 supports Codar content deployment.
The following enhancements are done to the installer to support Codar:
- User interface displays Codar as a product.
- Installer identifies the licenses applied on CSA or Codar and allows the user to deploy the content based on licenses.
The following table lists the details about license and content deployment:
| Base Product | Topup License Applied | Content Type in Content Pack | Content Type Expected to Deploy |
|---|---|---|---|
| CSA | CSA | CSA | CSA |
| CSA | Codar | CSA | |
| CSA | CSA+Codar | CSA and Codar | |
| CSA+Codar | CSA | CSA | |
| CSA+Codar | Codar | Codar | |
| CSA+Codar | CSA+Codar | CSA and Codar | |
| Codar | Codar | CSA | Does not allow to deploy |
| Codar | Codar | Codar | |
| Codar | CSA+Codar | Codar | |
| Codar+CSA | Codar+CSA | CSA and Codar | |
| Codar+CSA | Codar | CSA and Codar | |
| Codar+CSA | CSA | CSA |
Note In the Silent mode, the Cloud Content Capsule Installer considers only CSA content for deployment. It ignores Codar content.
Run Cloud Content Capsule Installer in CSA High Availability Cluster Mode
In a CSA High Availability setup, while installing CSA Installer, the Cloud Content Capsule Installer will be invoked on all nodes.
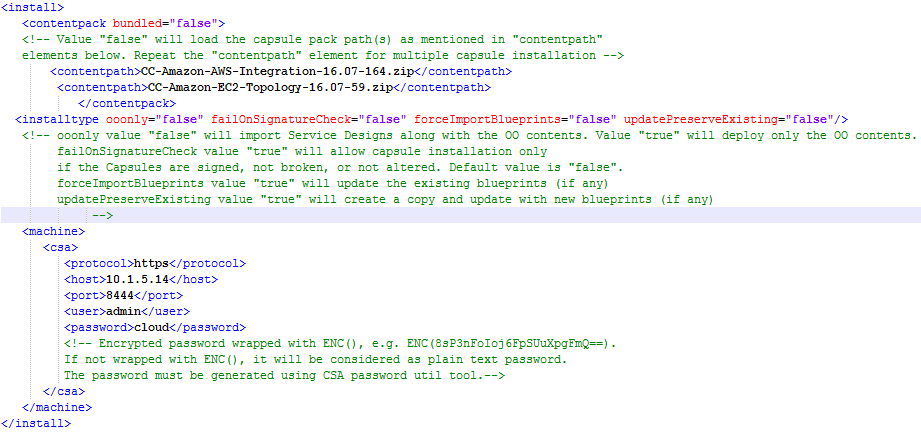
For example, if you want to explicitly install any OOTB content on an existing HA Setup, then run the Cloud Content Capsule Installer in the Standalone mode.
To do this, modify the silent_install.xml file with the host name and port of HA server host, and run the installer in each node. Also, update the OOS_URL (in csa.properties) with the HA server URL.
Verify CSA Instance Information
The Cloud Content Capsule Installer attempts to automatically detect information about the local CSA and its Operations Orchestration instances. You must provide the correct user name and password.