
Searching the Help
To search for information in the Help, type a word or phrase in the Search box. When you enter a group of words, OR is inferred. You can use Boolean operators to refine your search.
Results returned are case insensitive. However, results ranking takes case into account and assigns higher scores to case matches. Therefore, a search for "cats" followed by a search for "Cats" would return the same number of Help topics, but the order in which the topics are listed would be different.
| Search for | Example | Results |
|---|---|---|
| A single word | cat
|
Topics that contain the word "cat". You will also find its grammatical variations, such as "cats". |
|
A phrase. You can specify that the search results contain a specific phrase. |
"cat food" (quotation marks) |
Topics that contain the literal phrase "cat food" and all its grammatical variations. Without the quotation marks, the query is equivalent to specifying an OR operator, which finds topics with one of the individual words instead of the phrase. |
| Search for | Operator | Example |
|---|---|---|
|
Two or more words in the same topic |
|
|
| Either word in a topic |
|
|
| Topics that do not contain a specific word or phrase |
|
|
| Topics that contain one string and do not contain another | ^ (caret) |
cat ^ mouse
|
| A combination of search types | ( ) parentheses |
|


![]()
![]()

You can create and manage Breakdowns for a KPI according to the KPI dimensions.
- The total number of KPI Breakdowns (STUDIO and on-Demand) is limited to 5000 per dimension.
- If the calculation of a KPI or Metric ends in error, check the engine.log for a number of Breakdowns being larger than the default value. You can update the default value in $HPBA_Home\glassfish\glassfish\domains\BTOA\config\settings\engine-settings.xml to be more or less 5000. 5000 is the recommended breakdown size. Larger numbers may bring performance and stabilization issue.
Select a KPI Breakdown in the Active KPIs pane.

 About KPI Breakdowns
A KPI represents all or part of a business context (universe). The value of the KPI is calculated based on the entities (facts or dimensions) that provide information on the business context. A business context can include lots of facts or dimensions.
Example
- The Attrition Rate KPI for the whole company is composed of the attrition rates for each organization in the company, and those are composed of the attrition rates of each group in the organization. The Attrition rate KPI is calculated using the number of employees in the company and the number of employees who have left the company to pursue other interests or who have retired.
- A ticket that includes information about the department, the subject, the location of the problem, and additional information.
The administrator creates multiple levels of KPI Breakdowns depending on the definition of the KPI and on the KPI universe. These definitions provide the different levels of breakdown that enable you to obtain very detailed information.
Example The executive wants to know what is the attrition rate for the whole enterprise. If the dimensions of the Attrition Rate KPI are organizations in the enterprise, groups, and location, then the administrator can create KPI Breakdowns of the attrition rate per organization, and groups, and then per location. This would provide the executive with the capability to drill down from the attrition rate for the whole enterprise, through the organizations and sub-organizations of the enterprise to the attrition rate of the smallest organization in a specific location.
In the Studio, you can configure Breakdowns according to their dimensions. For each KPI, a list of the relevant entities is provided in a menu and the dimensions of these entities in sub-menus. KPIs can have many levels of breakdowns (limited to 6 levels).
Note When you configure the breakdown you are locking the context of the KPI for which you are creating the Breakdown because the Breakdown inherits the definitions of the KPIs (for example, the Period definition). You cannot specify a different definition for the Breakdown, and you cannot change the definition of the KPI for which you have created Breakdowns. To unlock the KPI context you must remove the Breakdown.
The list of fields that are available for breakdowns is configured in the Context Designer. By default,numeric fields are not dimensions, therefore they are not available for breakdowns. If you want them to be available for breakdown, open the Context Designer and in the Entities area, click ![]() to enable the creation of Breakdowns. For details, see Semantic Layer - Context Designer
to enable the creation of Breakdowns. For details, see Semantic Layer - Context Designer
Date fields are not available for breakdowns.
Tip
- If you change the name of a KPI that has KPI Breakdowns or the name of a Metric that has Metric Breakdowns, you must perform a new calculation to update names of their overrides. For details about overrides, see KPI and Metric Breakdown Overrides.
- The names of the KPI or Metric Breakdowns are not automatically updated after you change the name of the KPI or Metric parent even after a new calculation.You must access the Studio and manually change the names of the KPI or Metric Breakdowns to match the new parent KPI or Metric names.
Impact of changes to configurations in the Studio on the display in Dashboard and the EXPLORER tab
Changes in the STUDIO have impacts on the display in Dashboard and EXPLORER. For details, see Synchronization of Changes in the Studio with Display in the Dashboard and the EXPLORER tab.
Dimension Permissions
The administrator can provide permissions at the level of a dimension and its entities (Breakdown and its values). An end-user with such a permission can view data in the Dashboard and Explorer only at the level of the specific Breakdown. For details, see Users and Roles - Dimension Permissions
Example: An end-user should be able to view only the results of KPI\Metric Breakdowns for the EMEA location and not from other locations. That end-user should not even have the option to select other locations. In the Dashboard page, after the end-user selects to view the results by Location: EMEA, the entire page is refreshed filtered for the Location:EMEA entity.

Create a KPI Breakdown
- Click the Studio button (top right corner) to open the Studio.
- In the Active KPIs pane, perform one of the following actions:
- Select the relevant KPI, and click the Create a breakdown for the KPI
 button in the toolbar.
 - Right-click the relevant KPI, and select Breakdown in the menu that opens.
- Select the relevant KPI, and click the Create a breakdown for the KPI
- In the list of entities that opens, select the required dimension.
-
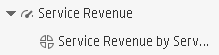
The KPI Breakdown is inserted as a child of the KPI with the Breakdown
 icon.
icon. Example A typical KPI Breakdown:
- You can add more than one breakdown.
Create a KPI Breakdown of a KPI Breakdown
- Click the Studio button (top right corner) to open the Studio.
- In the Active KPIs pane, perform one of the following actions:
- Select the relevant KPI Breakdown, and click the Create a breakdown for the KPI button in the toolbar.
- Right-click the relevant KPI Breakdown, and select Breakdown in the menu that opens.
- Select the relevant KPI Breakdown, and click the Create a breakdown for the KPI
-
In the menu that opens, select the required entity, and if relevant select the required dimension.
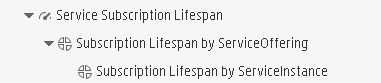
A new KPI Breakdown is inserted as a child of the KPI Breakdown in the relevant Scorecard tree with the Breakdown
icon. Example A KPI Breakdown of a KPI Breakdown:
- You can add more breakdown levels depending on the selected dimensions. The dimensions you selected in higher levels of the breakdown are disabled for lower levels.
Remove a Breakdown
To remove a Breakdown, proceed as follows:
- Click the Studio button (top right corner) to open the Studio.
- In the Active KPIs pane, perform one of the following actions:
- Select the relevant KPI Breakdown, and click the Delete the currently selected node
 button in the toolbar.
 - Right-click the relevant KPI Breakdown, and select Delete option in the menu that opens. If you select a Breakdown that has child Breakdowns, these child Breakdowns are also deleted after you confirm the action.
- Select the relevant KPI Breakdown, and click the Delete the currently selected node
- Confirm the deletion when you are prompted to do so.
Use Case - Create KPI Breakdowns and Configure Breakdown Override
For details, see Create KPI Breakdowns and Configure Breakdown Override.

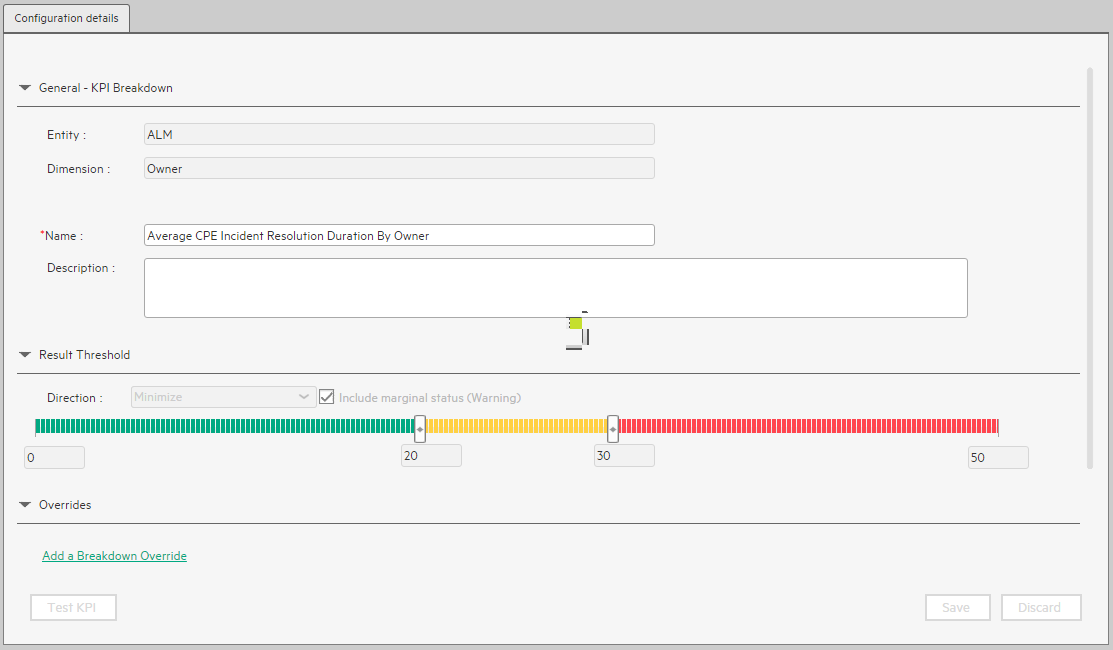
Configuration Details Tab for a KPI Breakdown
User interface elements are described below (when relevant, unlabeled elements are shown in angle brackets):
|
UI Element |
Description |
|---|---|
| General - KPI Breakdown | |
| Entity | The name of the entity you selected when creating the KPI Breakdown. |
| Dimension | The name of the dimension you selected when creating the KPI Breakdown. |
| Name
|
The name of the KPI Breakdown.
Its format is <KPI_name> by <entity_name> <dimension_name>.
|
| Description |
The description of the KPI. Limitations: The maximum number of characters is 1000. |
| Id |
The ID of the parent KPI. It is automatically assigned. This information is displayed only when in debug mode. To set the debug mode, click ADMIN > Settings > BA Settings, and in Debug Mode, select the Application Debug Mode setting. |
| Type |
The type of the parent KPI. It is automatically assigned. This information is displayed only when in debug mode. To set the debug mode, click ADMIN > Settings > BA Settings, and in Debug Mode, select the Application Debug Mode setting. |
| Result Threshold
|
|
| Direction
|
Displays the threshold direction selected for the parent KPI. For details, see KPI or Metric Configuration and Calculation Details. Example
|
| Threshold |
Displays the threshold values selected for the parent KPI. For details, see KPI or Metric Configuration and Calculation Details. Enter in each of the boxes the values to be used as a threshold. The threshold is used to assign a status to the KPI. For details on statuses, see Activate Scorecards, Perspectives, Objectives, Metrics, or KPIs Using Templates. Example As the measurement unit of the Employee Attrition rate is a percentage, the limits of the threshold are 0 and 100. You can decide that a good attrition rate for your company or group is between 0% to 5% (green), a warning rate is between 5% and 10% (yellow), and a bad rate is between 10% and 100% (red).
|
| Include marginal status (Warning) |
Displays whether you selected this option or not when you configured the parent KPI. For details, see KPI or Metric Configuration and Calculation Details. |
|
Overrides |
|
| Add a breakdown override
|
Click to open the Add a Breakdown Override dialog box. For details, see KPI and Metric Breakdown Overrides.
|
| Name |
The name of the override you just created. Its format is: |

|
Edit. Click to edit the selected override. For details, see KPI and Metric Breakdown Overrides. |
|
|
Remove. Click to delete the selected override. |
| Test KPI |
Click to test the KPI. The button is disabled for KPI Breakdowns. |
| Save | Click to save the changes. |
| Discard | Click to discard the changes you have made since the last Save operation. |

We welcome your comments!
To open the configured email client on this computer, open an email window.
Otherwise, copy the information below to a web mail client, and send this email to SW-Doc@hpe.com.
Help Topic ID:
Product:
Topic Title:
Feedback: