
Searching the Help
To search for information in the Help, type a word or phrase in the Search box. When you enter a group of words, OR is inferred. You can use Boolean operators to refine your search.
Results returned are case insensitive. However, results ranking takes case into account and assigns higher scores to case matches. Therefore, a search for "cats" followed by a search for "Cats" would return the same number of Help topics, but the order in which the topics are listed would be different.
| Search for | Example | Results |
|---|---|---|
| A single word | cat
|
Topics that contain the word "cat". You will also find its grammatical variations, such as "cats". |
|
A phrase. You can specify that the search results contain a specific phrase. |
"cat food" (quotation marks) |
Topics that contain the literal phrase "cat food" and all its grammatical variations. Without the quotation marks, the query is equivalent to specifying an OR operator, which finds topics with one of the individual words instead of the phrase. |
| Search for | Operator | Example |
|---|---|---|
|
Two or more words in the same topic |
|
|
| Either word in a topic |
|
|
| Topics that do not contain a specific word or phrase |
|
|
| Topics that contain one string and do not contain another | ^ (caret) |
cat ^ mouse
|
| A combination of search types | ( ) parentheses |
|


![]()
![]()

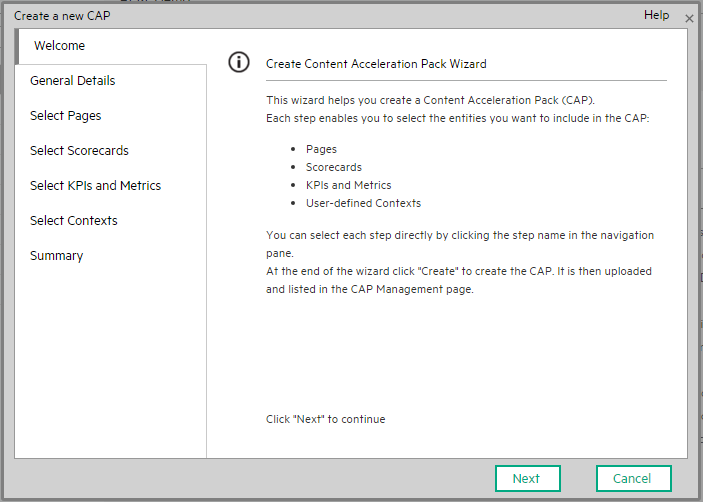
Content Acceleration Packs (CAPs) are ready-to-import packages that include Dashboard pages that display Scorecards and components, KPIs, Metrics, Contexts (universes), data (.CSV files), and documentation for the CAP.
CAPs describe typical stories that show how correct implementation of IT Business Analytics drives Performance Improvement and Cost Reduction for the IT organization. CAPs demonstrate IT Business Analytics capabilities, and helps you add basic elements that can be used to customize your Dashboard.
You can also create your own CAPs.
For details about the Content Accelerations (CAPs) contents, see Out-of-the-Box Content Acceleration Packs (CAPs).
Click Admin > Data Management > Activate CAP, and then click  to open a wizard where you can create the CAP.

 Create a CAP with the ITBA application data
You can create a new CAP that includes existing Contexts, Scorecards, KPIs and Metrics, Data (via .CSV files), and Dashboard pages.
- Prerequisite: Before creating the CAP, make sure you have already created all the relevant Scorecards, KPIs , Metrics, Pages and Contexts that you wish to include in the CAP and that they have been calculated with the expected results. If you find that some content is missing, go back and create it. Once this is done. you can start creating the CAP.
- In ITBA, click ADMIN > Data Management > Activate CAP.
-
Click the Create a new CAP
button to open the Create Content Acceleration Pack wizard where you can create the CAP.
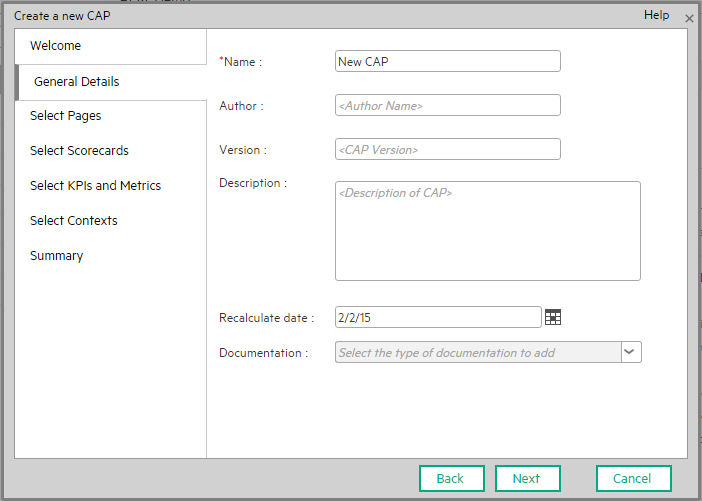
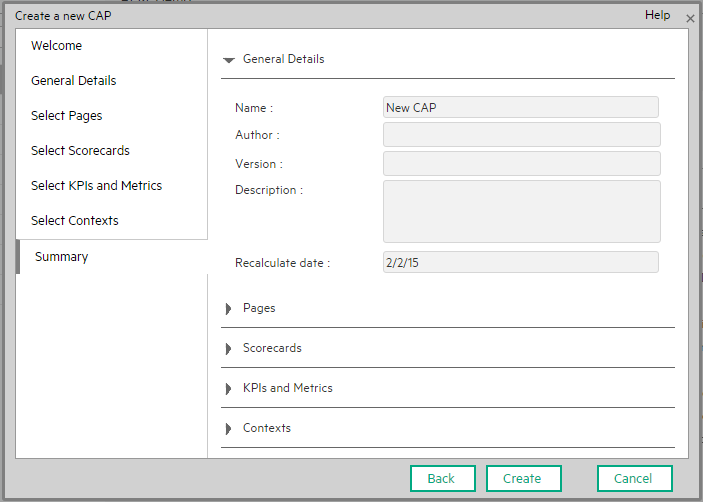
Click Next and specify the CAP name, author, version, description, recalculation date and link to any relevant document.
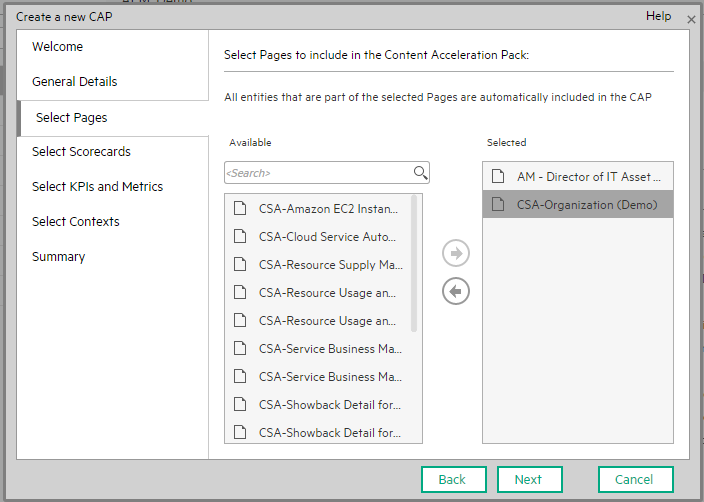
Click Next and in the Select Pages wizard page, select the pages you want to include in this CAP.
Note Once you have selected a Page, the Scorecards, KPIs, and Metrics that are included in that page and the Contexts that are assigned to the KPIs included in the page, are automatically selected. If you want to add to the CAP additional elements like Scorecards, KPIs, and more, click the Next button and modify your selection in the other pages of the wizard. Otherwise you can jump directly to the Summary wizard page.
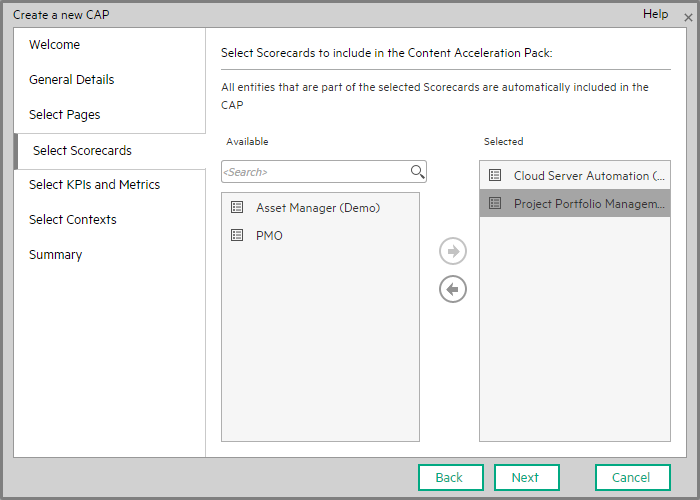
Click Next and in the Select Scorecards wizard page, select the Scorecards you want to include in this CAP.
Click Next and in the Select KPIs and Metrics wizard page, select the KPIs and Metrics you want to include in this CAP.
Click Next and in the Select Contexts wizard page, select the Contexts you want to include in this CAP.
-
Click Create to create the CAP. Once the CAP is created you cannot modify it. The new CAP is displayed in the list of CAPs in the CAP Management page. In the right pane you can see the contents of the CAP you have just created. For details, see Create Content Acceleration Packs.
Tip If you want to modify the CAP you created, create a new CAP with the modified content and then to delete the existing CAP.
The page displays the list of available CAPs.
You can then download the generated CAP to a local directory and optionally, delete the CAP from the ITBA application.

Create a new CAP wizard
User interface elements are described below (when relevant, unlabeled elements are shown in angle brackets):
| UI Element | Description |
|---|---|
| Name |
The name you want to give to the CAP. The name should be unique. The standard characters are supported: a-z,A-Z,and 0-9. The size of the name is limited to 256 characters. |
| Author |
The name of the creator of the CAP. It can be a single user, an |
| Description |
The description of the CAP. The size of the description is limited to 1000 characters. |
| Recalculate date |
The date used to recalculate all the Contexts included in the CAP during the CAP activation. Default value is one year back from the CAP upload date. You can delete the default value. If you do not specify a recalculation date, the recalculation is not performed during CAP activation. |
| Documentation |
Attached File. Select to attach a file to the CAP. Click Browse to access the location of the CAP documentation. The document can be a Microsoft Word file or a .PDF. When the CAP.ZIP file is created, the document you selected is automatically added to the .ZIP file at the level of the manifest.properties file. External Link. Select to provide a link to the external documentation for the CAP. Enter the URL of the documentation. When the CAP.ZIP file is created, the link you added is automatically added to the .ZIP file at the level of the manifest.properties file. |
Select the pages you want to include in the CAP from the Available area and click the relevant arrows to move these pages to the Selected area. The pages listed in the Available area are the pages that already exist in the application.
You can select more than one page using the Shift button.
To unselect pages, select them in the Selected area and click the relevant arrows to move the selected pages back to the Available area.
Click the relevant link in the navigation pane to access the corresponding page or click Next to open the next page of the wizard.
Limitation:
- "Shared KPIs" are KPIs that are reused in different Scorecards. If you share KPIs between CAPs by including pages that include these Scorecards, then after uploading these CAPs to another ITBA machine, and after activating the first CAP, and while activating the second CAP, the shared KPIs are removed from the Active KPIs hierarchies and from the Scorecard of the CAP that is activated first.
It is recommended to add all the Scorecards with shared KPIs to each CAP to prevent the removal of the shared KPIs during the activation of the second CAP.
The same issue may occur during the backup of a CAP with shared KPIs. - Pages from an activated CAP are listed in the Settings menu of the ITBA app installed on your device, only after they are opened in the Dashboard.
Select the Scorecards you want to include in the CAP from the Available area and click the relevant arrows to move these Scorecards to the Selected area. The Scorecards listed in the Available area are the Scorecards that already exist in the application.
You can select more than one Scorecard using the Shift button.
To unselect Scorecards, select them in the Selected area and click the relevant arrows to move the selected Scorecards back to the Available area.
Click the relevant link in the navigation pane to access the corresponding page or click Next to open the next page of the wizard.
User interface elements are described below (when relevant, unlabeled elements are shown in angle brackets):
| UI Element | Description |
|---|---|
| Available Scorecards |
The list of Scorecards that are already active in the application, that the user has permissions to view, and that have not already been manually selected, or that were not automatically selected as part of the pages that were selected in the Create CAP Wizard - Select Pages page. You can select more than one Scorecard using the |
| Selected Scorecards |
The list of Scorecards that you want to include in the CAP. Note
You can select more than one Scorecard using the |

|
Select the Scorecards you want to include in the CAP from the Available area and click the relevant arrows to move these Scorecards to the Selected area. The Scorecards listed in the Available area are the active Scorecards that already exist in the application. To unselect Scorecards, select them in the Selected area and click the relevant arrows to move the selected Scorecards back to the Available area. You can also drag and drop Scorecards from the Available area to the Selected area and vice-versa. |
| Search |
Enter a string to list all the active Scorecards with names that include the string. |
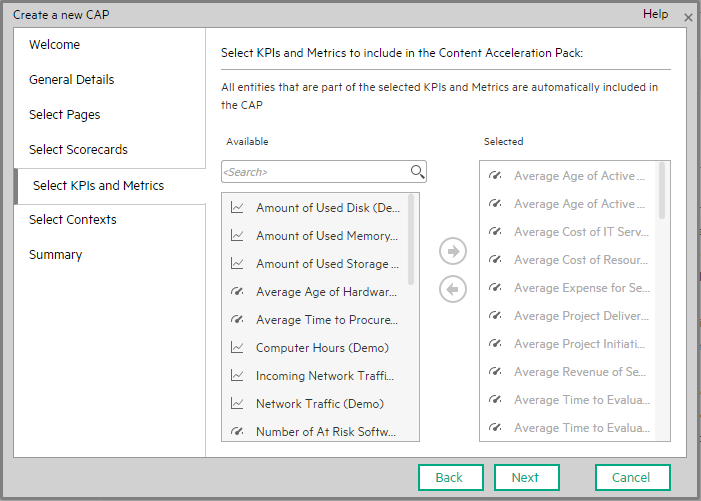
User interface elements are described below (when relevant, unlabeled elements are shown in angle brackets):
| UI Element | Description |
|---|---|
| Available |
The list of KPIs and Metrics that already exist in the application. You can select more than one KPI or Metric using the |
| Selected |
The list of KPIs and Metrics that you want to include in the CAP. KPIs or Metrics that are included in the Scorecards selected in the Create CAP Wizard - Select Scorecards page appear as read-only. They are already listed in the Selected area and you cannot deselect them. You can select more than one KPI or Metric using the |
|
|
Select the KPIs and Metrics you want to include in the CAP from the Available area and click the relevant arrows to move these KPIs and Metrics to the Selected area. The KPIs and Metrics listed in the Available area are the active KPIs and Metrics that already exist in the application. To unselect KPIs and Metrics, select them in the Selected area and click the relevant arrows to move the selected KPIs and Metrics back to the Available area. You can also drag and drop KPIs or Metrics from the Available area to the Selected area and vice-versa. |
| Search |
Enter a string to list all the active KPIs or Metrics with names that include the string. |
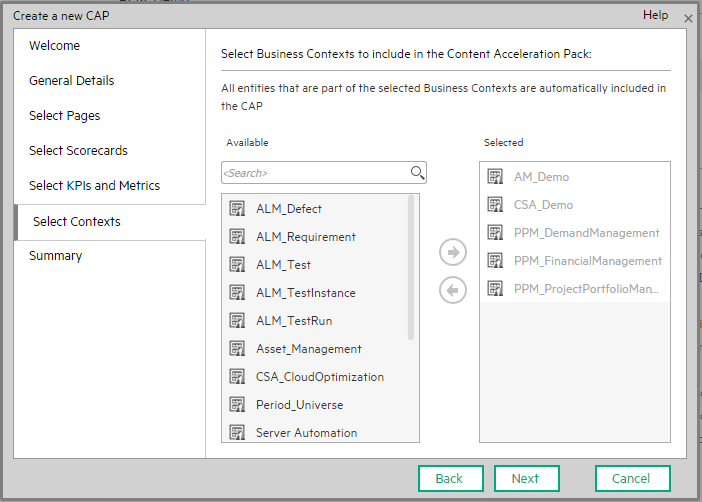
User interface elements are described below (when relevant, unlabeled elements are shown in angle brackets):
| UI Element | Description |
|---|---|
| Available |
The list of available user-defined Contexts that already exist in the application and that are not already selected. You can select more than one Context using the Recommended: CSV tables used in Contexts should have unique names across all active Content Acceleration Packs (CAPs). For details on CAPs, see Data Management - Activate CAPs. |
| Selected |
The list of Contexts that you want to include in the CAP. User-defined contexts that are related to KPIs or Metrics selected in the Create CAP Wizard - Select KPIs and Metrics Page are already pre-selected and cannot be deselected. You can select more than one Context using the |
|
|
Select the Contexts you want to include in the CAP from the Available area and click the relevant arrows to move these Contexts to the Selected area. The Contexts listed in the Available area are the Contexts that already exist in the application. To unselect Contexts, select them in the Selected area and click the relevant arrows to move the selected Contexts back to the Available area. You can also drag and drop Contexts from the Available area to the Selected area and vice-versa. |
| Search |
Enter a string to list all the active Contexts with names that include the string. |
The Summary page of the wizard displays all the details of the CAP you just configured.
Expand the areas to display the details of each area.
Click Back to change the configuration.
Click Create to create the CAP. Once the CAP is created you cannot modify it. The new CAP is displayed in the list of CAPs in the CAP Management page. For details, see Data Management - Activate CAPs.
We welcome your comments!
To open the configured email client on this computer, open an email window.
Otherwise, copy the information below to a web mail client, and send this email to SW-Doc@hpe.com.
Help Topic ID:
Product:
Topic Title:
Feedback: