


Administer > Delta Migration Tool > Delta migration methods > Method 1: Manually export/import a single UNL file
Method 1: Manually export/import a single UNL file
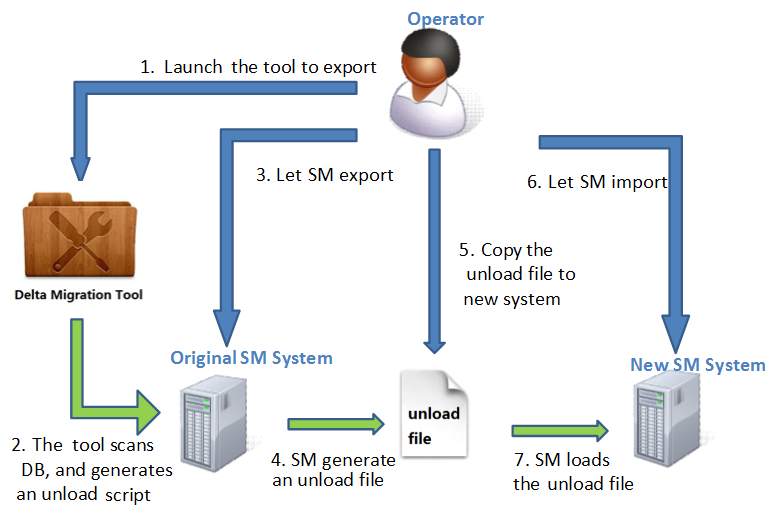
The following flow chart illustrates how the operator migrates the delta data by using method 1.
To export the delta data by using method 1, follow these steps:
- Log in to the original Service Manager system.
- Open Tailoring > ScriptLibrary. Type DeltaMigration_Export in the Name field, press Enter. And then click Execute. A welcome page appears showing the instructions for migration.
- Click Next on the welcome page and select Method 1: Manually export/import a single UNL file.
- Click Next to check the steps of using method 1.
- Click Next to specify the time range of the delta data. The delta migration tool will generate an unload script to extract all the delta data within this range.
- Click Next to generate the unload script.
- Open the generated unload script, and then run it to generate an UNL file.
- Copy the UNL file to the new system.
To import the delta data by using method 1, follow these steps:
- Log in to the new Service Manager system as an administrator.
- Disable the triggers by adding
$L.void=rtecall(“trigger”,$L.rc,0)in the format control file of login.DEFAULT file. - Log out and then log in to the new Service Manager system again.
- Open Database Manager, right click, and then select Import/Load.
- Select the UNL file that you want to import.
- Enable the triggers by removing
$L.void=rtecall(“trigger”,$L.rc,0)in the format control file of login.DEFAULT. - Log out and then log in to the new Service Manager system again.