


Generate an entity relationship diagram for a file
Applies to User Roles:
System Administrator
To generate an entity relationship diagram (ERD) for a file, follow these steps:
-
Navigate to Tailoring > SQL Utilities > Entity Relationship Diagram to open the Entity Relationship Diagram utility.
-
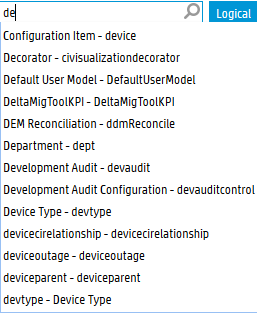
In the Table Name box at the top left corner, type the name of the file. For example, dept.
Auto Complete is available for table names. When you are typing, suggested items are automatically listed. The list items are in the following format and are sorted in alphabetical order by caption: <caption> - <table name>. Instead of typing the full table name, you can select the name from the list.
-
Press Enter, or click Search (the magnifying glass icon).
The Entity Relationship Diagram utility creates a list of related tables and fields on the left pane, and generates a dynamic ERD that shows all relationships between the current file (dept in this example) and other files.
-
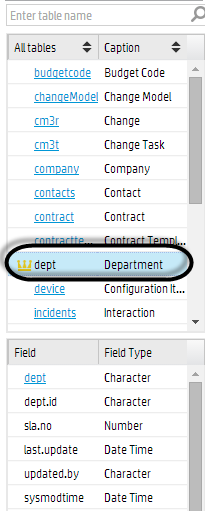
View the list of tables and fields on the left pane.
In the upper area, a list of tables that have a relationship with the current file (dept in this example) is displayed along with their captions; in the lower area, a list of fields of the current file that have a relationship with other tables is displayed along with their field types.
Tip The current file is identified by a crown icon before its name. When you select a file in the list, a crown icon appears before the name of that file. You can use the up/down arrows to sort the table list in ascending or descending order by table name or by table caption.
-
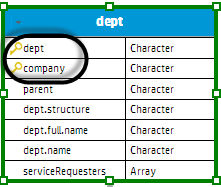
View the ERD in the right pane.
In the ERD, the current table is highlighted with a green border, and fields that are the unique key of a table have a key icon before their names.
Next, you can work with the ERD as described in the following tasks:
Interact with an entity relationship diagram
View relationships of a specific field in an entity relationship diagram