Searching the Help
To search for information in the Help, type a word or phrase in the Search box. When you enter a group of words, OR is inferred. You can use Boolean operators to refine your search.
Results returned are case insensitive. However, results ranking takes case into account and assigns higher scores to case matches. Therefore, a search for "cats" followed by a search for "Cats" would return the same number of Help topics, but the order in which the topics are listed would be different.
| Search for | Example | Results |
|---|---|---|
| A single word | cat
|
Topics that contain the word "cat". You will also find its grammatical variations, such as "cats". |
|
A phrase. You can specify that the search results contain a specific phrase. |
"cat food" (quotation marks) |
Topics that contain the literal phrase "cat food" and all its grammatical variations. Without the quotation marks, the query is equivalent to specifying an OR operator, which finds topics with one of the individual words instead of the phrase. |
| Search for | Operator | Example |
|---|---|---|
|
Two or more words in the same topic |
|
|
| Either word in a topic |
|
|
| Topics that do not contain a specific word or phrase |
|
|
| Topics that contain one string and do not contain another | ^ (caret) |
cat ^ mouse
|
| A combination of search types | ( ) parentheses |
|
- Install and configure the standalone IdM service
- Task 1: Deploy IdM on a web application server
- Task 2: Configure SSL in the IdM web application server
- Task 3: Create an IdM client trust store
- Task 4: Configure SAML SSO
- Task 5: Configure a tenant and specify the ADFS metadata URL
- Task 6: Configure the IdM service for LW-SSO compatibility
- Task 7: Specify an IdM token signing key
- Task 8: Specify an IdM user account for Service Manager
- Task 9: Replace JRE policy files for the IdM server
- Task 10: Configure the SAML keystore in IdM
- Task 11: Import the IdP public key into the IdM SAML keystore
- Task 12: Encrypt IdM passwords and keys
- Task 13: Create an empty database for IdM
- Task 14: Configure database connection in the IdM service
- Task 15: Download the IdM metadata
- Task 16: Create a trust relationship with ADFS
- Task 17: Adjust the max authentication age setting in the IdM service
- Configure SAML authentication by using the IdM admin console
Task 16: Create a trust relationship with ADFS
Currently, the only supported identity provider is Microsoft Active Directory Federation Service (ADFS) 2.0 or 3.0. ADFS helps you use single sign-on (SSO) to authenticate users to multiple, related web applications over the life of a single online session.
Once ADFS is installed and configured to authenticate users from an LDAP directory, you are ready to add the IdM metadata to ADFS to add the IdM service as a trusted relying party.
Note The screenshots in this section are from ADFS 3.0, and may slightly differ from those in ADFS 2.0.
To add the IdM service as a trusted relying party to ADFS, follow these steps:
-
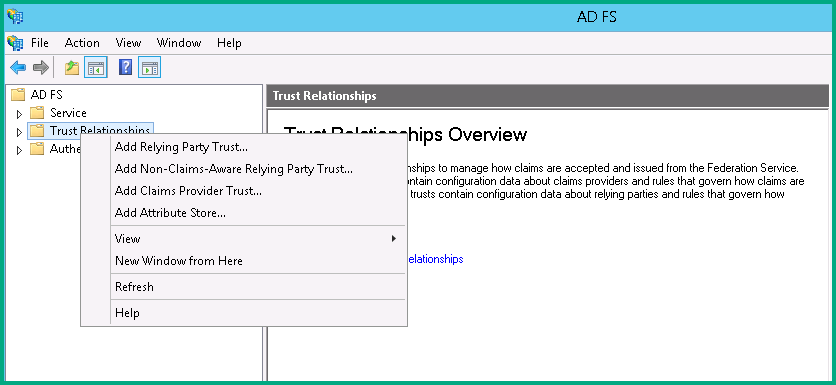
In the ADFS 3.0 Management Console, right-click Trust Relationships and then select Add Relying Party Trust.
-
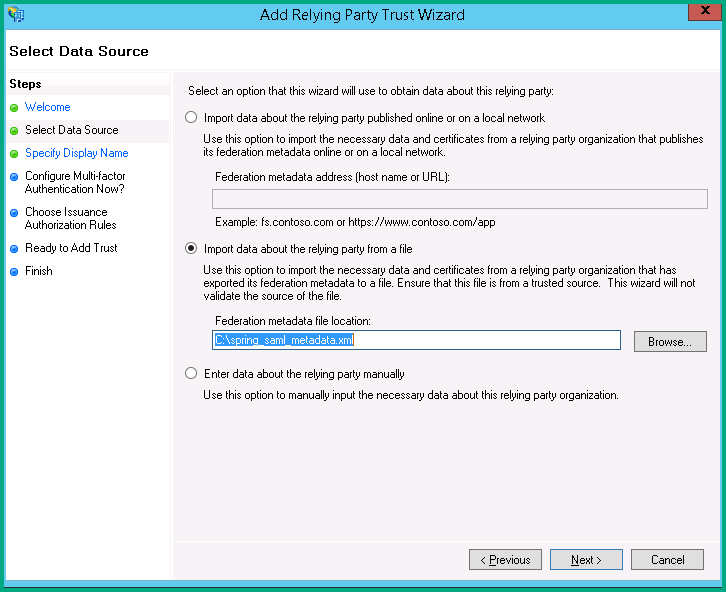
Select Import data about the relying party from a file, and then select the IdM metadata file (metadata.xml) that you created previously. Click Next.
-
The wizard may display a warning, indicating that some content of the metadata is not supported. You can safely ignore this warning.
Click OK to ignore the warning.

-
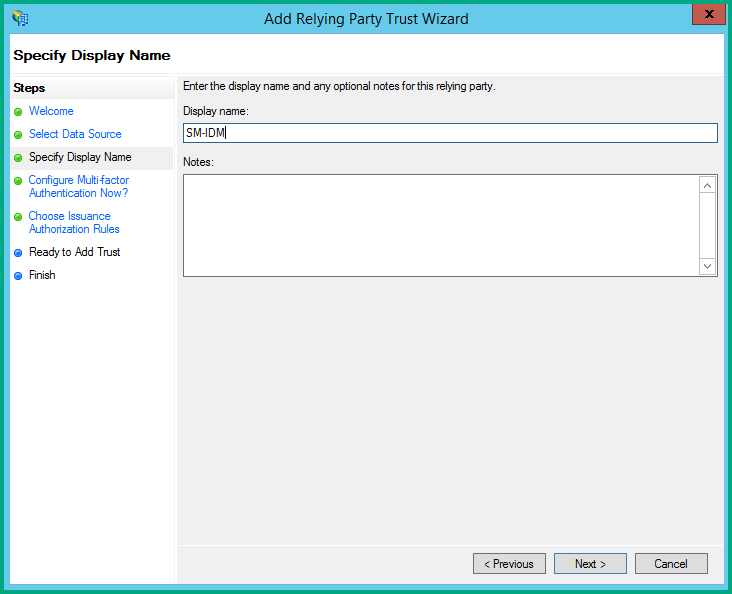
Specify a display name for the IdM service, and add optional notes. Click Next.
-
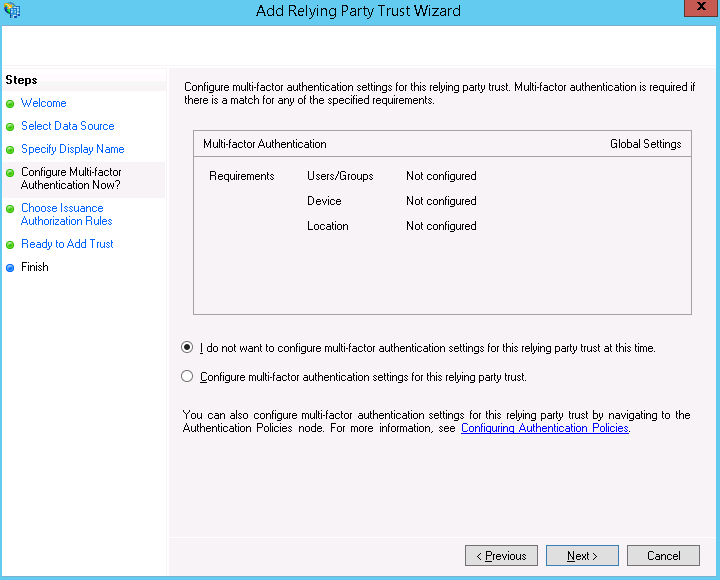
Make sure the I do not want to configure multi-factor authentication setting for this relying party trust at this time option is selected, and then click Next.
-
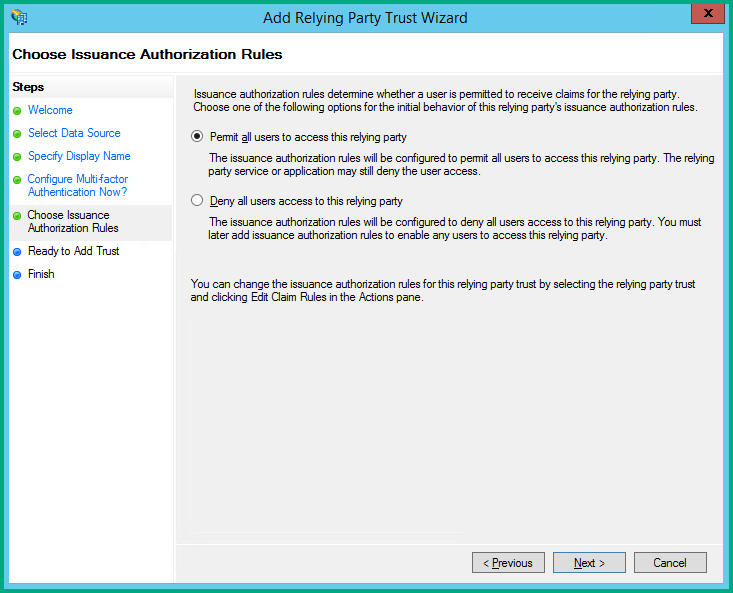
Select the Permit all users to access this relying party issuance authorization rule.
-
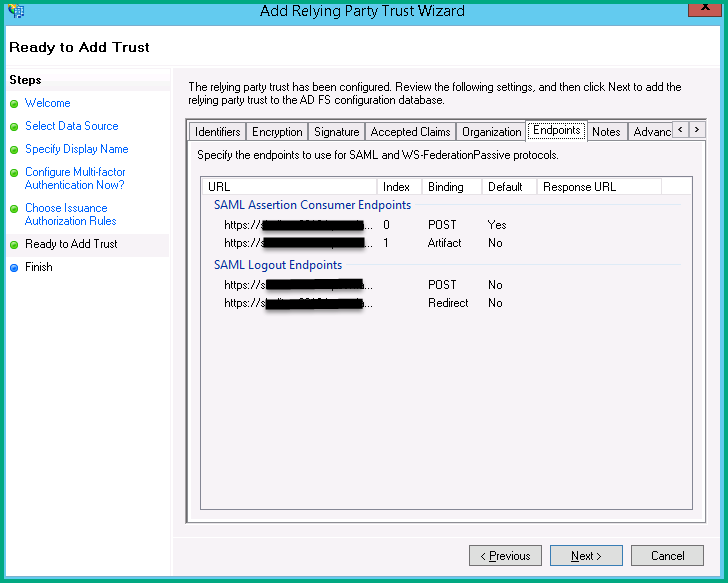
You are now in the Ready to Add Trust step. Check that the Endpoints tab contains multiple endpoint values. If not, verify that your metadata was generated with https protocol URLs.
-
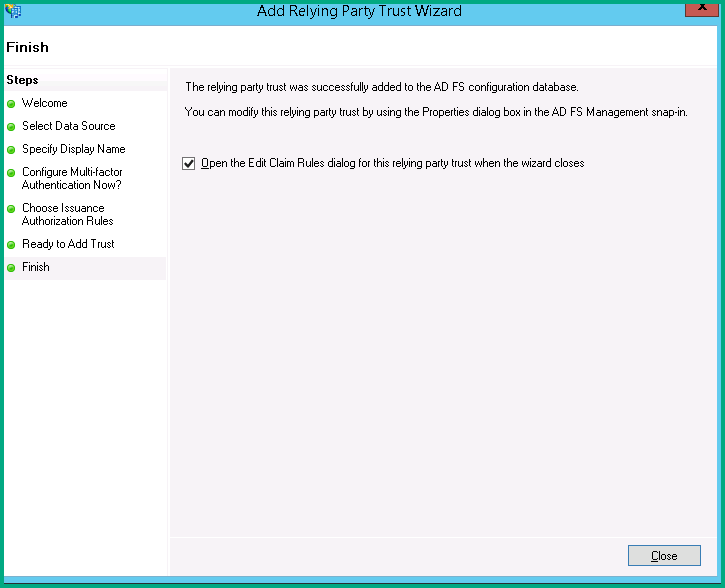
Leave the Open the Edit Claim Rules dialog checkbox selected, and click Close to close the wizard.
-
The Add Transform Claim Rule wizard opens. Perform the steps below to configure the NameID element as part of the Subject in the SAML Response message.
-
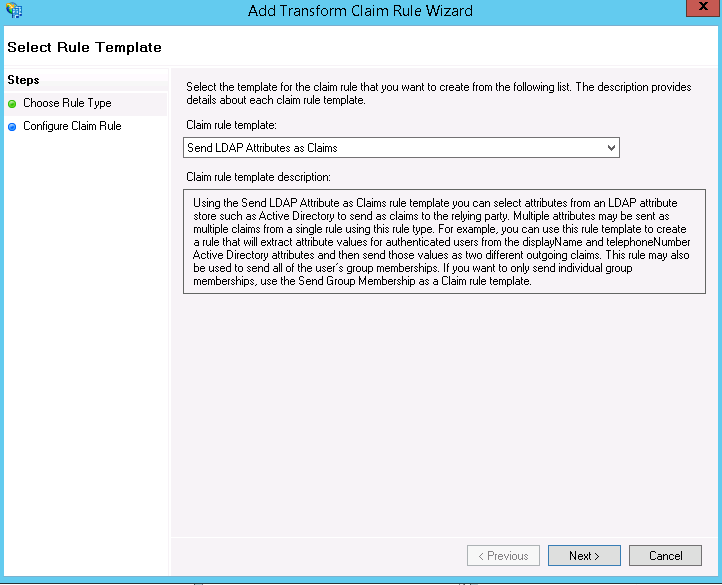
Select Add Rule, and then select Send LDAP Attributes as Claims. Click Next.
-
Specify the following fields to configure the claim rule:
- Claim rule name: enter NameID
- Attribute store: select Active Directory
- LDAP Attribute: select SAM-Account-Name
- Outgoing claim type: select Name ID

-
Close the wizard and the Apply the claim rules window.
Note In ADFS 3.0, you may need to configure the Name ID as a PassThrough claim.
-


