


Back up content data
User Role: Administrator
To ensure that you always have up-to-date copies of the data that the IDOL Server stores, we recommend that you back up the IDOL Server at regular intervals. This section describes two methods to back up and restore content data:
Enabling scheduled backup
To enable scheduled backup, follow these steps:
- Open the
<Smart Analytics Installation>\Content<x>\Content<x>.cfgfiles of the content servers. -
Locate the
[schedule]section. Insert the following lines, and then update the values if needed.[Schedule] Backup=true BackupTime=10:50 //0 means daily backups BackupInterval=0 BackupRetryAttempts=3 BackupRetryPause=5 NumberOfBackups=7 BackupDir0=C:\idolbak\content1\Backup0 BackupDir1=C:\idolbak\content1\Backup1 BackupDir2=C:\idolbak\content1\Backup2 BackupDir3=C:\idolbak\content1\Backup3 BackupDir4=C:\idolbak\content1\Backup4 BackupDir5=C:\idolbak\content1\Backup5 BackupDir6=C:\idolbak\content1\Backup6
Parameter Description BackupInterval The interval that the system creates backup files.
If you set the value of this parameter to 0, the system will automatically create a backup every 24 hours.
BackupRetryAttempts The number of retry attempts when a backup task fails. BackupRetryPause The interval (seconds) between retry attempts when a backup task fails. NumberOfBackups The number of backup files that are created by the system.
If you set the value of this parameter to 7, the first 7 backup schedules create new backup files respectively. The eighth backup operation overwrites the first backup, the nineth backup operation overwrites the second backup, and so on.
-
Restart the content servers.
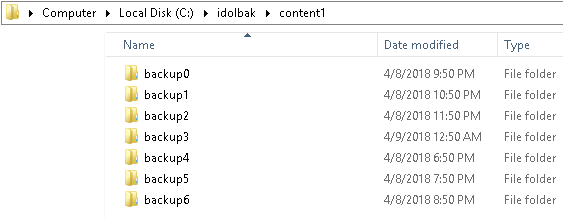
After you enable scheduled backup, the system automatically creates a series of backup files for the content server. See the following screenshot as an example:
Using commands
To back up content data, you can export all contents index and category files with commands. To do this, run the following actions by using the Smart Analytics Assistant (SAA) utility:
To export contents index:
http://<idolhost>:<MainIDOLServerIndexPort>/DREEXPORTIDX?filename=c:\BackupFolderName\File&HostDetails=true
To export category files:
http://<idolhost>:<MainIDOLServerPort>/action=CategoryExportToXML&Output=File&FileName=c:\\<folder>\\<subfolder>\\<xxx.xml>&IncludeCatID=true
Note
- By default, the port number for <
MainIDOLServerIndexPort> is 9001. - By default, the port number for
<MainIDOLServerPort>is 9000.
To restore the content data backed up using this method, you can run the following action by using Smart Analytics Assistant (SAA) utility:
http://<idolhost>:<ACIPort>/DREADD?/<path>/<xxx.idx.gz>&CreateDatabase=True
For example:
http://<idolhost>:<Content1indexport>/DREADD?/home/Jora/BackupFolderName/FilePrefix-SGDLITVM0772-10010-0.idx.gz&CreateDatabase=True
http://<idolhost>:<Level2proxyindexport>/DREADD?/home/Jora/BackupFolderName/FilePrefix-SGDLITVM0772-30010-0.idx.gz&CreateDatabase=True
http://<idolhost>:<Level2proxyindexport>/DREADD?/home/Jora/BackupFolderName/FilePrefix-SGDLITVM0772-30020-0.idx.gz&CreateDatabase=True
Note
- By default, the port number for <
Content1IndexPort> is 10011. - By default, the port number for
<Level2proxyIndexPort>is 20011.


