Use > Modeling > Modeling > Reports > Reports User Interface > Auditing Report

Auditing Report

This report displays auditing information about CIs, Relationships and many Unified Resource Manager (URM) resources.
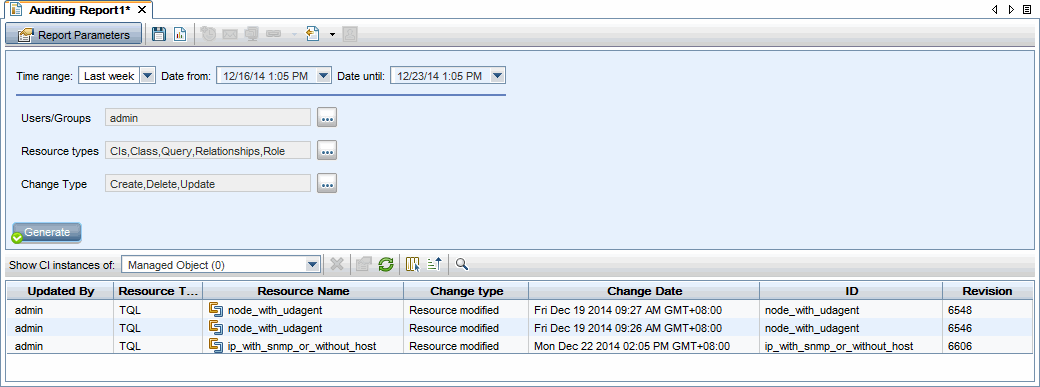
Report Example
Click thumbnail to view full size image.
To access

Select Managers > Modeling > Reports. In the Custom Reports pane, do one of the following:

  • Click Create New Report and select Auditing Report.

  • Under Administration:

    • Double-click Auditing Report.
    • Right-click Auditing Report and select Create New Report.
    • Select Auditing Report and drag it onto the right pane.

Important information
  • The report is visible only for users with Auditing permission.
  • The out-of-the-box TenantAdmin role does not have Auditing permission and cannot create Auditing reports.
  • The report supports all standard features of any custom report such as:

    • Email
    • Scheduling
    • Export (only CSV, Excel, and XML)
    • Saving the input parameters
  • Exploring changes is enabled by right-clicking a row:

    • For CIs and Relationships:

      A shortcut menu appears, including options related to CIs, such as CI History.

      Exploring shows the history within the selected time frame.

    • For URM resources:

      Exploring is used for comparing a base revision with any other changes made on the URM resources.

      Note  

      • Results cannot be retrieved after purging the history from the JMX.
      • Changes that are made by the probe through the discovery process or made through the integration points do not appear in the report output.

      Click Explore Resource. The Compare Revisions dialog opens, displaying a text area with the same Diff code as in the JMX. The XML of the current selected revision is displayed in the left panel, and users can select any other revision of the same resource to display in the right panel.

      Different colors indicate different changes as follows:

      • Green color for modified lines.
      • Red color for removed lines.
      • Yellow color for added lines.
Relevant tasks

How to Generate a Custom Report.

User interface elements are described below (unlabeled elements are shown in angle brackets):

UI Element (A-Z) Description
<Shortcut Menu> Right-click a CI in the report to access the IT Universe Manager shortcut menu. For details, see IT Universe Manager Shortcut Menu.
<Toolbar> For details, see Report Toolbar Options.
Date from Configure a start date and time for the report.
Date until Configure an end date and time for the report.
Time range

Select a time frame for the changes that you want to display. The system automatically provides the starting and ending dates in the Date from and Date until boxes.

Note If you select Custom, you can manually configure a start and end date in the Date from and Date until boxes.

Users/Groups

Click and select users and/or groups for the report.

Resource types

Click and select resource types to include in the auditing report. The available resource types are as follows:

  • CIs
  • Class
  • Customer Setting
  • Deployed Package
  • Discovery Script
  • Enrichment Rule
  • Global Setting
  • Identification Rule
  • Impact Rule
  • Integration Point
  • Query
  • Relationships
  • Resource Group
  • Resource Tenants Association
  • Role
  • Role Assignment
  • Scheduled Report
  • System Type
  • User
  • Users Group
  • View
Change Type

Click and select the change type for the report. The available types are as follows:

  • Create
  • Delete
  • Update

Generate Report. Enables you to generate the selected report.

Note This button appears disabled prior to defining the report parameters.

<Generated report>

Displays the generated report.

The generated report contains the following columns:

  • Updated By: The user name of the administrator who updated the item.
  • Resource Type: Resource type for the item.
  • Resource Name: Resource name for the item.
  • Change Type: Change type for the item.
  • Change Date: Date and time when the item was changed.
  • ID: Identifier for the item.
  • Revision: Revision number for the item.