
Searching the Help
To search for information in the Help, type a word or phrase in the Search box. When you enter a group of words, OR is inferred. You can use Boolean operators to refine your search.
Results returned are case insensitive. However, results ranking takes case into account and assigns higher scores to case matches. Therefore, a search for "cats" followed by a search for "Cats" would return the same number of Help topics, but the order in which the topics are listed would be different.
| Search for | Example | Results |
|---|---|---|
| A single word | cat
|
Topics that contain the word "cat". You will also find its grammatical variations, such as "cats". |
|
A phrase. You can specify that the search results contain a specific phrase. |
"cat food" (quotation marks) |
Topics that contain the literal phrase "cat food" and all its grammatical variations. Without the quotation marks, the query is equivalent to specifying an OR operator, which finds topics with one of the individual words instead of the phrase. |
| Search for | Operator | Example |
|---|---|---|
|
Two or more words in the same topic |
|
|
| Either word in a topic |
|
|
| Topics that do not contain a specific word or phrase |
|
|
| Topics that contain one string and do not contain another | ^ (caret) |
cat ^ mouse
|
| A combination of search types | ( ) parentheses |
|


![]()
![]()

- System Administrator
- Logon
- Splash Screen
- Launch or Stop the Business Analytics Application
- Configure CAC
- Licenses
- About Users, Roles, Resources, Permissions, LDAP, and Dimension Permissions
- Users and Roles - User Management
- Users and Roles - Role Management
- Users and Roles - Resource Management
- Users and Roles - LDAP Management
- LDAP in BusinessObjects
- Users and Roles - Dimension Permissions
- Settings
- Settings - Data Warehouse
- Settings - Foundation
- Settings - Single Sign On
- Settings - Pages
- Settings - Website
- Settings - Dashboard Settings
- Settings - Engine Settings
- Settings - Score Thresholds
- Settings - BA Settings
- Apache Web Server
- Security Recommendations
- LW-SSO
- Cryptography
- Set Up Java
- Localization and Globalization
- Xcelsius Reports
- Browsers and BOE Reports
- Notifications - Entity Report
- External Tools
- Migrate from a Development or Test Environment to Production
- Vertica Back Up
- Business Analytics Back Up
- Disaster and Recovery
Configure CAC
This section explains how to configure Common Access Card (CAC) (Smart Card/PKI Authentication) on ITBA.

 Configure CAC
-
Preparation.
-
To prepare the root Certificate Authority (CA) certificate and client certificates for the ITBA server, copy the root CA certificate to the following path in the ITBA server:
$HPBA_HOME/conf/keysIf your certificate is DER binary format, please convert the binary certificate file into PEM format using one of the following methods:
-
Convert DER to PEM using: $ openssl x509 -inform der -in certificate.cer -out certificate.pem
- Convert it with the online tool: https://www.sslshopper.com/ssl-converter.html
Note Apache uses PEM format certificates, so that the root certificate provided by the customer must obey this rule.
-
-
Add users in ITBA (ADMIN >Users and Roles-> User Management).
The logon name should align with the CAC setting item certificateFieldExtractDN. For example, if you have set certificateFieldExtractDN as SUBJECT.E, the logon name should be the email address of the client certificate.
Parameter: certificateFieldExtractDN
Default: Subject.CN
This parameter specifies a unique attribute in the user certificate that the web application server extracts as a Distinguished Name (DN) and sends to the SM server as the user's user name. You can specify a Subject attribute in this parameter. By default, the Subject CN attribute (the certificate owner’s Common Name) is extracted as the user's DN. You can also specify this parameter as one of the following Subject Alternative Name (SAN) sub-attributes: RFC822 Name, and Other Name (see the figure below).
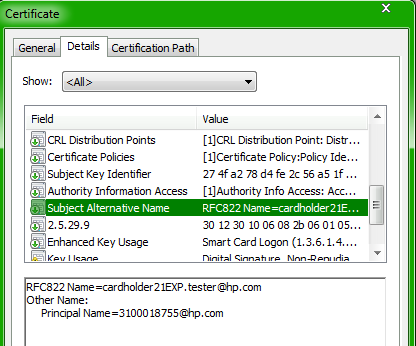
-
If using a sub-attribute of Other Name, specify the parameter in this format: SAN_OTHERNAME.<Alias>, where <Alias> is a name that you specify for the sub-attribute. The user certificate's SAN Other Name value that binds to the OID will be extracted as the DN.
Example: If you use Other Name's Principal Name sub-attribute (also known as UPN, which should be mapped to OID "1.3.6.1.4.1.311.20.2.3"), you can specify the following value (where PrincipalName is an alias for Principal Name):
certificateFieldExtractDN=SAN_OTHERNAME.PrincipalNameTip As a best practice, avoid including white spaces in alias names. For example, for Principal Name, specify PrincipalName or PN as an alias.
Note You will next specify a mapping between the alias and object ID (OID) of the specified sub-attribute of SAN Other Name, using the certificateOIDMapping parameter.
-
If using the RFC822 Name sub-attribute, specify the following value:
certificateFieldExtractDN=SAN.RFC822
Examples:
certificateFieldExtractDN=Subject.E
certificateFieldExtractDN=SAN_OTHERNAME.PrincipalNameParameter: certificateOIDMapping
This parameter specifies a mapping between the <Alias> you specified in certificateFieldExtractDN and an OID. Specify the parameter in this format: <Alias>:<OID>.
Example: For SAN's Principal Name, specify this mapping:
certificateOIDMapping=PrincipalName:1.3.6.1.4.1.311.20.2.3 -
-
-
Configure the root CA in the ITBA Server.
Edit the $HPBA_HOME/webserver/httpd/conf/extra/httpd-ssl.confconfiguration file. Uncomment the following lines to enable SSL client authentication:
#SSLCACertificateFile "../../conf/keys/ca.cer"
#JkOptions +ForwardSSLCertChain
#<Location /bsf >
#       SSLVerifyClient optional
#       SSLVerifyDepth  10
#       SSLOptions +StdEnvVars +ExportCertData
#</Location>
The values can vary depending on your CA certificate file name and verification depth.
Make sure the CA certificate (ca.cer file) is located in the $HPBA_HOME/conf/keys directory.
-
Enable CAC mode in the ITBA Server.
In the ITBA server, edit the $HPBA_HOME/glassfish/glassfish/domains/BTOA/config/conf/cac.properties property file.
-
Enable CAC mode.
Mark the following flag as true to enable CAC. The default value is false.
isCACEnabled=true -
Set the Distinguished Name (DN) field for certificate extraction.
The following flag is used to indicate which field is "login name".
certificateFieldExtractDN=<certificate_standard>where <certificate_standard> can be either SUBJECT.E or SUBJECT.CN. The element after the dot must be aligned with the certificate standard.
See the following example: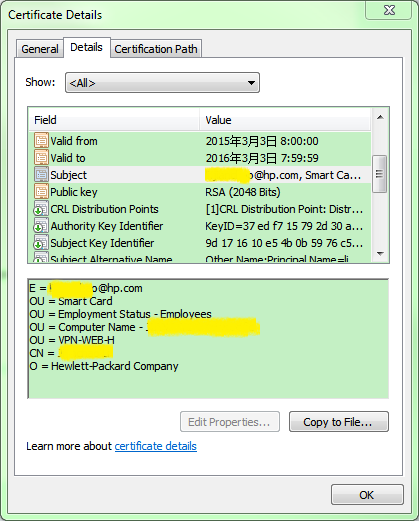
-
Choose validation strategy.
For example: validationStrategy=<validation_strategy>
where <validation_strategy> can be:
- LOCAL_CRL. Local Certificate Revocation Location (CRL) validation. Then make sure that CRLStoreLocation is set as shown below.
- ONLINE_CRL. Online CRL validation. Then make sure that CRLDownloadURL is set as shown below.
- OCSP . OCSP validation. Then make sure that OCSPResponderURL is set as shown below. OCSP stands for Online Certificate Status Protocol.
- CER_TYPE. Smart card certificate validation.
- EXPIRATION. Certificate expiration validation.
Note: The validation strategy can be a combination of these values and the delimiters are commas. For example: validationStrategy=LOCAL_CRL, EXPIRATION.
For security , you must choose, at least, one of these 3 options: LOCAL_CRL, ONLINE_CRL or OCSP.
-
Set the root certificate path.
RootCertPath=<root_certificate_path>where <root_certificate_path> is used for validation strategy. It can be: LOCAL_CRL, ONLINE_CRL, or OCSP.
-
Set the store path.
CRLStoreLocation=LOCAL_CRLThis is used for validation strategy.
-
Set the online CRL URL Path.
CRLDownloadURL=ONLINE_CRLThis is used for validation strategy.
-
Set the OCSP Responder URL.
OCSPResponderURL=OCSPThis is used for validation strategy.
-
Set the OCSP Server cert.
OCSPServerCertPath=OCSPThis is used for validation strategy. If the value is not set, the OCSP Server cert used RootCert instead.
-
-
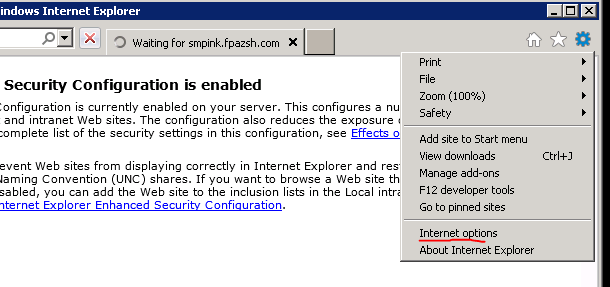
Install the client certificate in the client browser.
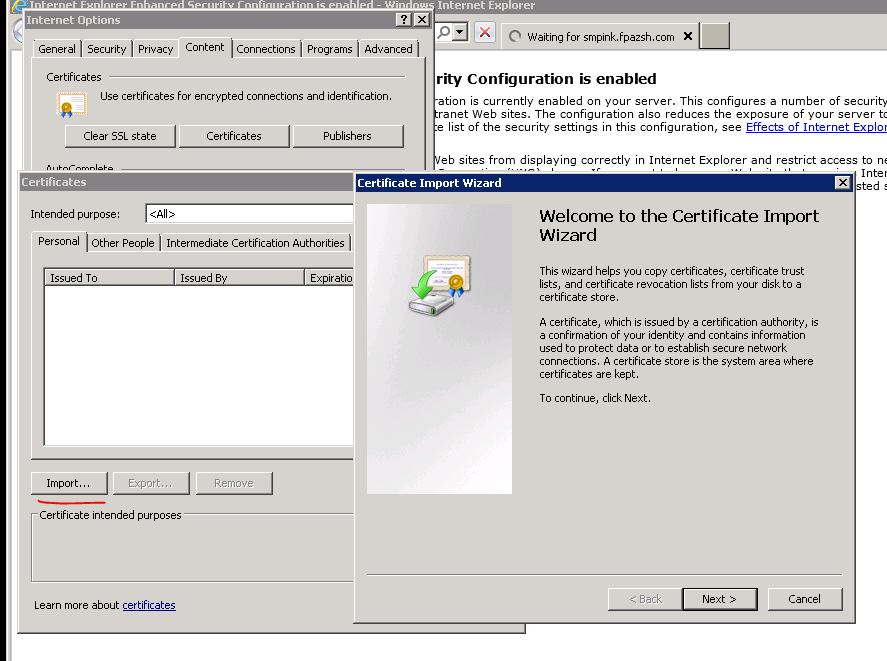
In the client browser, select Internet Options.
Click Content > Certificates:
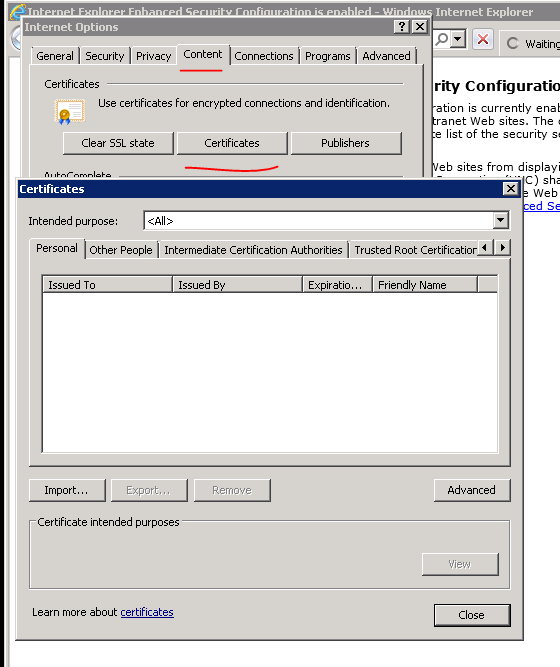
Click Import:
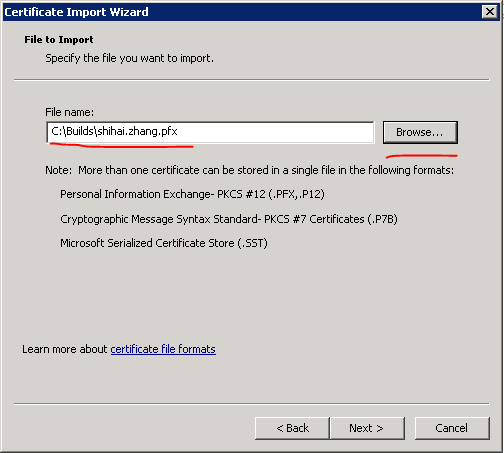
Enter the path to the file you want to import:
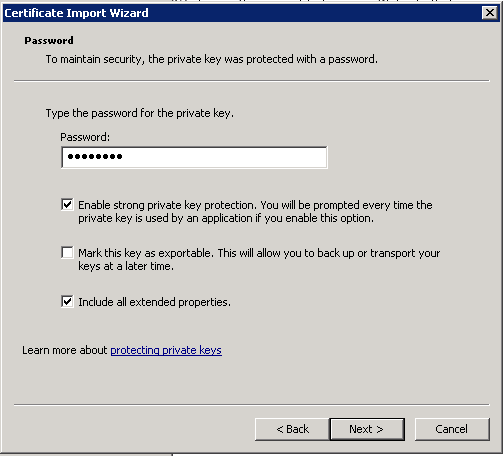
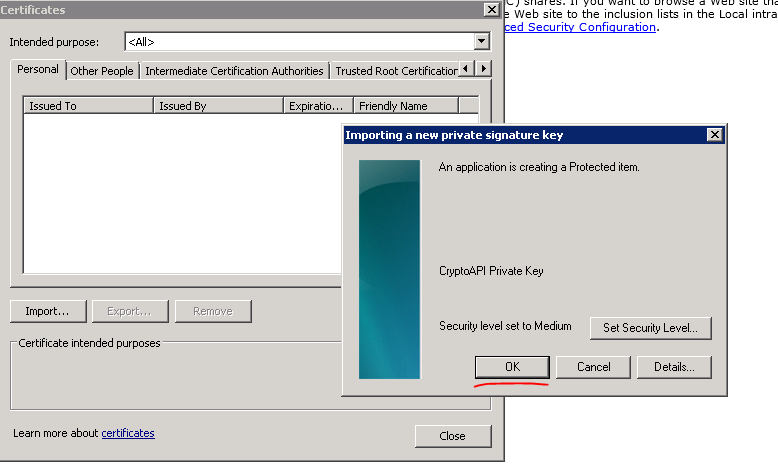
Enter the password:
Click Next.
Click Next.
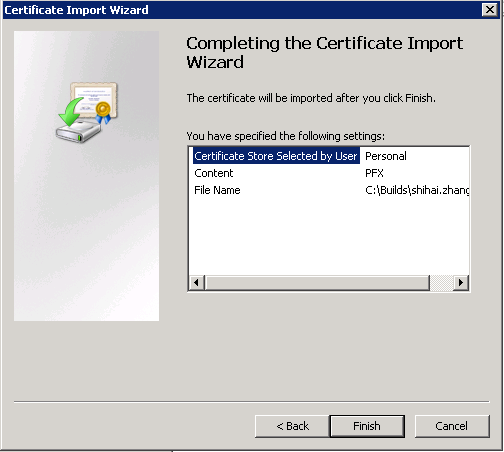
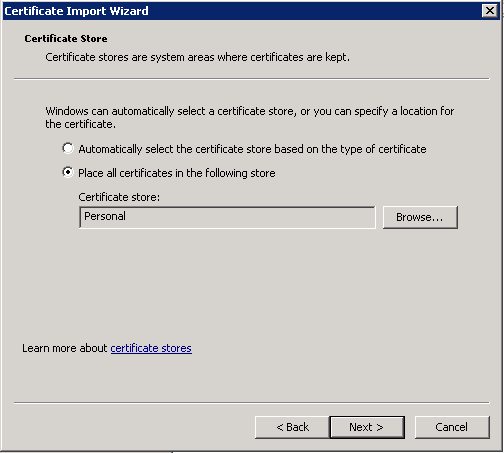
Click Next.
Click Next.
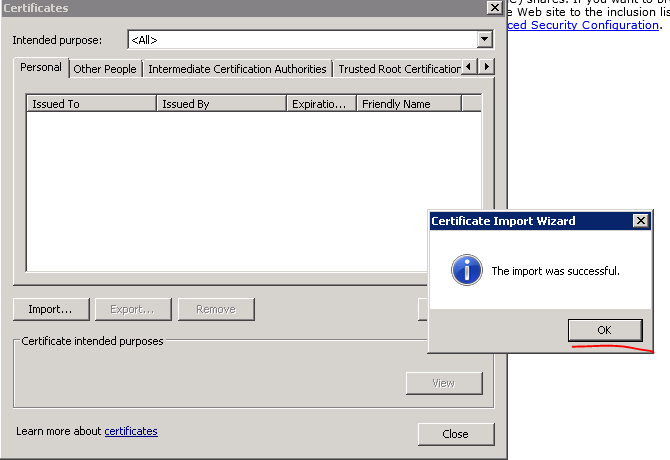
Click Next.
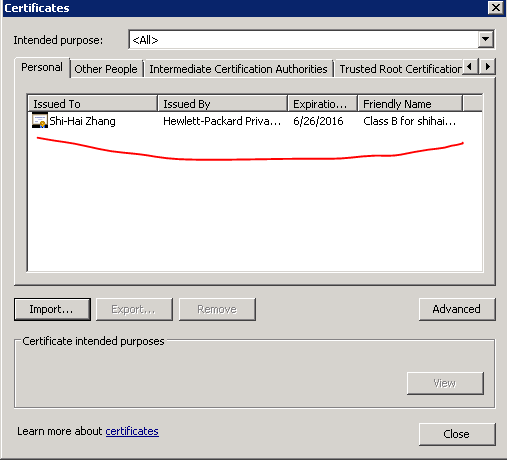
-
Restart the ITBA server.
When performing a logon, the end user is now required to provide CAC credentials before accessing the ITBA application from a browser.
Note that if you work with Chrome or Firefox you must make sure to follow a similar procedure for these browsers.
Note The $HPBA_HOME/glassfish/glassfish/domains/BTOA/logs/cac.log is issued when the user certification is revoked.
Customize the content of the splash screen.
For details, see Splash Screen.
Example of a CAC Configuration
Precondition:
-
Certification files:
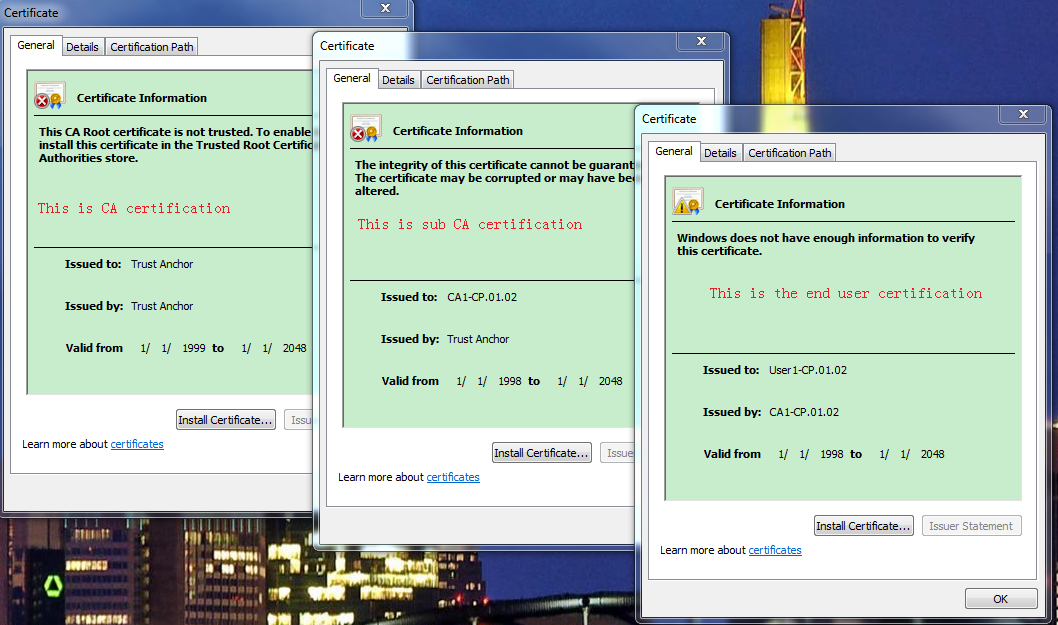
We have the following certification files.

where:
- Trust Anchor CP.01.01.crt: The CA certification.
- Trust Anchor CRL CP.01.01.crl: The certification revocation list by CA certification.
- Intermediate Certificate CP.01.02.crt: The sub CA certification, which is issued by above CA.
- Intermediate CRL CP.01.02.crl: The certification revocation list by the sub CA certification.
- End Certificate CP.01.02.p12: The end user certification, which is issued by the sub CA certification. If the end user certification is issued by CA certification, the sub certification is not needed.
-
Relations: The end user is issued by sub CA, sub CA is issued by CA.
-
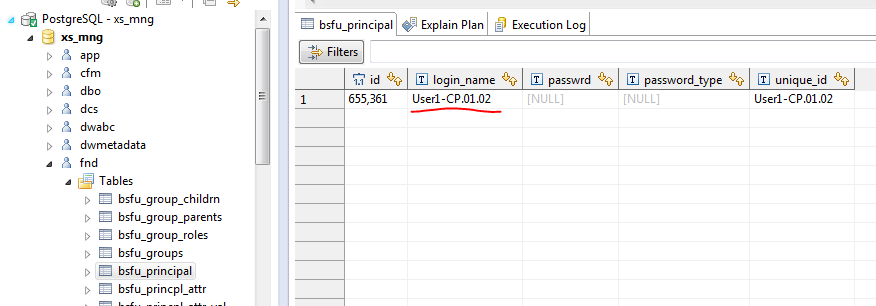
End User Certification:
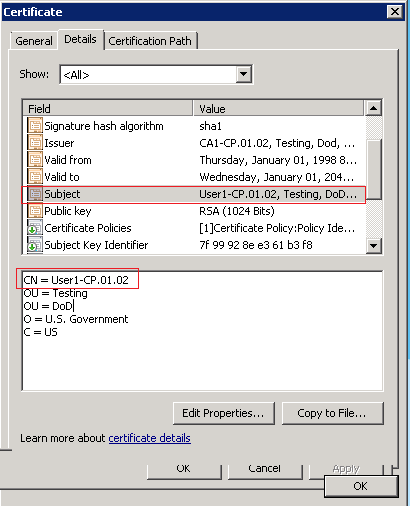
Note The SUBJECT.CN for the end user certification is : User1-CP.01.02. It is the logon name in this example, so make sure you have such a logon user in already in the ITBA application.
-
End User certification details:
-
ITBA application logon user:
-
Configure CA certification
On the ITBA application server:
-
Copy the above certification files to $HPBA_HOME/conf/keys.
-
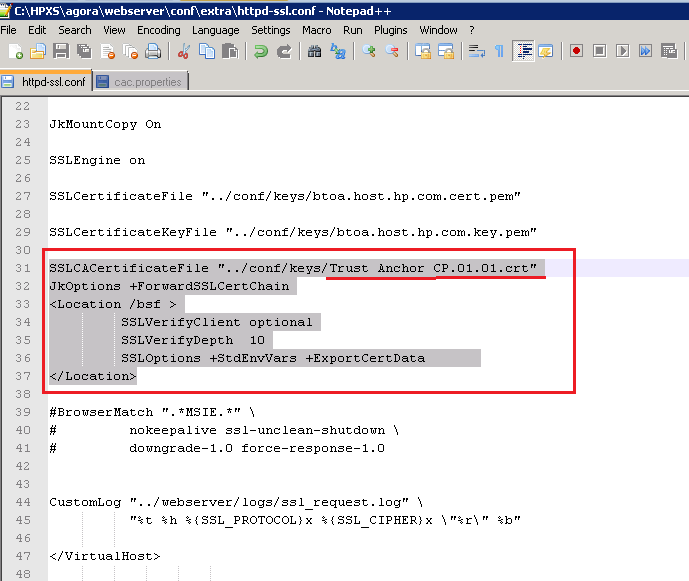
Edit the $HPBA_HOME/webserver/httpd/conf/extra/httpd-ssl.conf configuration file, as shown below.
-
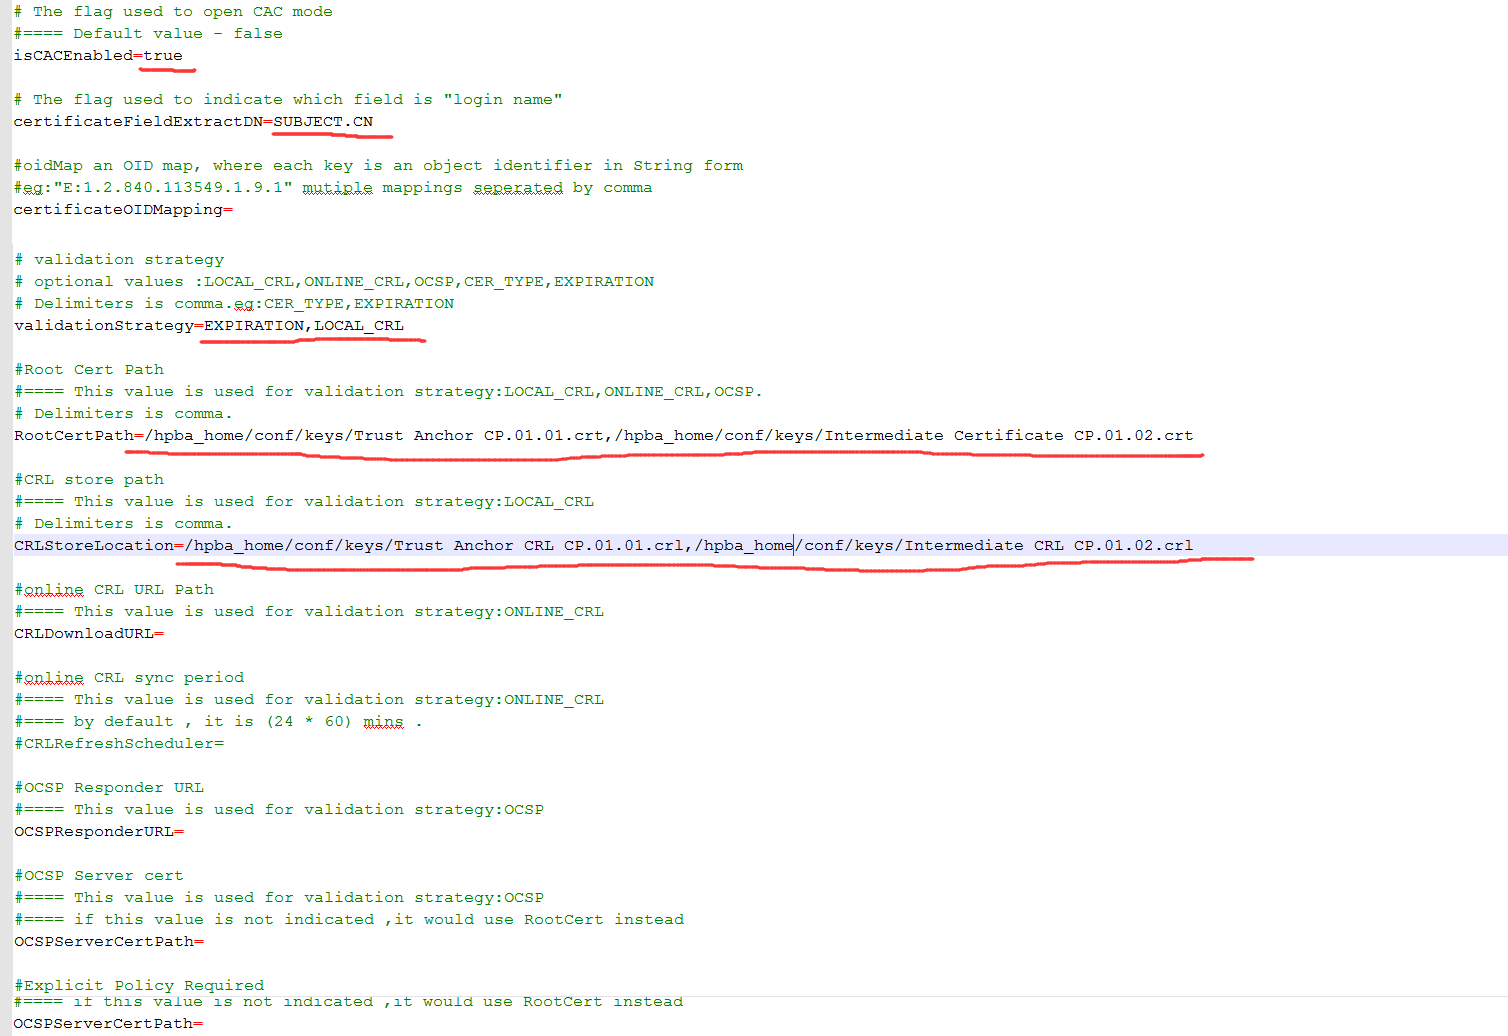
Enable the CAC mode:
Edit the $HPBA_HOME/glassfish/glassfish/domains/BTOA/config/conf/cac.properties property file, as shown below:
- Restart the ITBA service.
-
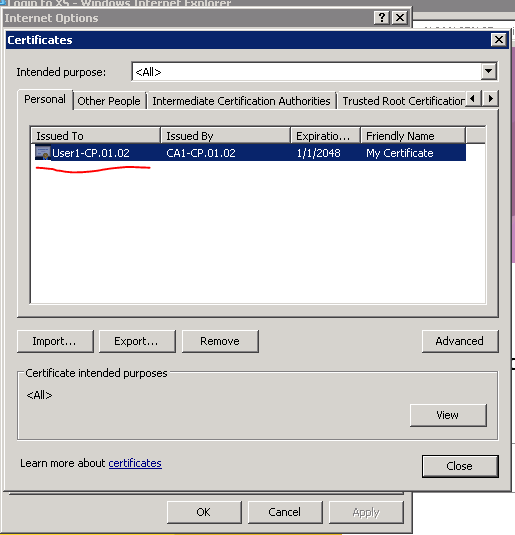
Install the End Certificate CP.01.02.p12 certification to your browser according to the steps that mentioned above:
-
Import the Intermediate Certificate CP.01.02.crt to the Intermediate Certification Authorities on your browser.
-
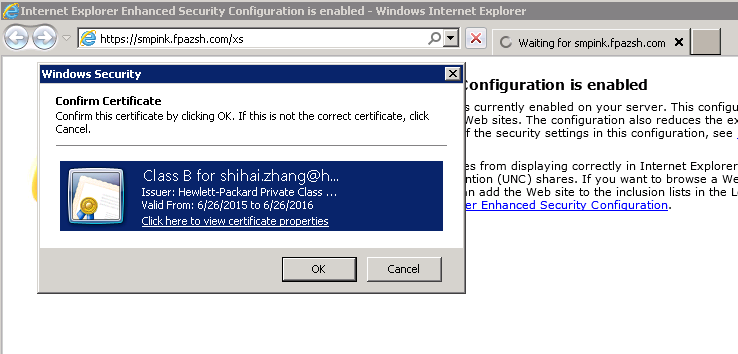
You can now log on to the ITBA application using the end user certification via CAC. The logon screen will look as follows:

Troubleshooting
If the user fails to log on, check the following log files to find the reason why.
-
$HPBA_Home/webserver/httpd/logs/error.log
-
$HPBA_Home/glassfish/glassfish/domains/BTOA/logs/cac.log
-
$HPBA_Home/glassfish/glassfish/domains/BTOA/logs/aui.log
We welcome your comments!
To open the configured email client on this computer, open an email window.
Otherwise, copy the information below to a web mail client, and send this email to SW-Doc@hpe.com.
Help Topic ID:
Product:
Topic Title:
Feedback: