


The best way to develop and debug Groovy scripts is by using the Groovy console.
Installation
To prepare your environment for developing Groovy scripts:
-
Install Java.
Groovy requires Java version 1.4 or higher. If not already installed, get the latest Java distribution from the following URL:
Run the installer and set the environment variable
JAVA_HOME. On Windows, follow these steps:-
Open the Control Panel, and go to section System and Security > System.
-
Click Advanced System Settings. The System Properties dialog opens.
-
Click the Environment Variables button. The Environment Variables dialog opens.
-
Click New... underneath the User variables box and add a variable
JAVA_HOMEand assign the path where Java is installed as its value. -
Select the variable
%Path%in the System variables box, click Edit... and add the variable%JAVA_HOME%to the path.
-
-
To install the Groovy console, obtain the installer for your operating system from the download page at the official Groovy website at the following URL:
By default, the installer adds the environment variable
GROOVY_HOMEholding the installation path to your system and adds the path to the binaries to your path. In the rest of this section,%GROOVY_HOME%is used to denote the installation path.Note The installer has had some issues with spaces in the installation path. HPE recommends installing the console in a directory without spaces in the path.
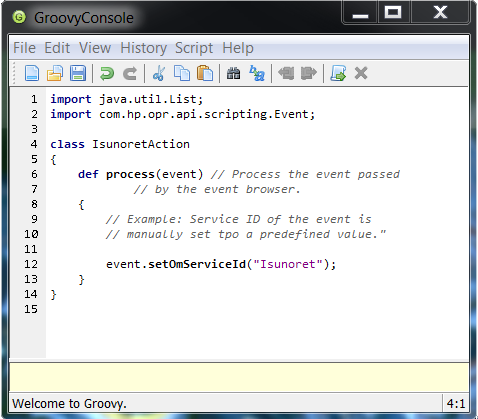
The Groovy Console looks like the following figure:
-
When running the Groovy console on a server other than the OMi Data Processing Server or Gateway Server you must copy the platform libraries to a predefined location. To make the libraries available to the Groovy console:
-
Open the file
%GROOVY_HOME%\conf\groovy-starter.confin a text editor. -
Make sure a line with the following format is active (if necessary, add or uncomment it):
load !{user.home}/.groovy/lib/*.jar -
If you made changes, save the file.
-
Copy the libraries to the directory corresponding to
user.home, whereuser.homedenotes the directory where the library files reside.
If in doubt, copy the libraries to the following directory, which is always loaded:
%GROOVY_INSTALL%\libFor OMi customizations, the following libraries are often needed:
-
Apache Commons Libraries
<install>/lib/commons-*.jarThis library Includes general functions such as the logging function
log4j. -
JSON Library
<install>/lib/json.jarFor parsing and generating JSON code.
-
<install>/lib/opr-external-api.jar -
<install>/lib/opr-common.jar -
Apache Wink REST Web Services APIs
<install>/lib/wink-*.jar -
JSR-311 REST APIs
<install>/lib/jsr311-api.jar -
RTSM Topology APIs
<install>/lib/ucmdb-api.jar
-
Compatibility with OMi
OMi supports Groovy versions listed in the following table. Features contained in later versions of Groovy are not supported.
| OMi Version | Latest Compatible Groovy Version |
|---|---|
| 10.10 | 2.4.5 |
| 10.0x | 2.2.1 |
| 9.13, 9.2x | 1.7.3 |
| 9.10, 9.11 and 9.12 | 1.6.0 for EPI and Custom Action scripts. 1.7.3 for other scripts. |
| 9.01 | 1.6.0 for EPI and Custom Action scripts. 1.5.6 for other scripts. |
Debugging using the Groovy console
The following tips can help you when testing and debugging Groovy scripts:
-
The Groovy console is an interpreter. Certain errors, such as references to classes without
import, are not reported until the line of code is actually executed. -
Make sure you have an
importstatement for each class used in the script. -
Use extensive logging while debugging. Logging can be a very powerful tool to assist in debugging but be careful not to log unnecessary information. Too many log entries can make it hard to find entries for a specific issue, as well as cause the logs to roll over too quickly.
Note Make sure to deactivate the logging code before moving the script to the production environment. Log information that is not to be deactivated in the production environment should be used sparingly. See also Best practices.
-
Your script can be enabled to log to Apache by using the Apache LogFactory class, which is defined in the Apache Common Libraries. To include the log factory in your script class, declare a member variable of type Log and initialize it to the name of the log method for the relevant OMi package, for example:
private static Log s_log = LogFactory.getLog("com.hp.opr.epi.MyLogs")Notes for logging to Apache:
-
Make sure you declare the member variable as
staticso it is initialized only once. -
The package name
com.hp.opr.epishould be used if you are using one of the OMi scripts. This will automatically add your log entries to the EPI scripting log file (see Event Processing Interface scripts). -
To access a custom package you must supply the properties file for your package. The properties files can be found in a sub-directory in the directory
conf/core/Tools/log4j. The name of the sub-directory corresponds with the name of the process triggering your script, as detailed under the heading Trigger for each script type described in section Development and deployment of scripts. -
To adjust the logging level for a script, edit the logging level entry in the appropriate properties file )see previous bullet point).
-
To create an Apache log entry, use the following syntax (provided you used the same name for the Log member):
s_log.error("<Error text>")For example:
s_Log.error("Attempt to get event failed; HTTP status: ${response.statusCode}")Specify the appropriate error level as the method name (
error()in the example). To track the behavior of your script, HPE recommends to include a log entry at error levelinfo()so you can verify that script loads successfully.
-