


Configure SharePoint Connector
To configure SharePoint Connector, follow these steps:
-
Make sure that the OMNI Group Server and SharePoint Connector components were included when Smart Analytics was installed.
Note You can install OMNI Group Server and SharePoint connector either along with other components by using the All in One install template, or install them separately by using the Customize install template through advanced installation. For more details, see Advanced Installation in Install Smart Analytics
-
Go to <Smart Analytics Installation>/SharepointRemoteConnector, locate the
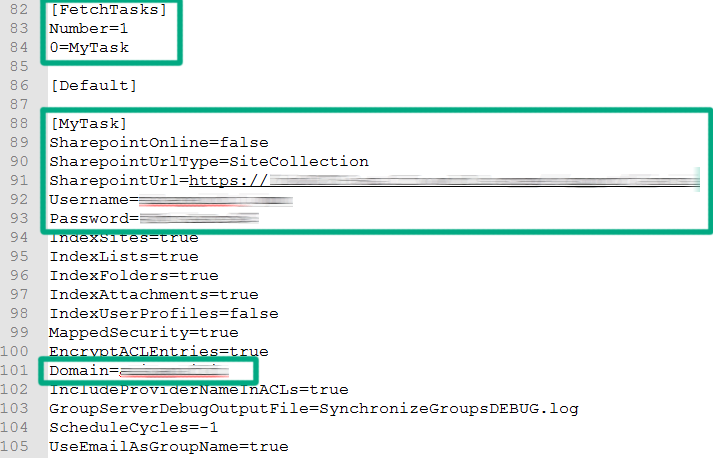
SharepointRemoteConnector.cfgfile, and then configure the[FetchTasks]and[MyTask]sections as needed.Sample code:
[FetchTasks]
Number=1
0=MyTask

[Default]

[MyTask]
SharepointOnline=false
SharepointUrlType=SiteCollection
SharepointUrl=http://<SharePoint URL>/
Username=<username>
Password=<password>

IndexSites=true
IndexLists=true
IndexFolders=true
IndexAttachments=true
IndexUserProfiles=false
MappedSecurity=true
EncryptACLEntries=true
//Domain=DOMAIN
IncludeProviderNameInACLs=true
GroupServerDebugOutputFile=SynchronizeGroupsDEBUG.log
ScheduleCycles=-1
UseEmailAsGroupName=true
Sample screenshot:
- Restart your Smart Analytics SharePoint Connector service.
-
If you want to use OMNI Group Server, continue the following steps:
-
Go to <Smart Analytics installation>/OmniGroupServer, locate the
OmniGroupServer.cfgfile, and then configure the[LDAP]and[Sharepoint]sections as neededSample code:
[LDAP]
ActiveDirectory=True
GroupServerLibrary=ogs_ldap.dll
//GroupServerCycles=1
LDAPServer=abc.asciapacific.example.net
LDAPPort=389
LDAPUserBase=OU=CN,OU=Users,OU=Accounts,DC=asicapacific,DC=example,DC=net
LDAPGroupBase=CN=PDL@example.com, OU=Managed Groups,OU=Accounts,DC=asicapacific,DC=example,DC=net
//UserFilter=(objectClass=<objectClass>)
//GroupFilter=(objectClass=<objectClass>)
LDAPUsername=user@example.com
LDAPPassword=<password>

ExtractDomainFromDN=true
LDAPMode=Group
PageSize=10000
KeyUserName=sAMAccountName
LDAPEnableReverseLookup=true
[SharePoint]
GroupServerJobType=Connector
ConnectorHost=<ConnectorHost>
ConnectorPort=36000
ConnectorTask=MyTask
Sample screenshots:


Note Make sure that the value of
ConnectorTaskis consistent with<TaskName>in the[FetchTasks]section of theSharepointRemoteConnector.cfgfile. -
Go to <Smart Analytics installation>/IDOL, locate the
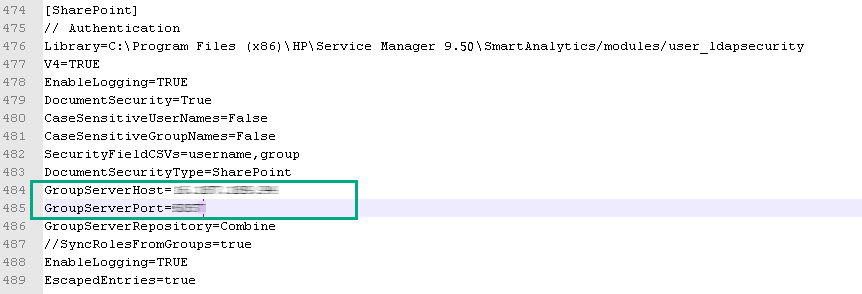
IDOLServer.cfgfile, uncommentGroupServerHostandGroupServerPort, and then specify OMNI Group Server Host and Port as needed.Sample code:
[SharePoint]
//Authentication
Library=C:\Program Files (x86)\Micro Focus\Service Manager 9.xx\SmartAnalytics/modules/user_ldapsecurity
V4=TRUE
EnableLogging=TRUE
DocumentSecurity=true
CaseSensitiveUserNames=False
CaseSensitiveGroupNames=False
SecurityFieldCSVs=username,group
DocumentSecurityType=SharePoint
GroupServerHost=<GroupServerHost>
GroupServerPort=5057
GroupServerRepository=Combine
//SyncRolesFromGroups=true
EnableLogging=TRUE
EscapedEntries=true
Sample screenshot:
- Restart the Smart Analytics Server and the OMNI Group Server services.
-
- Log on to Service Manager, and then click System Administration > Ongoing Maintenance > Smart Analytics > Smart Search. The Smart Search configuration page appears.
- Click the Connector Configuration link to open the connector configuration page.
-
From the CFS Server tab, a list of all CFS server URLs is provided. You can click the Refresh Status button to refresh the URL list. Connectors need CFS servers to transfer data, so after you add a new connector, the corresponding CFS server information is added to this list.
Note If there two or more connectors that are installed on the same machine and share one CFS server, there is no new URLs added to the list.
-
Go to the SharePoint Connector tab, perform the following actions:
-
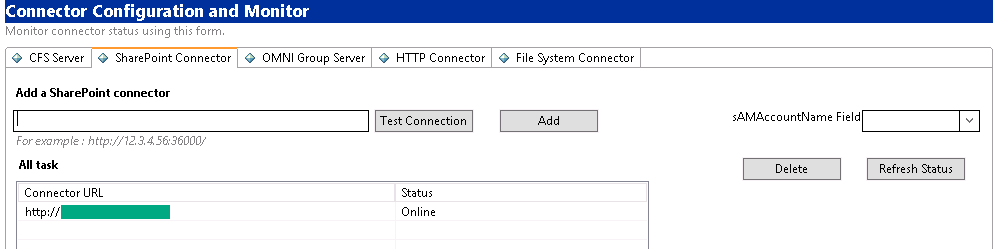
Add a SharePoint connector: Type a configured SharePoint connector URL here, for example: http://192.168.255.255:36000/. You can click Test connection to test the URL connection status, and then click Add to add this URL to the current list.
Sample screenshot:
Note
- The “/” at the end of the URL is mandatory.
- Make sure the status for SharePoint is online.
-
To get the URL information for the SharePoint connector you have configured, check the following configuration file:
<Smart Analytics Installation>/SharepointRemoteConnector/SharepointRemoteConnector.cfg
-
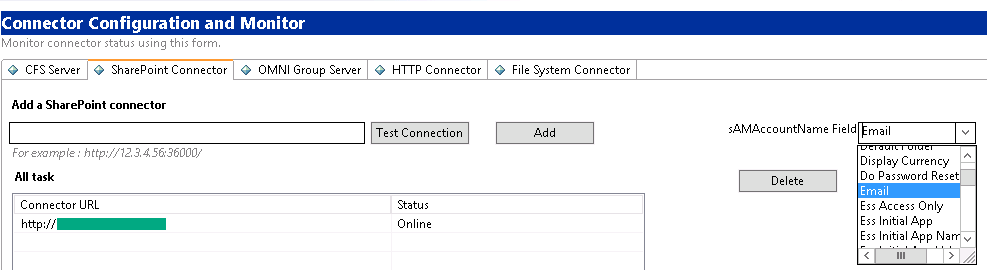
sAMAccountName Field: Choose the field type from the drop-down list. This field is the mapping field of SharePoint and SM users.
If SharePoint on premise is used, configure this field to the domain account field of the SM operator table.
If SharePoint Online is used only, there is no need to set this field as operator email field is used for user mapping.
Sample screenshot:
- Delete: Select a SharePoint connector URL and then click this button to delete it from the list.
- Refresh Status: Click to refresh the status of the URL list.
-
- From the OMNI Group Server tab, a Repository list of all OMNI group servers is provided. OMNI Group Server provides the LDAP configuration information which may be required for SharePoint login. You can also check the target task of a repository and its working status. You can click the Refresh Status button to refresh the URL list.
-
(For Security SharePoint), go to <Smart Analytics installation>/OmniGroupServer, locate the
OmniGroupServer.cfgfile, and specifyFiledName0to the option you selected for the sAMAccountName Field.Sample code:
ExtractDomainFromDN=true
LDAPMode=Group
PageSize=10000
KeyUserName=sAMAccountName
LDAPEnableReserveLookup=true

KeyGroupName=mail
KeyMember=member
LDAPDebugLogging=TRUE
FieldKey0=sAMAccountName
FieldName0=Email
FieldKey1=mail
FieldName1=mail
FieldKey2=cn
FieldName2=cn
GroupServerMaxDatastoreQueue=100000
//remove domain prefix for groups
GroupServerOp0=StartAfter
GroupServerOpParam0=0;\
GroupServerOpApplyTo0=GROUP
//Just to avoid unnecessary queries for members that don't exist.
//This might not have any effect if the group members are properly managed.
DisableUserFromDNSearch=TRUE
DisableGroupFromDNSearch=TRUE
Sample screenshot:

-
Restart the Smart Analytics OMNI Group Server service.
-
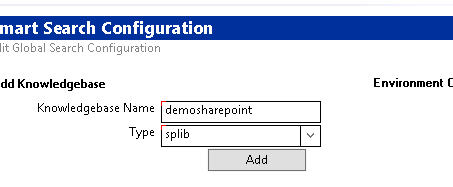
Do the following to add a splib library for the sharepoint connector:
- go to Smart Search Configuration page.
- Specify Knowledgebase Name,
- Select splib for Type
-
Click Add. The Knowledgebase Maintenance page opens.
-
Specify Connector and Task, and then select the Do not use OmniGroupServer for access count check box.

- Click Save.
- Click Full Reindex and Refresh Status.
-
You can perform the search when the status changes to Indexing and Doc Count for this library is greater than 1.
Note Log off and then log back on to your Service Manager if you can not find library in your Smart Search library list.


