


How to Create Web Service Fields to Support the CI Type
In order to add a CI type to the integration, you must create a Service Manager web service object for each CI attribute for which you created an XSL transformation on the UCMDB system. Service Manager uses the web service object to determine which Service Manager table and column to store the incoming CI attribute values.
The following steps illustrate how to create a web service object necessary to support the SM RDBMS CI type described in previous sections.
Note This example of creating a new web service object (ucmdbRDBMS) is provided only as an illustration of the steps. The best practice is to reuse the existing Service Manager web service object ucmdbRunningSoftware to map with Universal CMDB CI type SM RDBMS.
To create web service fields to support your new CI type:
- Log in to Service Manager with an administrator account.
- Navigate to Tailoring > Web Services > WSDL Configuration.
- In Service Name, type ucmdbIntegration.
- In Name, select the name of the join file you have created for the new CI type. For example, joinRDBMS.
- In Object Name, type a name. For example, ucmdbRDBMS.
- Click the Allowed Actions tab, and specify the actions as shown in the following figure.
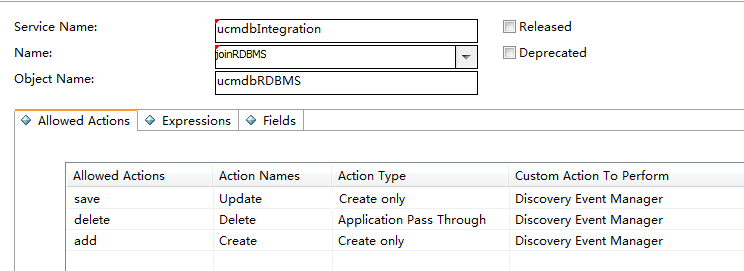
Caution For UCMDB integration WSDL configurations, be sure to use the “Create only” action type for the “add” and “save” actions, and “Application Pass Through” for the “delete” action. For more information about the action types, see Service Manager Web Services.
- Click Add to create the WSDL configuration.
-
Click the Fields tab, select fields from the list and type a caption for each of them, as shown in the following table.
Field Caption ucmdb.id UCMDBId ci.name ApplicationName type Type subtype SubType company CustomerId sm.device.display.name DisplayName description Description - Click Save to save WSDL configuration changes.
The new web service fields are now available to the integration.


