


How to Create an XML Configuration File for a Relationship Type
To create an XML configuration file for a relationship type:
- Log in to UCMDB with an administrator account.
- Navigate to Data Flow Management > Adapter Management > ServiceManagerEnhancedAdapter9.41, and select the adapter.
- Click the Create New Resource icon .
- Select New Configuration File.
- Enter the full file name: <AdapterID>/mappings/push/<filename>. For example, ServiceManagerEnhancedAdapter9.41/mappings/push/SM Cost CostCategory Ownership.xml.
- Click OK to save to the new file. The new file appears in the list of configuration files.
- Open the new file in the XML Editor of the Visual Mapping interface.
-
Copy the content from an existing mapping file to overwrite the content of the new file in the XML Editor pane, and update query name to the name of the query you created (Cost CostCategory Ownership Relations Push).
<?xml version="1.0" encoding="UTF-8"?> <integration xmlns:xsi="http://www.w3.org/2001/XMLSchema-instance" xsi:noNamespaceSchemaLocation="../mappings_schema.xsd"> <info> <source name="UCMDB" version="10.20" vendor="HP"/> <target name="SM" version="9.40" vendor="HP"/> </info> <import> <scriptFile path="mappings.scripts.SMPushFunctions"/> </import> <!-- Push Cost to Cost Category Relations. --> <target_entities> <source_instance query-name="Cost CostCategory Ownership Relations Push" root-element-name="Root"> <target_entity name="Relationship"> <target_mapping name="RelationshipType" datatype="STRING" value="SMPushFunctions.getDisplayName(Root['element_type'],ClassModel)"/> <target_mapping name="ParentCI" datatype="STRING" value="SMPushFunctions.getEndId(OutputCI.getExternalId().getEnd1Id())"/> <target_mapping name="ChildCIs" datatype="STRING_LIST" value="[SMPushFunctions.getEndId(OutputCI.getExternalId().getEnd2Id())]"/> </target_entity> </source_instance> </target_entities> </integration> - Click the Save icon to save the new configuration file.
Now, you have added the new relationship type to the integration. Next, you need to add the new relationship query to a data push job, as shown in the following figure. For detailed steps, see How to Add a Custom Query to an Integration Job.
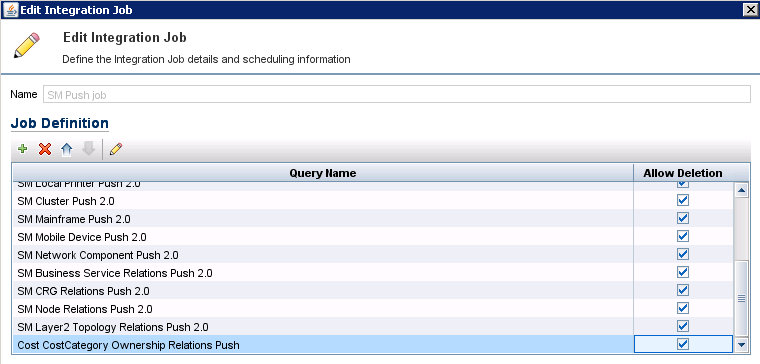
Caution Before you run the relationship push job, make sure you have already added the relevant CI types (Cost and CostCategory in this example) to the integration and pushed the relevant CIs to Service Manager.


