


Configure the ADFS SAML token
The SAML token that is exchanged between ADFS (the IdP) and Service Manager Service Portal’s IdM (the SP) must contain data to allow Service Manager Service Portal to identify the user and optionally check to which groups the user belongs. The minimum data that is needed in the SAML token is the user ID. All user information (attributes) provided in the SAML token will be stored during the initial login in the IdM database tables.
Service Manager Service Portal also can use an avatar (a link to a URL to show a picture in the menu), an email address, and the manager attribute (used for Request on Behalf).
In ADFS, you need to claim rules. The following examples will help you understand how to configure them. This might be different for each customer.
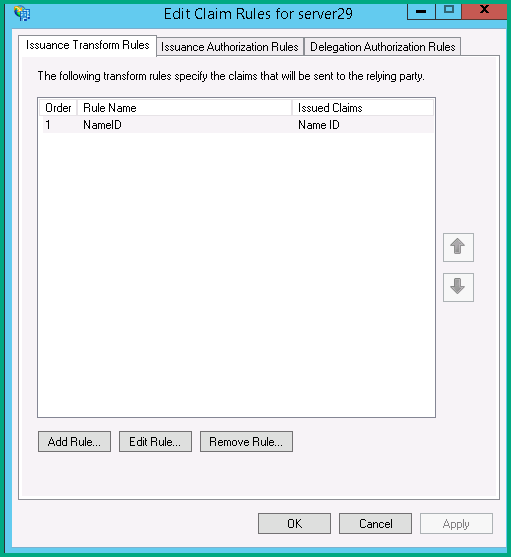
Task 1: Create a claim rule set (NameID) for IdM
This task will create a claim rule set for the AD username that will be added to the SAML token and used by IdM to authenticate the user.
- Log in to your ADFS server.
- On the Start screen, type AD FS Management, and then press Enter.
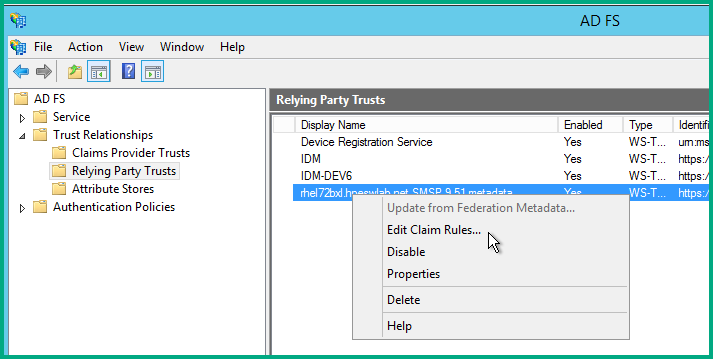
- In the console tree, under AD FS\Trust Relationships, click Relying Party Trusts, and then click a specific trust in the list where you want to create this rule.
-
Right-click the selected trust, and then click Edit Claim Rules.
-
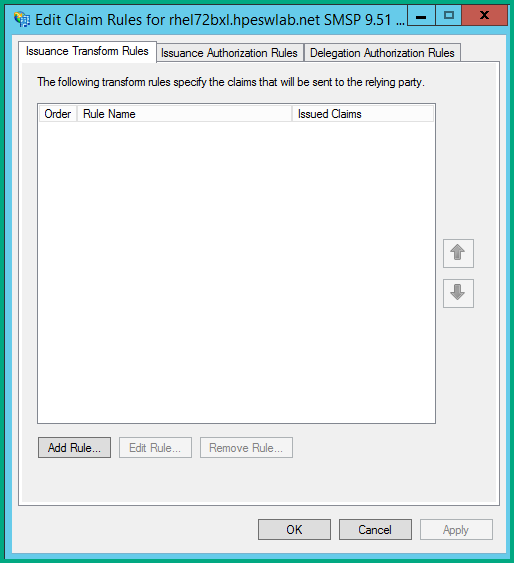
In the Edit Claim Rules dialog box, select one of the following tabs, depending on the trust that you are editing and which rule set you want to create this rule in, and then click Add Rule to start the rule wizard that is associated with that rule set:
- Issuance Transform Rules
- Issuance Authorization Rules
- Delegation Authorization Rules
-
Start by adding a new rule (the Add Rule button) to the Issuance Transform Rules tab.
-
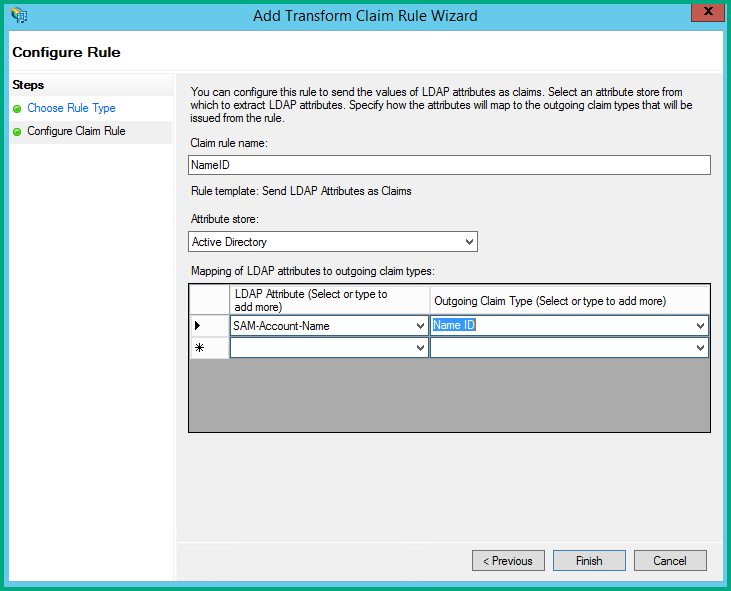
On the Select Rule Template page, under Claim rule template, select Send LDAP Attributes as Claims from the list, and then click Next.

-
Enter NameID in the Claim rule name field, select SAMAccount-Name as the LDAP attribute, and then select Name ID as the Outgoing Claim Type.
-
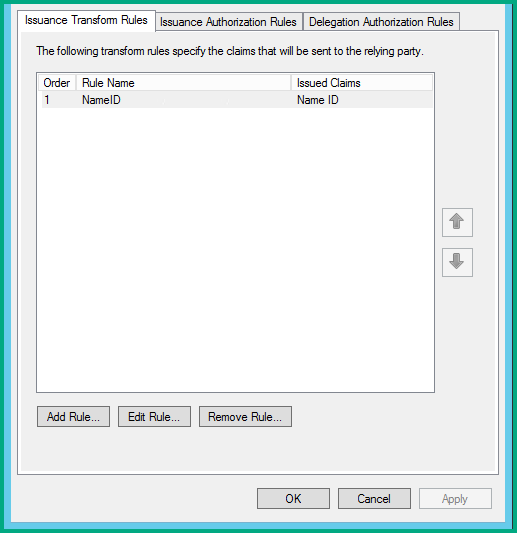
Finish the wizard and click Apply in the claim rules window.
- If you choose a name other than NameID as the transferred attribute, the /var/log/messages log file of Service Manager Service Portal will indicate that Service Manager Service Portal’s IdM service needs the NameID rule name attribute.
- You can also use E-Mail-Address as NameID for login. This will determine how the user logs in to Service Manager Service Portal. Note that this information will be stored in IdM and used by Service Manager Service Portal Service Exchange to communicate with Service Manager. That means that operators in Service Manager must have their unique id corresponding to the LDAP attribute that you store in the SAML token.
(Optional) Task 2: Configure groups
Important Optionally, you can create claims for groups. Only start this configuration if you decide not to use the LDAP integration to handle authorization. In the event that you do not have access to the ADFS LDAP, you can use this method to transfer Group information per user. additionally, you need to create a Calculated Group in Service Manager Service Portal that matches this Group information.
To pass the group name without the domain group of a user, create a rule with the Send LDAP Attributes template. These (LDAP) groups will be used by Service Manager Service Portal IdM to authorize you within Service Manager Service Portal.
-
On the Edit Rule page, select Token-Groups – Unqualified Names for the LDAP Attribute. For the Outgoing Claim Type, you can specify any name for this outgoing claim.
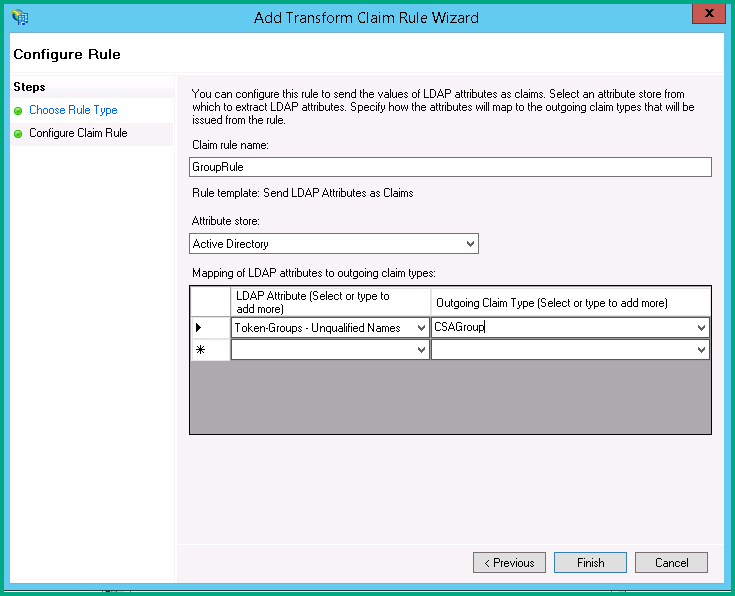
Note In this example, the Outgoing Claim Type is called CSAGroup.
-
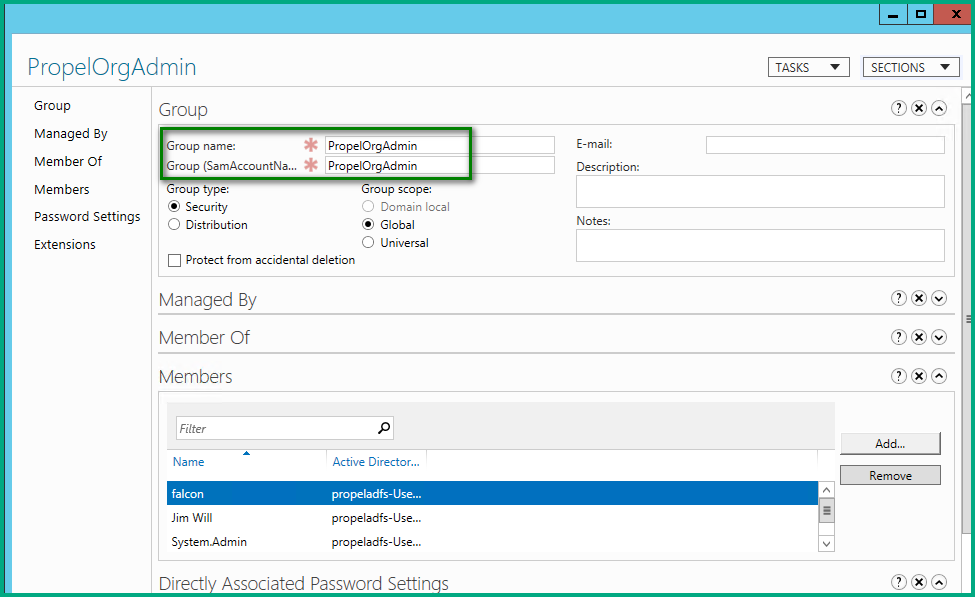
Ensure that the LDAP Group name and Group (SamAccountName) values are the same when you create a group in AD.
(Optional) Task 3: Configure additional ADFS SAML attributes
When using SAML login with ADFS, you can pass other values in addition to the authentication values. This task describes how to pass a user's full name, organization, phone number, role, or custom role.
Tip Normally, the LDAP integration configured in Service Manager Service Portal will take care of this. That is why this task is optional.
These values are defined as Claim Rules in the Relying Party Trust. To edit the Claim Rules, select the Relying Party Trusts folder from AD FS Management, and choose Edit Claim Rules from the Actions sidebar. New rules are added by clicking Add Rule and then selecting a template from the window that pops up.
Example:
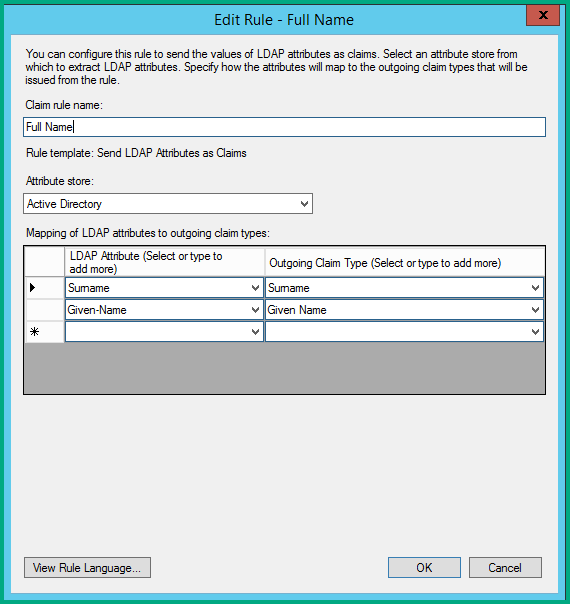
Full name
To pass the full name of a user, follow these steps:
-
Create a rule with the Send LDAP Attributes template.

-
In the LDAP Attribute column, add a row for Surname and a row for Given-Name. In the Outgoing Claim Type column, select Surname and Given Name, respectively.
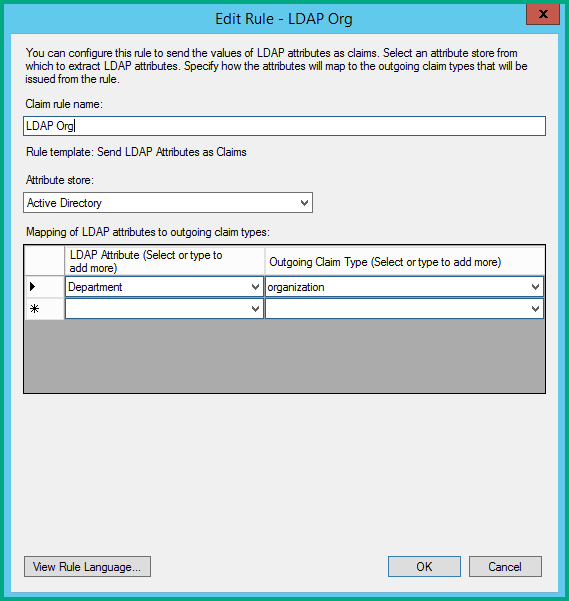
Organization
To pass the organization, follow these steps:
- Create a rule with the Send LDAP Attributes template. This rule will map a field in Active Directory to the outgoing claim type of organization. The LDAP attribute will depend on how you wish to map users. For example, you might want to map departments to different organizations.
-
In the LDAP Attribute field, select the field that you are mapping to the organization claim type; in the Outgoing Claim Type field, type the word organization in lowercase.
(Optional) Task 3: Create new calculated groups as SAML groups
Note This is an optional task and will be needed only when the SAML assertion sends the userid and the groups that a user belongs to.
Our default setup uses SAML for authentication and LDAP roster loaded data to retrieve the groups to which a user belongs in order to authorize access to Service Manager Service Portal.
To create a calculated group, follow these steps:
- Log in to Service Manager Service Portal as an orgadmin in your organization.
- Open the Identity application.
-
Select your organization, and go to the Groups tab.
-
Click Add Group, and then specify the following settings.
- Group Name: specify a display name to identify the group.
- Group Representation Type: select Calculated Representation.
- Reference User: leave it blank.
-
Calculation Criteria: click Add Criteria and then enter your criteria.
The following figure shows an example.
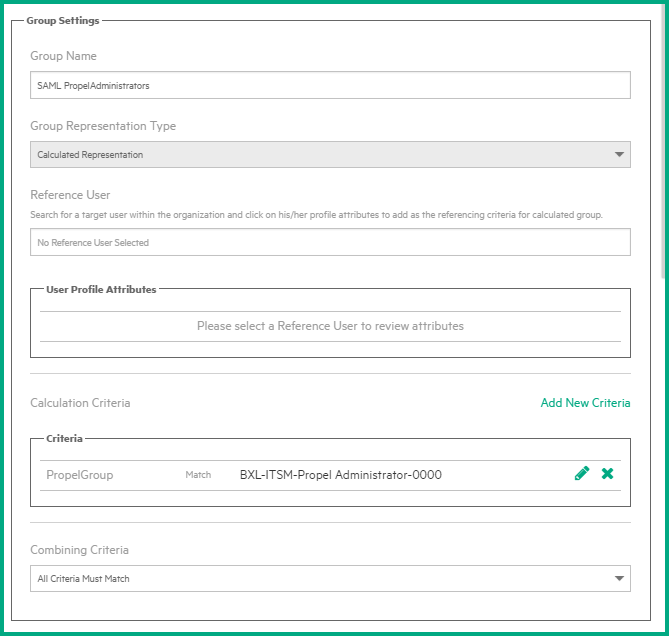
In this example, the SAML assertion will contain an attribute “PropelGroup”, which will contain values of one or more groups to which a user belongs.
(Optional) Task 4: Map the calculated groups to user roles
The general concept of Role-Based Access Control (RBAC) places roles at the center of authorization: roles are made up of permissions and associated with users either directly or through groups. This differs from the existing roles-based authorization in IdM, in which roles are analogous to RBAC permissions and there is no composition of authorization as there is with RBAC. The IdM Admin UI provides virtual roles that combine IdM roles much like an RBAC role is composed of permissions, but the virtual roles are defined in a configuration file and are not modifiable at run time.
To assign a user permissions, you need to associate the user's groups to roles, and then associate the roles to permissions through the UI, APIs or seeded json file. To look up the out-of-box roles and permissions, use the Identity application of Service Manager Service Portal.
To map a group to a role, follow these steps:
- Log in as an orgadmin in your organization and open the Identity application.
- From the list, select your organization. There will be only one.
-
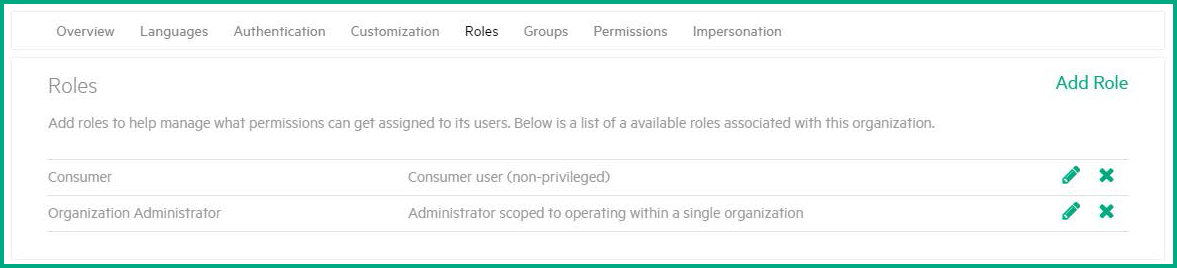
Select the Roles tab, to view the out-of-box roles.
-
Select the Permissions tab, to view the out-of-box permissions.
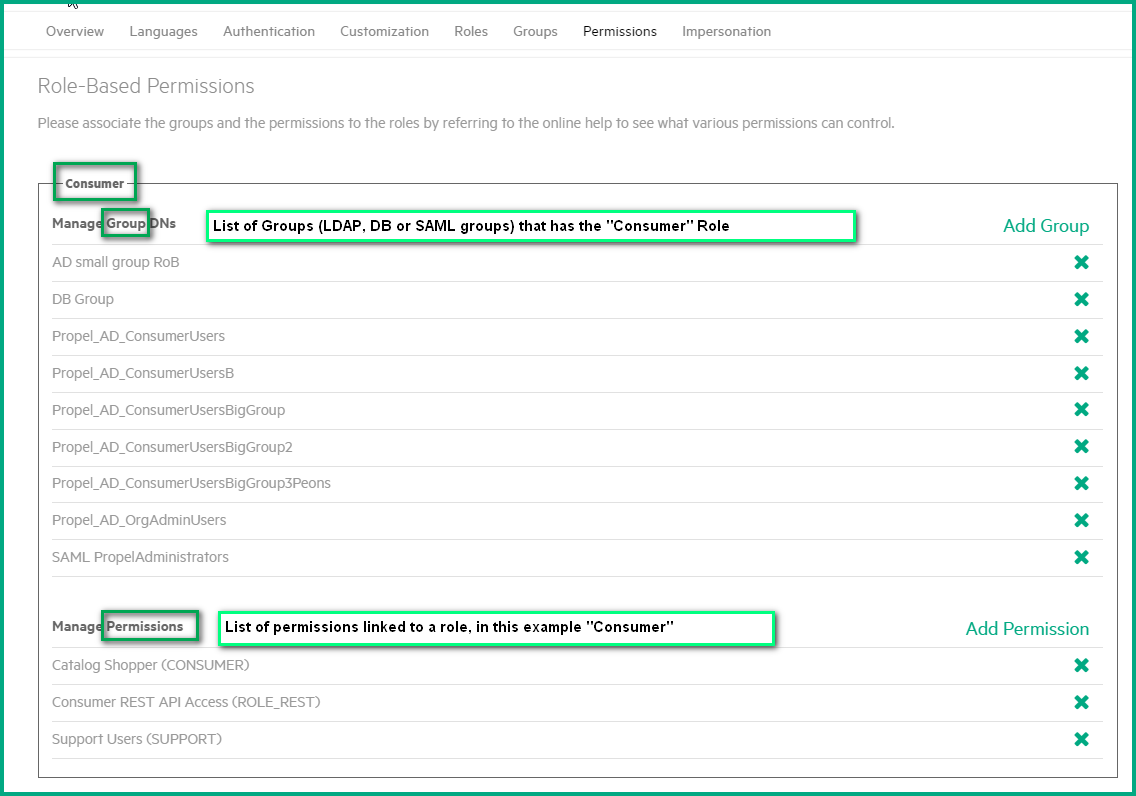
Next, you need to map the new SAML group to a role.
-
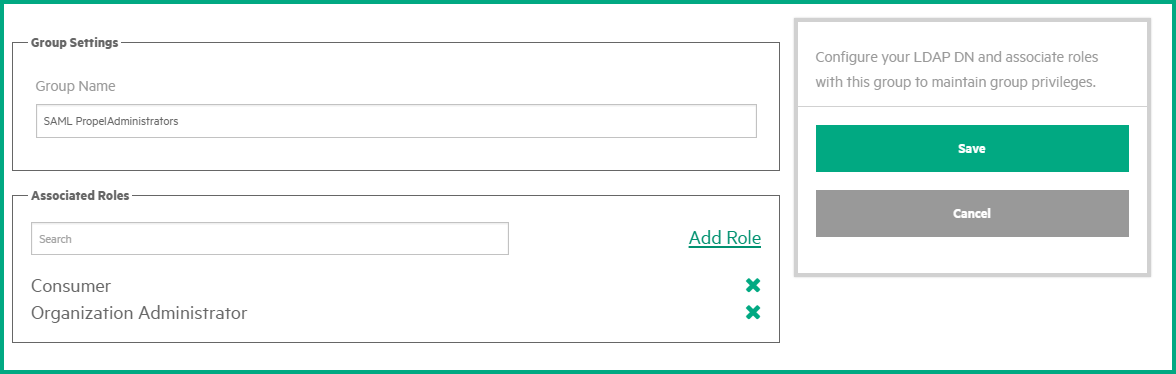
Go to the Groups tab. Your newly added groups are available.
-
Click the Edit icon for a new group to open the group details.

-
In the Associated Roles field, click Add Roles to add the role(s) you need. Once finished, click Save.
- Repeat these actions for the rest of the SAML groups you created.
Next step
Adjust the max authentication age setting in IdM
Related topics


