Searching the Help
To search for information in the Help, type a word or phrase in the Search box. When you enter a group of words, OR is inferred. You can use Boolean operators to refine your search.
Results returned are case insensitive. However, results ranking takes case into account and assigns higher scores to case matches. Therefore, a search for "cats" followed by a search for "Cats" would return the same number of Help topics, but the order in which the topics are listed would be different.
| Search for | Example | Results |
|---|---|---|
| A single word | cat
|
Topics that contain the word "cat". You will also find its grammatical variations, such as "cats". |
|
A phrase. You can specify that the search results contain a specific phrase. |
"cat food" (quotation marks) |
Topics that contain the literal phrase "cat food" and all its grammatical variations. Without the quotation marks, the query is equivalent to specifying an OR operator, which finds topics with one of the individual words instead of the phrase. |
| Search for | Operator | Example |
|---|---|---|
|
Two or more words in the same topic |
|
|
| Either word in a topic |
|
|
| Topics that do not contain a specific word or phrase |
|
|
| Topics that contain one string and do not contain another | ^ (caret) |
cat ^ mouse
|
| A combination of search types | ( ) parentheses |
|
Create a link
The following table summarizes the properties required in the wizard. Have this data available before starting the wizard.
Note A link cannot be duplicated. For example, if a link already exists for SMServer1/Changes -> QCServer1/Domain1/Project1/Defects, a second link between
these two entities cannot be created.
|
End Point |
Parameter |
Requirements |
|---|---|---|
|
QC |
Username |
|
|
QC |
Password |
|
|
QC |
Server URL |
|
|
QC |
Domain |
|
|
QC |
Project |
|
|
SM |
User name |
|
|
SM |
Password |
|
|
SM |
Service URL |
or
|
|
SM |
Adapter Configuration (SM field values) filename |
Empty or the adapter data folder file |
|
SM |
QCProject |
Required (because of an adapter limitation). The format is <qc_host>/<qc_domain>/<qc_project>
|
To create a link:
-
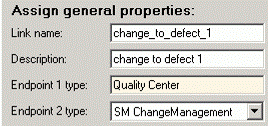
Click Link/Create. The “Step 1: Assign general properties” dialog appears.
-
Enter the required information (the following example is for SM Change -> QC Defect).

-
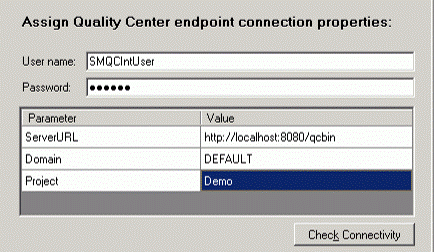
Click Next. The “Step 2: Assign QC endpoint connection properties” dialog appears.
-
Enter the required information.

-
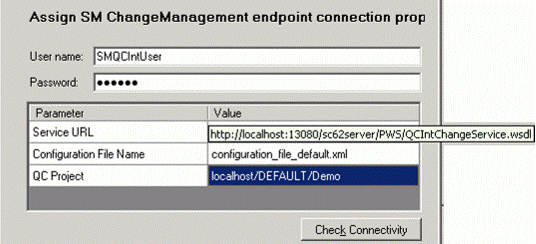
Click Next. One of the following appears:
- “Step 3: Assign SM ChangeManagement endpoint connection properties”
- “Step 3: Assign SM ProblemManagement endpoint connection properties”
-
Enter the required information (the following example is for SM Change -> QC Defect).

Note QC Project has the same value as specified on SM customization.
-
Click Next. If this is a change management link, “Step 4: Select entity types” dialog appears.
-
Select one of the following:
- Change as Defect
- Change as Requirement

-
Click Save. The link is created.
-
Modify required settings on the Connectivity tab.


