


Customize the End User Chat window
As a Service Desk manager, you can use the Service Desk Pre-chat Configuration form to customize the fields that are displayed on the End User Chat window. These customized fields, together with a list of custom fields types, enable you to gather additional information from end users before the chat begins.
See the following sample screenshots as a comparison:
| Default End User Chat window | End User Chat window after configuration |
|---|---|
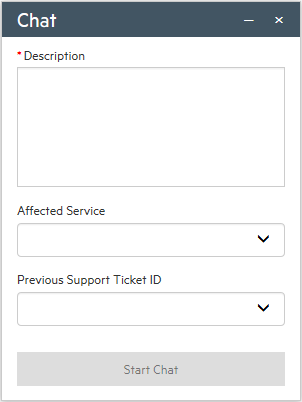
|

|
Update the out-of-box End User Chat window configuration
One company can only have one End User Chat window configuration record. If you do not enable multi-tenancy in your Service Manager system, you can update the out-of-box End User Chat window configuration record only.
Follow these steps to update the out-of-box End User Chat window configuration:
- Log on to Service Manager as a Service Desk manager.
- Click Service Desk > Administration > Service Desk Pre-chat Configuration to open the Service Desk Prechat Configuration form.
- Click Search to display the out-of-box Service Desk Prechat Configuration form, on which the default fields are Description, Affected Service, and Previous Support Ticket ID.
-
Follow these steps to add a new field to the End User Chat window:
- Click Add New Custom Field.
-
Fill in the fields as necessary. See the following table for details.
Label Description ID Specify the ID for the custom field. This ID uniquely identifies the field so that it can be referenced programmatically. Label Specify a label for the custom field. This label is displayed on the End User Chat window.
Mapped Field Select a mapped field from the Service Manager sdchat table. To append more selections to this drop-down menu, see Append a Customized Mapped Field. Max Length The maximum text input length of the custom field. This number is populated automatically. Mandatory Select this check box to make the custom field mandatory. Display Type Specify the display type of the custom field. The format of the field on the End User Chat window depends on the type you select. Refer to the following explanations:
- Select Text to display the custom field as a single-line text field.
- Select Check Box to display the custom field as a check box.
- Select Multitext to display the custom field as a multiple-line text field.
-
Select Pick List to display the custom field as a drop-down menu. The system prompts you for the following additional information:
- Select Global List, and then click the Fill Field button to select a Service Manager global list definition.
- Select Options, and then provide entries to display in the drop-down menu manually. For example, type 1 in the Value field, and then type Emergency in the Display Value field, this entry is display as 1 - Emergency in the customized drop-down menu.
-
Select JavaScript, and then set the valueList JaveScript array and the displayList JaveScript array. For example:
var user=system.functions.operator();
var list=lib.EndUserChat.getSubscriptions(user);
valueList=list['valueList'];
displayList=list['displayList'];
- Click Finish. Your customized field is displayed in the Prechat Form section on the Service Desk Prechat Configuration form.
- (Optional) Select a field in the Prechat Form section, and then click Move Field Up or Move Field Down to adjust the sequence of the fields.
-
(Optional) To remove a customized field, select the field and then click Remove Custom Field.
Note You cannot remove the default Description field.
-
(Optional) To update the localized labels, click the ID of a customized field in the in the Prechat Form section and then click Edit localized labels.
For each language available, you can localize the label text. After you localize the text, click Save and then OK to return to the Service Desk Prechat Configuration form.
- Click Save.
Now your customized field is displayed on the End User Chat window. End users need to relogin the Service Portal or the ESS portal to see the newly customized fields that are displayed on the End User Chat window..
Add a new End User Chat window configuration
If your Service Manager system has enabled multi-tenancy, you can add a new End User Chat window configuration record for each company.
Follow these steps to add a new End User Chat window configuration:
- Log on to Service Manager as a Service Desk manager.
- Click Service Desk > Administration > Service Desk Pre-chat Configuration to open the Service Desk Prechat Configuration form.
- Type your description in the Brief Description field.
- Select a company in the Company drop-down menu.
- Click Add. The system automatically generates a new configuration record number in the Number field.
- Follow step 4 to step 7 as described in Update the Out-Of-Box Service Portal Chat Window Configuration.
Append a customized mapped field
Follow these steps to append a customized mapped field:
- Log on to Service Manager as a system administrator.
- Click System Administration > Tailoring > Database Dictionary.
- Type sdchat in the File Name field, and then click Search.
- Click sdchat in the list, and then click New Field/Key.
- Type a name for your customized field in the Name field, and then select character in the Type drop-down list.
- Click Add.
- Log out from Service Manager and then log on again.
Now your customized mapped field appears in the Mapped Field drop-down menu.
View the customized field on a Service Manager End User Chat request record
Follow these steps to view the customized field on a Service Manager End User Chat request record:
- Log on to Service Manager as a Service Desk manager.
- Select Service Desk Chat Request in Service Manager To-Do queue.
- Click More > Customize Current View.
- Click Fields..., and then select your customized field in the Service Desk Chat Request drop-down list.
- Click Add to List.
- Click Next and Finish.


