


How to Add the CI Type to the UCMDB Class Model
Before creating a new UCMDB CI type, you should determine if there are any existing CI types in your UCMDB system that provide the CI attributes you want. In most cases, you can create links to one or more existing CI types to create a new logical CI type for use by the integration.
The following steps illustrate how to create a new CI type called SM RDBMS based on an existing CI type called database.
Note The integration does not require any special steps to add a CI type to the UCMDB class model. You can use the standard CI type creation procedures to add a CI type. For more information on CI type creation, see the UCMDB Help Center.
To add a CI type to the UCMDB class model:
- Log in to UCMDB as an administrator.
- Navigate to Modeling > CI Type Manager.
- Select the base CI type you want to use for your new CI type from the CI Types navigation tree: Managed Object > ConfigurationItem > Infrastructure Element > Running Software > Database.
- Click the New icon
 .
.The Create Configuration Item Type window opens.
- In Name, type the unique name you want to use for the new CI type. For example, sm_rdbms.
Caution The name cannot include any of the following characters: ‘ / \ [ ] : | < > + = ; , ? *.
- In Display Name, type the name you want UCMDB to display in the interface. For example, SM RDBMS.
- In Description, type a description of the new CI type. This is an optional field. For example, Hosts running relational databases.
- In Base CI Type, verify that the proper base CI type is selected. Your new CI type will inherit the attributes of the base CI type you select here. For example, Database.
- Click Next. The wizard displays a list of CI attributes from the base CI type.
- Add, edit, or remove CI attributes as needed for the new CI type. For example, accept the default attributes inherited from Database.
- Click Next. The wizard displays a list of qualifiers from the base CI type.
- Add or remove qualifiers as needed for the new CI type. For example, accept the default qualifiers.
- Click Next. The wizard displays a list of icons associated with the CI type.
- Select the icons associated with this CI type. For example, accept the default abstract class icon.
- Click Next to add any menu item properties or label definitions as needed. For example, accept the default settings from the base CI type.
-
Click Finish to create the CI type.
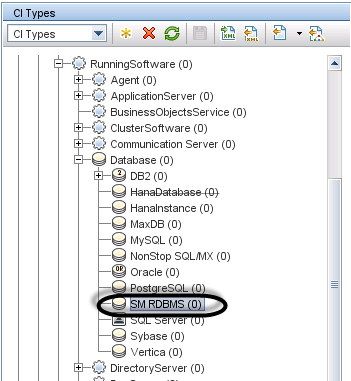
- Select your new CI type from the tree. For example, SM RDBMS.
- Browse to an existing CI type you want to link to, and control-click it to add it to your selection. For example, Node.
Note Choose an existing CI type that has the attributes that you want to be part of your new logical CI type.
- Right-click one of the selected CI types, and click Add/Remove Relationship. The Relationships window opens.
- Create an SM Link relationship from the existing CI type to the new CI type. For example, from Node to SM RDBMS.
Note You need to create a new SM Link relationship if it does not exist.
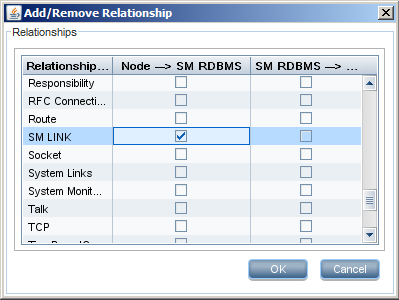
- Click OK to create the relationship.
- Click the Save icon to save the CI type.


