


How to Add the CI Type’s Attributes to the Query Layout
To add a CI attribute to the integration, you must enable the calculation layout setting from the query that synchronizes the CI type. Because you must enable calculation for each attribute you want to add to the integration, you should be familiar with the integration CI types and their attributes.
The following steps illustrate how to enable calculation for attributes of the SM RDBMS CI type described in previous sections.
To add a CI type’s attributes to the query layout:
- Log in to UCMDB as an administrator.
- Navigate to Modeling > Modeling Studio.
- From the Queries navigation tree, click Integration > Service Manager.
- Double-click the query that manages the CI type whose attributes you want to add to the integration. For example, rdbmsData. UCMDB displays the TQL layout of the query.
- Right-click the Root node from the query layout, and then select Query Node Properties. The Query Node Properties window opens.
Caution Your integration query must contain a node called Root. See Query Requirements for more information.
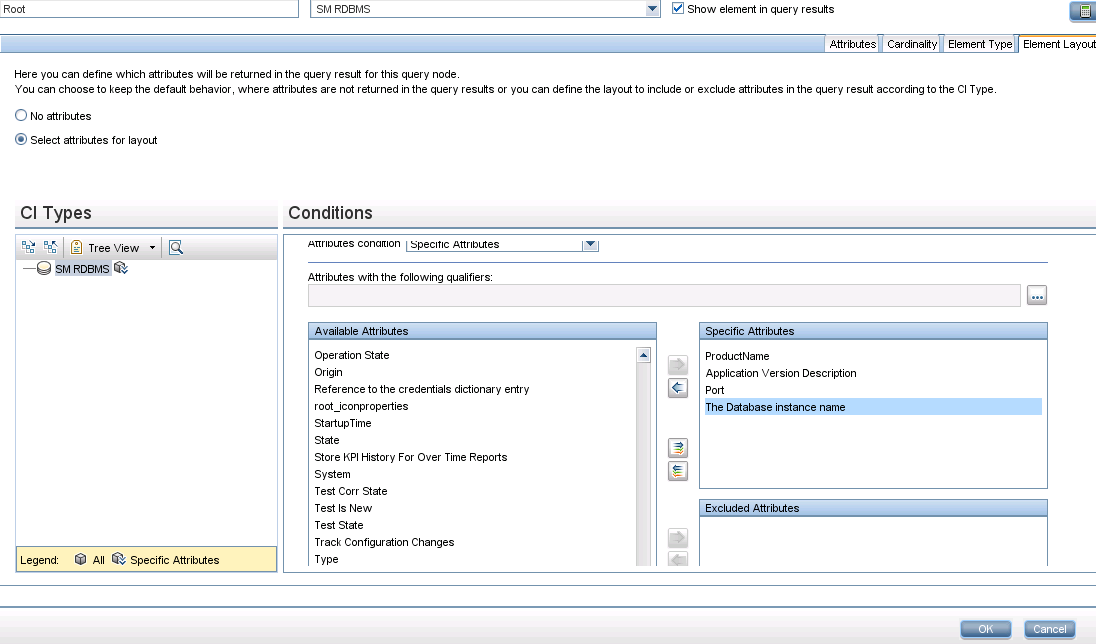
- Click the Element Layout tab, and select the Select attributes for layout option.
-
Select Specific Attributes from the Attributes condition list, and from the Available Attributes list select the attributes you want and move them to the Specific Attributes list. For example, add the Product Name, Application Version Description, The Database Instance Name, and Port attributes.
- Click OK to save the query node properties.
- Select any additional node that contains the attributes you want to add to the integration. For example, Node.
- Repeat step 4 through step8 for each additional node.
- Click OK to save the query node properties.
- Repeat step 9 to step 13 for each additional node that contains the attributes you want to add to the integration.
- Click the Save icon to save the query
 .
.


