


Process of a major upgrade
The following diagram illustrates the process of a major upgrade.
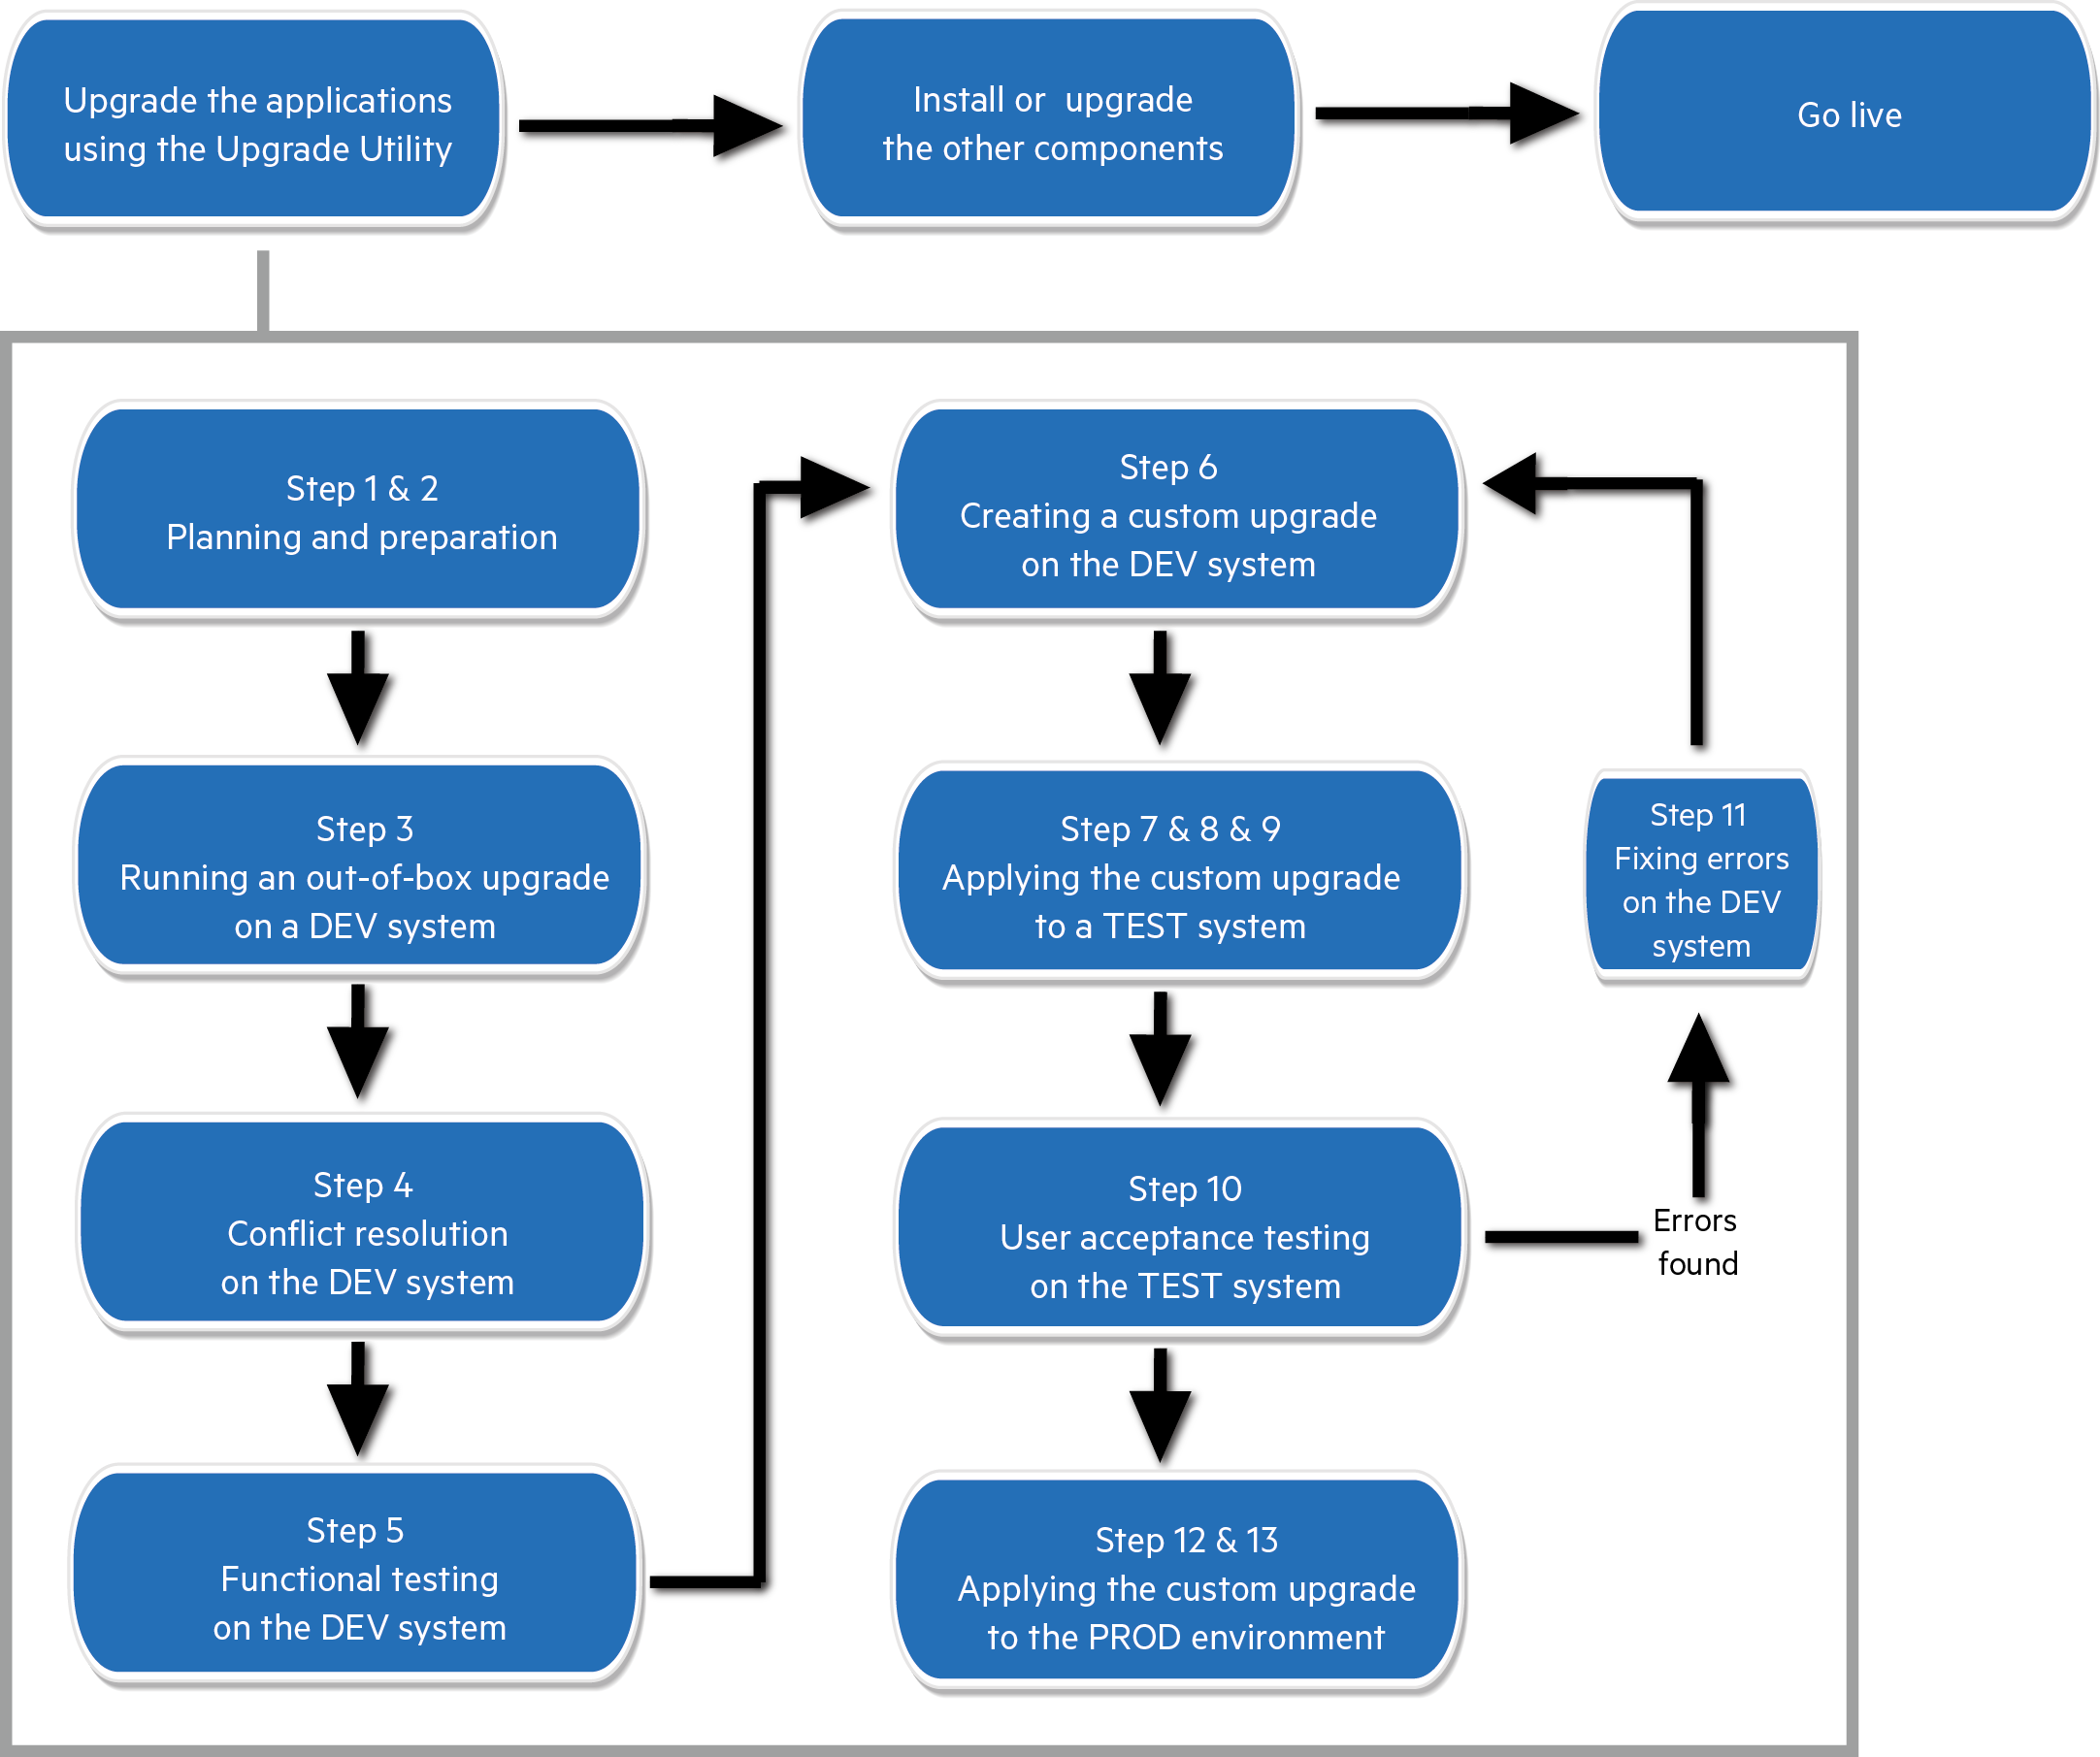
The high-level steps of the applications major upgrade process are explained as follows. For more detailed information of each step, see Applications major upgrade overview.
Step 1. Create a development system by duplicating your production system.
You will run an out-of-box upgrade on this system, and then fix errors and resolve conflicts. Make sure the development system meets the requirements in the support matrix of the target upgrade version, and copy your production data to the development system.
Step 2. Prepare the development system for an upgrade.
Prepare the data and binaries (server and client) of the development system for an upgrade.
-
Purge and archive unnecessary data to optimize upgrade performance.
Purge and archive unnecessary data in the following files (which may contain large amounts of data): mail, msglog, syslog, spool, eventin, eventout, schedule, sysperform, and devaudit (on a production system, development auditing should be turned off).
For information about purging and archiving records, see the Service Manager Help Center.
-
Meet database requirements.
- Keep the table space name same as the production system for an Oracle database.
- Convert all column names to uppercase for a case-sensitive database.
- Remove some indexes and constraints.
- Upgrade your Service Manager server and client to the latest version.
-
Update the server configuration files (sm.cfg and sm.ini).
Before running the Upgrade Utility, you need to make changes to the Service Manager configuration files before running the Upgrade Utility. Record all changes that you have made so that you can revert them to the original status after the upgrade.
Step 3. Run an out-of-box upgrade on the development system.
-
Check the size of the applications upgrade data, and compare it with the out-of-box upgrade package to make sure the downloaded data has no problems.
-
Load applications upgrade file preupg.bin from the out-of-box upgrade package.
-
Log off and then log back in.
-
Apply the out-of-box upgrade package to the development system.
-
Log out, restart the server, and then log back in.
Step 4. Conflict resolution on the development system.
- Fix all exceptions in the except.log file, and verify your fixes.
- Resolve all conflicts in the upgraderesults table, and verify your conflict resolution results.
-
Perform additional manual tasks.
Step 5. Functional testing on the development system.
Return the development system to normal operation, and test the upgraded development system.
Step 6. Create a custom upgrade package in the development system.
Now you have resolved all the exceptions and conflicts. It is necessary to package all the reconciled objects together into a "custom upgrade" so that they can be moved into the production environment automatically.
Step 7. Create a test system by duplicating your production system.
You need to apply the newly-created custom upgrade to your test system for user acceptance testing. Make sure the test system meets the requirements in the support matrix of the target upgrade version, and then copy your production data to the test system.
Step 8. Prepare the test system for an upgrade.
Follow the same steps for the development system, as described in step 2.
Step 9. Apply the custom upgrade package to the test system.
-
Upgrade the Service Manager server and client to the latest version for your test system.
-
Load applications upgrade file preupg.bin from the custom upgrade package.
-
Log off and then log back in.
-
Apply the custom upgrade package to the test system.
-
Fix all exceptions in the except.log file, and verify your fixes.
-
Resolve all "Error" results in the upgraderesults table, and verify your resolution results.
Step 10. User acceptance testing on the test system.
Return the test system to normal operation, and test the custom upgrade.
Test all features that your users will access. Pay particular attention to areas that were modified on your system.
Step 11: (Optional) Fixing errors on the development system.
If there are errors found in the test system, fix them in the development system and then go to step 6.
Step 12. Prepare the production system for an upgrade.
Follow the same steps for the development system, as described in step 2.
Step 13. Apply the customer upgrade package to your production system.
Make sure you have thoroughly tested the custom upgrade, before you apply the newly-created custom upgrade to your production system. This process is identical to the one you followed when applying your upgrade to your test system.
Note The production system should not be available to users while you are applying the custom upgrade.


