


Task 8: Deploy and configure the web server
In this task, you will deploy and configure the web server for Service Manager Collaboration.
Apache
Task A: Deploy the Apache HTTP server
In this task, you will deploy and configure the Apache HTTP server for Service Manager Collaboration.
Note The deployment instructions in this document are for a sample OpenSSL Apache server. If you have profound web server knowledge, you can also customize your web server by following your own business rules.
Follow these steps:
-
Download Apache with OpenSSL (for example, httpd-2.4.xx-x64.zip for Apache 2.4, or httpd-2.2.31-x64-r3.zip for Apache 2.2) from here.
Extract the zip file to C:\. This unzip process creates a new C:\Apache24 directory or a new C:\Apache22 directory.
-
(For Apache 2.4) Navigate to the C:\Apache24\conf folder.
(For Apache 2.2) Navigate to the C:\Apache22\conf folder.
-
Make a copy of the httpd.conf file and save it as httpd_OOB.conf.
-
Open the httpd.conf file with a text editor.
-
Locate
httpd-vhosts.conf, and then uncommentInclude conf/extra/httpd-vhosts.conf. - Save and close the httpd.conf file.
-
(For Apache 2.4) Navigate to the C:\Apache24\conf\extra directory.
(For Apache 2.2) Navigate to the C:\Apache22\conf\extra directory.
-
Make a copy of the httpd-vhosts.conf file and save it as httpd-vhosts_OOB.conf.
-
(For Apache 2.4) Navigate to the C:\Apache24\bin folder.
(For Apache 2.2) Navigate to the C:\Apache22\bin folder.
-
Double-click httpd.exe to start the Apache server.
The httpd.exe window opens. Click the minimize button to minimize this window.
-
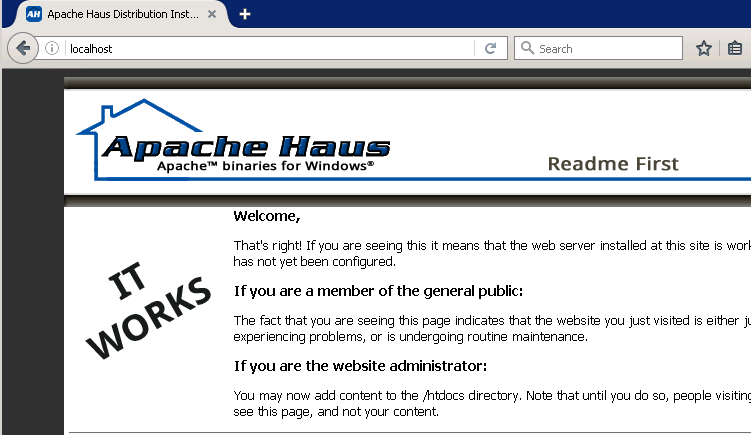
In your web browser, type http://localhost and press Enter. The following page is displayed, indicating Apache has started successfully.
-
Close the browser.
-
Close the Apache httpd.exe window.
Note The steps below will install Apache as a Windows service.
-
(For Apache 2.4) Navigate to the C:\Apache24\bin folder. Open a DOS command prompt and change the directory to C:\Apache24\bin.
cd C:\Apache24\bin
(For Apache 2.2) Navigate to the C:\Apache22\bin folder. Open a DOS command prompt and change the directory to C:\Apache22\bin.
cd C:\Apache22\bin
-
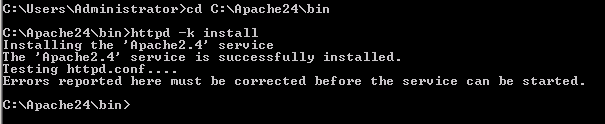
Run the httpd –k install command to install the Windows service.
For Apache 2.4:
For Apache 2.2:
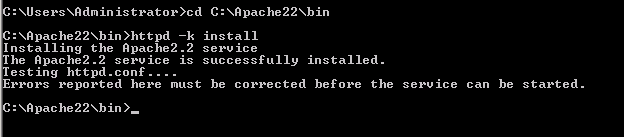
Note If you see an error here, navigate to the logs directory and check the error.log file. Depending on the error, you may need to repeat the steps above. To verify whether the error still exists, type httpd –k start to start Apache from the command line.
-
(For Apache 2.4) Go to Windows Services, and start the newly installed Apache2.4 service.
(For Apache 2.2) Go to Windows Services, and start the newly installed Apache2.2 service.
Task B: Connect Apache to Tomcat
In this task, you will set up Apache to connect to Tomcat through the AJP port. Consequently, Secure Sockets Layer (SSL) is open by default. You can perform this step rather than enable full SSL on the Service Manager environment.
Follow these steps:
-
Navigate to the C:\Program Files\Apache Software Foundation\Tomcat 8.0_SMWeb\conf directory.
- Open the server.xml file with a text editor.
-
Make sure that the AJP 1.3 Connector port is set to
8009.<!-- Define an AJP 1.3 Connector on port 8009 --> <Connector port="8009" protocol="AJP/1.3" redirectPort="8443" />
Note If you need to change it to another port, make a note of that port number as you will need it later in this task.
- Save and close the server.xml file.
Steps for Apache 2.4
- Navigate to the C:\Apache24\conf directory.
-
Open the httpd.conf file with a text editor.
The next few steps describe how to uncomment a number of
LoadModulecodes in the httpd.conf file. -
Locate
lbmethod.#LoadModule lbmethod_bybusyness_module modules/mod_lbmethod_bybusyness.so #LoadModule lbmethod_byrequests_module modules/mod_lbmethod_byrequests.so #LoadModule lbmethod_bytraffic_module modules/mod_lbmethod_bytraffic.so #LoadModule lbmethod_heartbeat_module modules/mod_lbmethod_heartbeat.so #LoadModule ldap_module modules/mod_ldap.so
-
Uncomment two lines as shown below:
#LoadModule lbmethod_bybusyness_module modules/mod_lbmethod_bybusyness.so
LoadModule lbmethod_byrequests_module modules/mod_lbmethod_byrequests.so
LoadModule lbmethod_bytraffic_module modules/mod_lbmethod_bytraffic.so
#LoadModule lbmethod_heartbeat_module modules/mod_lbmethod_heartbeat.so
#LoadModule ldap_module modules/mod_ldap.so
-
Locate the following section by searching for
proxy_module.#LoadModule proxy_module modules/mod_proxy.so #LoadModule proxy_ajp_module modules/mod_proxy_ajp.so #LoadModule proxy_balancer_module modules/mod_proxy_balancer.so #LoadModule proxy_connect_module modules/mod_proxy_connect.so #LoadModule proxy_express_module modules/mod_proxy_express.so #LoadModule proxy_fcgi_module modules/mod_proxy_fcgi.so #LoadModule proxy_ftp_module modules/mod_proxy_ftp.so #LoadModule proxy_html_module modules/mod_proxy_html.so #LoadModule proxy_http_module modules/mod_proxy_http.so #LoadModule proxy_scgi_module modules/mod_proxy_scgi.so
-
Uncomment 8 lines as shown in the following:
LoadModule proxy_module modules/mod_proxy.so
LoadModule proxy_ajp_module modules/mod_proxy_ajp.so
LoadModule proxy_balancer_module modules/mod_proxy_balancer.so
LoadModule proxy_connect_module modules/mod_proxy_connect.so
LoadModule proxy_express_module modules/mod_proxy_express.so
#LoadModule proxy_fcgi_module modules/mod_proxy_fcgi.so
LoadModule proxy_ftp_module modules/mod_proxy_ftp.so
LoadModule proxy_html_module modules/mod_proxy_html.so
LoadModule proxy_http_module modules/mod_proxy_http.so
#LoadModule proxy_scgi_module modules/mod_proxy_scgi.so
-
Locate the following section by searching for
slotmem_shm.LoadModule setenvif_module modules/mod_setenvif.so #LoadModule slotmem_plain_module modules/mod_slotmem_plain.so #LoadModule slotmem_shm_module modules/mod_slotmem_shm.so
-
Uncomment the following line:
LoadModule slotmem_shm_module modules/mod_slotmem_shm.so
-
Locate the following section by searching for
xml2enc_module.#LoadModule version_module modules/mod_version.so #LoadModule vhost_alias_module modules/mod_vhost_alias.so #LoadModule watchdog_module modules/mod_watchdog.so #LoadModule xml2enc_module modules/mod_xml2enc.so <IfModule unixd_module>
-
Uncomment the following line:
LoadModule xml2enc_module modules/mod_xml2enc.so
-
Locate the following section. You may need to search for
mod_proxy_htmltwice.# Configure mod_proxy_html to understand HTML4/XHTML1 <IfModule proxy_html_module> Include conf/extra/httpd-proxy-html.conf </IfModule>
-
If the
Includeline does not containInclude conf/extra/httpd-proxy-html.conf, change theIncludeline toInclude conf/extra/httpd-proxy-html.conf. -
Browse to the end of the file, and then add the line in bold:
<IfModule http2_module>
	ProtocolsHonorOrder On
	Protocols h2 h2c http/1.1
</IfModule>
Include conf/httpd-proxy_ajp_loadbalanced.conf
-
Comment out the lines in bold by inserting
#in front of each line:#<IfModule http2_module> #ProtocolsHonorOrder On #Protocols h2 h2c http/1.1 #</IfModule> Include conf/httpd-proxy_ajp_loadbalanced.conf
- Save and close the httpd.conf file.
-
Navigate to the C:\Apache24\conf directory, and then create a new file called httpd-proxy_ajp_loadbalanced.conf.
<Proxy balancer://smcluster>
BalancerMember ajp://localhost:8009 route=161652175430301
Require all granted
</Proxy>
<Location /webtier-9.60>
Options FollowSymLinks
Require all granted
ProxyPass balancer://smcluster/webtier-9.60 stickysession=JSESSIONID|jsessionid nofailover=On
</Location>
<Location /chatui>
Options FollowSymLinks
Require all granted
ProxyPass balancer://smcluster/chatui stickysession=JSESSIONID|jsessionid nofailover=On
</Location>
Caution
- You must paste
ProxyPass balancer://smcluster/webtier-9.60 stickysession=JSESSIONID|jsessionid nofailover=Onin one line. -
You must paste
ProxyPass balancer://smcluster/chatui stickysession=JSESSIONID|jsessionid nofailover=Onin one line.
- You must paste
-
The script in the previous step assumes that the web tier directory is webtier-9.60 and the chat UI directory is chatui(see the line below). If your web tier or chat UI uses another name, update the httpd-proxy_ajp_loadbalanced.conf file with the actual name of your web tier.
<Location /webtier-9.60>
balancer://smcluster/webtier-9.60
<Location /chatui>
balancer://smcluster/chatui
-
In step 3 in this task, you configured the
AJP 1.3 Connectorport in the server.xml file. If this port is 8009, continue with the next step; if the connector listens on another port, update the following line in the httpd-proxy_ajp_loadbalanced.conf file with that port number.If Apache is deployed on the same computer in the all-in-one example described in this document, use
ajp://localhost:8009. Otherwise, you need to update this value to the correct IP of Tomcat.BalancerMember ajp://localhost:8009 route=161652175430301
-
Access Apache’s link with Apache’s FQDN. In this all-in-one example, access https://training.sm-demo.com/webtier-9.60/index.do, and then log on to Service Manager as a system administrator. The system displays the administrator's To Do Queue.
If you are directed to a Logout Successful page, there may be some issues with the LW-SSO setup. Check all your files from the previous tasks and then try again.
Note From now on, you must use HTTPS and the fully qualified domain name (FQDN) in the web tier URL when logging on to the Service Manager web client.
- Log out from Service Manager.
Steps for Apache 2.2
- Navigate to the C:\Apache22\conf directory.
-
Open the httpd.conf file with a text editor.
The next few steps describe how to uncomment a number of
LoadModulecodes in the httpd.conf file. -
Locate
proxy_module. -
Uncomment the following lines:
LoadModule proxy_module modules/mod_proxy.so
LoadModule proxy_ajp_module modules/mod_proxy_ajp.so
LoadModule proxy_balancer_module modules/mod_proxy_balancer.so
LoadModule proxy_connect_module modules/mod_proxy_connect.so
LoadModule proxy_ftp_module modules/mod_proxy_ftp.so
LoadModule proxy_http_module modules/mod_proxy_http.so
-
Browse to the end of the file, and then add the line in bold:
<IfModule http2_module> ProtocolsHonorOrder On Protocols h2 h2c http/1.1 </IfModule> Include conf/httpd-proxy_ajp_loadbalanced.conf - Save your changes and close the httpd.conf file.
-
Navigate to the C:\Apache22\conf directory, and then create a new file called httpd-proxy_ajp_loadbalanced.conf.
-
Copy and paste the following codes to the httpd-proxy_ajp_loadbalanced.conf file:
<Proxy balancer://smcluster>
BalancerMember ajp://localhost:8009 route=161652175430301
Order allow,deny
Allow from all
</Proxy>
<Location /webtier-9.60>
Options FollowSymLinks
Order allow,deny
Allow from all
ProxyPass balancer://smcluster/webtier-9.60 stickysession=JSESSIONID|jsessionid nofailover=On
</Location>
<Location /chatui>
Options FollowSymLinks
Order allow,deny
Allow from all
ProxyPass balancer://smcluster/chatui stickysession=JSESSIONID|jsessionid nofailover=On
</Location>
Caution
- You must paste
ProxyPass balancer://smcluster/webtier-9.60 stickysession=JSESSIONID|jsessionid nofailover=Onin one line. -
You must paste
ProxyPass balancer://smcluster/chatui stickysession=JSESSIONID|jsessionid nofailover=Onin one line.
- You must paste
-
The script in the previous step assumes that the web tier directory is webtier-9.60 and the chat UI directory is chatui(see the line below). If your web tier or chat UI uses another name, update the httpd-proxy_ajp_loadbalanced.conf file with the actual name of your web tier.
<Location /webtier-9.60>
balancer://smcluster/webtier-9.60
<Location /chatui>
balancer://smcluster/chatui
-
In step 3 in this task, you configured the
AJP 1.3 Connectorport in the server.xml file. If this port is 8009, continue with the next step; if the connector listens on another port, update the following line in the httpd-proxy_ajp_loadbalanced.conf file with that port number.If Apache is deployed on the same computer in the all-in-one example described in this document, use
ajp://localhost:8009. Otherwise, you need to update this value to the correct IP of Tomcat.BalancerMember ajp://localhost:8009 route=161652175430301
-
Access Apache’s link with Apache’s FQDN. In this all-in-one example, access https://training.sm-demo.com/webtier-9.60/index.do, and then log on to Service Manager as a system administrator. The system displays the administrator's To Do Queue.
If you are directed to a Logout Successful page, there may be some issues with the LW-SSO setup. Check all your files from the previous tasks and then try again.
Note From now on, you must use HTTPS and the fully qualified domain name (FQDN) in the web tier URL when logging on to the Service Manager web client.
- Log out from Service Manager.
Task C: Enable reverse proxy in Apache
In this task, you will enable the reverse proxy in Apache to protect sensitive information of Openfire (the IP address, ports, and so on). Follow the steps for your Apache version (2.4 or 2.2).
Important You must use the same Apache server that connects to Tomcat in the previous task.
Steps for Apache 2.4
-
Navigate to the C:\Apache24\conf\extra directory.
- Open the httpd-vhosts.conf file with a text editor.
-
Locate the following section by searching for "
VirtualHost_default_:80".<VirtualHost _default_:80> DocumentRoot "${SRVROOT}/htdocs" #ServerName www.example.com:80 </VirtualHost> -
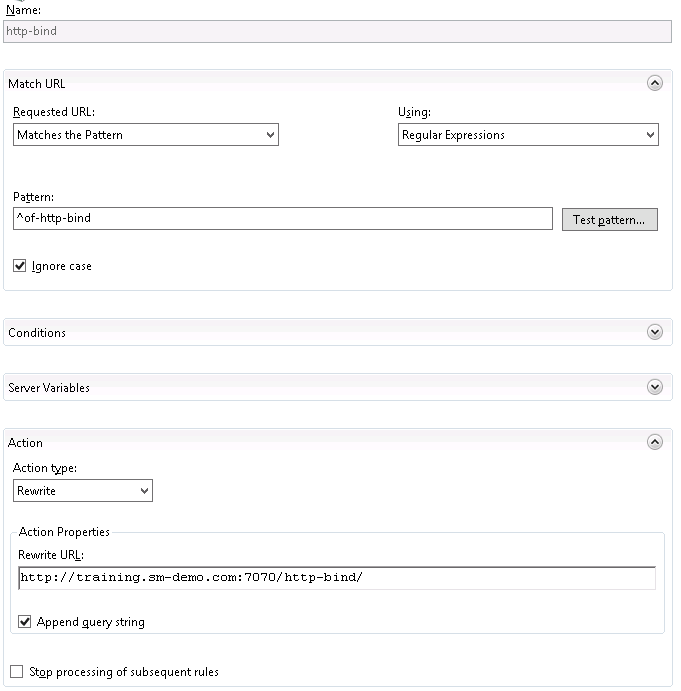
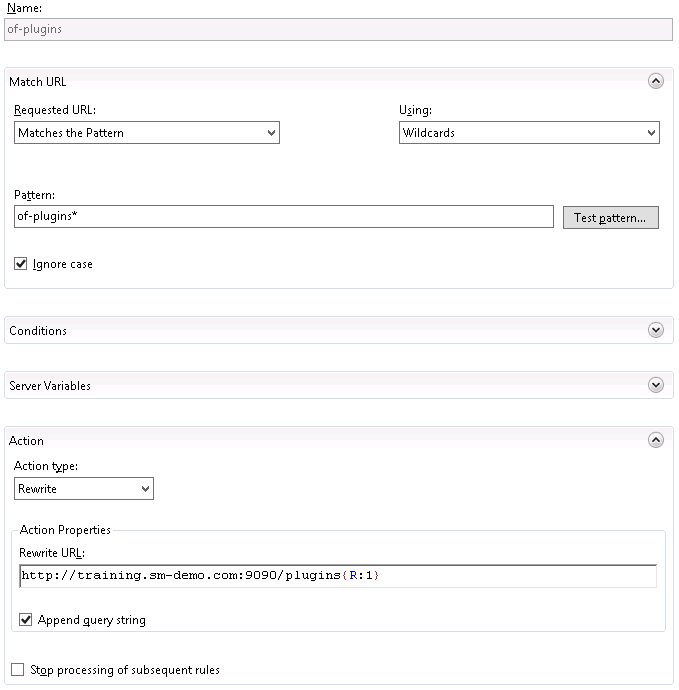
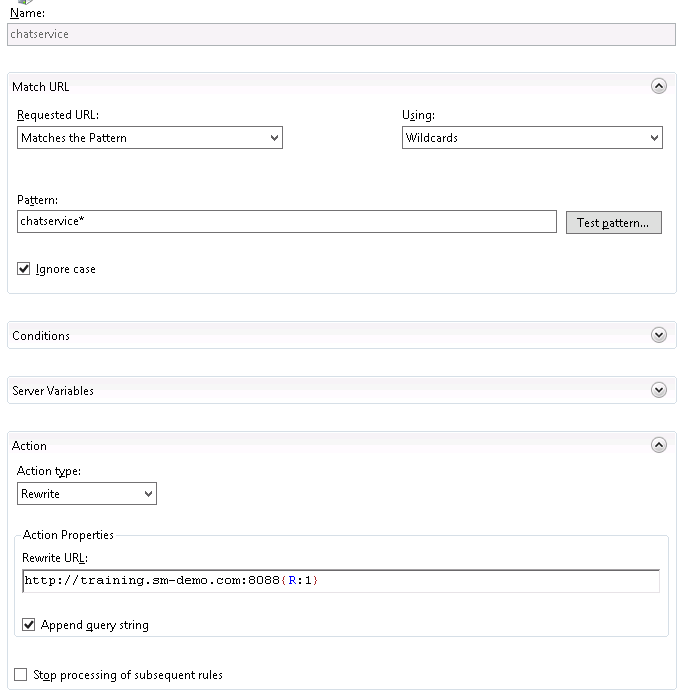
Insert the lines in bold to this section as shown below.
Set the chat server’s FQDN for the
ProxyPassReversevalue ofof-http-bindandof-plugin. Set the chat service’s FQDN for theProxyPassReversevalue ofchatservice. And in this all-in-one example, all these values aretraining.sm-demo.com.<VirtualHost _default_:80> DocumentRoot "${SRVROOT}/htdocs" #ServerName www.example.com:80 ProxyPass /of-http-bind http://training.sm-demo.com:7070/http-bind ProxyPassReverse /of-http-bind http://training.sm-demo.com:7070/http-bind ProxyPass /of-plugins http://training.sm-demo.com:9090/plugins ProxyPassReverse /of-plugins http://training.sm-demo.com:9090/plugins ProxyPass /chatservice http://training.sm-demo.com:8088 ProxyPassReverse /chatservice http://training.sm-demo.com:8088 </VirtualHost> - Save and close the httpd-vhosts.conf file.
Steps for Apache 2.2
-
Navigate to the C:\Apache22\conf\extra directory.
- Open the httpd-vhosts.conf file with a text editor.
-
Locate the following section by searching for “
VirtualHost _default_: 80”.<VirtualHost _default_:80> DocumentRoot "${SRVROOT}/htdocs" #ServerName www.example.com:80 </VirtualHost> -
Insert the lines in bold to this section as shown below:
Set the chat server’s FQDN for the
ProxyPassReversevalue ofof-http-bindandof-plugin. Set the chat service’s FQDN for theProxyPassReversevalue ofchatservice. And in this all-in-one example, all these values aretraining.sm-demo.com.<VirtualHost _default_:80> DocumentRoot "${SRVROOT}/htdocs" #ServerName www.example.com:80 ProxyPass /of-http-bind http://training.sm-demo.com:7070/http-bind ProxyPassReverse /of-http-bind http://training.sm-demo.com:7070/http-bind ProxyPass /of-plugins http://training.sm-demo.com:9090/plugins ProxyPassReverse /of-plugins http://training.sm-demo.com:9090/plugins ProxyPass /chatservice http://training.sm-demo.com:8088 ProxyPassReverse /chatservice http://training.sm-demo.com:8088 </VirtualHost> - Save your changes and close the httpd-vhosts.conf file.
IIS
Follow these steps:
-
Download and install Application Request Routing as an extension for IIS.
-
Download and install URL Rewrite as an extension for IIS.
-
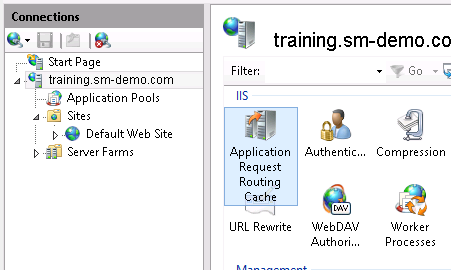
After you have successfully installed these two modules, open Internet Information Services (IIS) Manager from Control Panel> All Control Panel Items > Administrative Tools.
-
Go to the website node, and then open Application Request Rounting Cache in feature view:
-
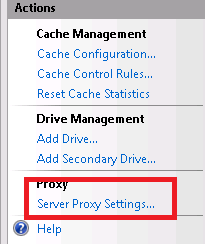
Open ARP, and then click Server Proxy Settings.
-
On the Proxy Settings page, select the Enable proxy check box and set other fields by following your company policies:
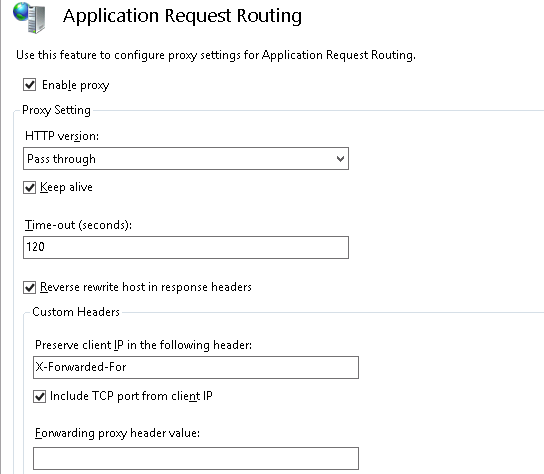
Save your changes.
-
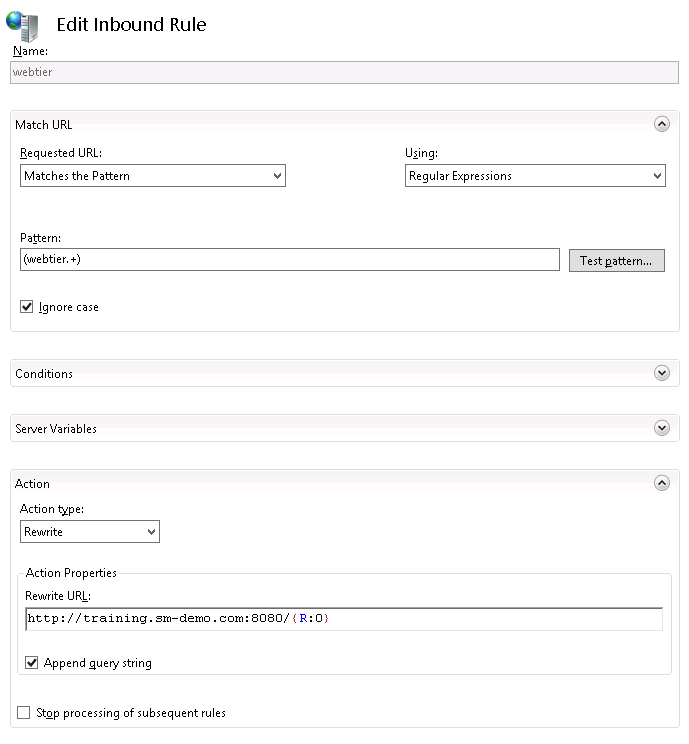
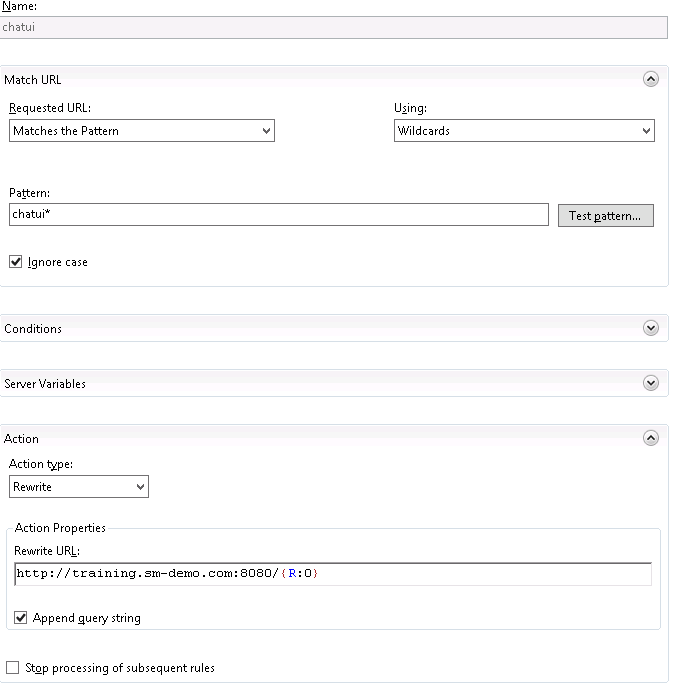
Click the URL Rewrite… button on the right panel, and then add five new rules for Collaboration as follows:
-
Save your changes.
F5
Follow these steps:
-
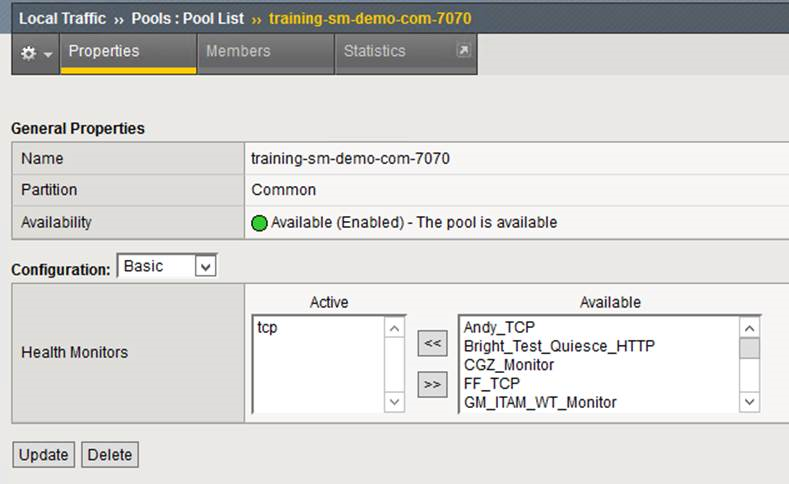
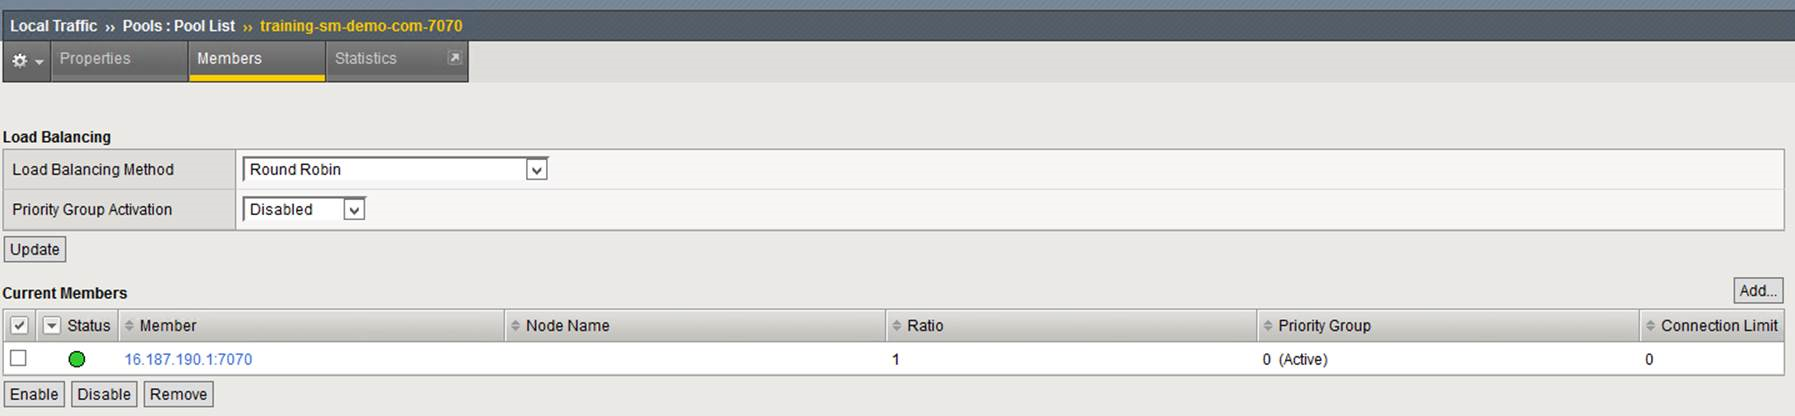
Create a pool named training-sm-demo-com-7070 for port 7070 of the chat server. See the following screenshot:
- Create a pool named training-sm-demo-com-9090 for port 9090 of the chat server.
- Create a pool named training-sm-demo-com-8088 for port 8088 of the chat server.
- Create a pool named training-sm-demo-com-8080 for port 8080 of Tomcat.
-
Configure iRules as follows:
when HTTP_REQUEST { if { [HTTP::host] contains "training.sm-demo.com" and [HTTP::uri] starts_with "/of-http-bind" } { set uri [string map {"/of-http-bind/" "/http-bind"} [HTTP::uri]] HTTP::uri $uri pool training-sm-demo-com-7070 return } elseif { [HTTP::host] contains "training.sm-demo.com" and [HTTP::uri] starts_with "/of-plugins" } { set uri [string map {"/of-plugins/" "/plugins"} [HTTP::uri]] HTTP::uri $uri pool training-sm-demo-com-9090 return } elseif { [HTTP::host] contains "training.sm-demo.com" and [HTTP::uri] starts_with "/chatservice" } { set uri [string map {"/chatservice/" "/"} [HTTP::uri]] HTTP::uri $uri pool training-sm-demo-com-8088 return } elseif { [HTTP::host] contains "training.sm-demo.com" and [HTTP::uri] starts_with "/chatui" } { pool training-sm-demo-com-8080 return } elseif { [HTTP::host] contains "training.sm-demo.com" and [HTTP::uri] starts_with "/webtier-9.51" } { pool training-sm-demo-com-8080 return } } - Save your changes.


